
Androidアプリ開発のチュートリアルとして、ストップウォッチアプリを一緒に作っていきます!
- UIの実装方法
- UIとロジックの連動
- イベントの受け取り方
Androidアプリ開発で重要な要素が詰まっていますので、初心者や入門者の方はぜひ手を動かして取り組んでみてください!
完成形はこちら!
「スタート」と「ストップ」ボタンがあり、スタートボタンを押すとラベルに時間が加算されていきストップを押すとその時点での時間が表示されるアプリです。

- Android Studio Chipmunk | 2021.2.1 Patch 1
- Kotlin 1.6.21
プロジェクトの作成
まずはプロジェクトを作成していきましょう。
プロジェクトの作成はこちらで詳細に解説していますので、必要があれば参考にしてください。

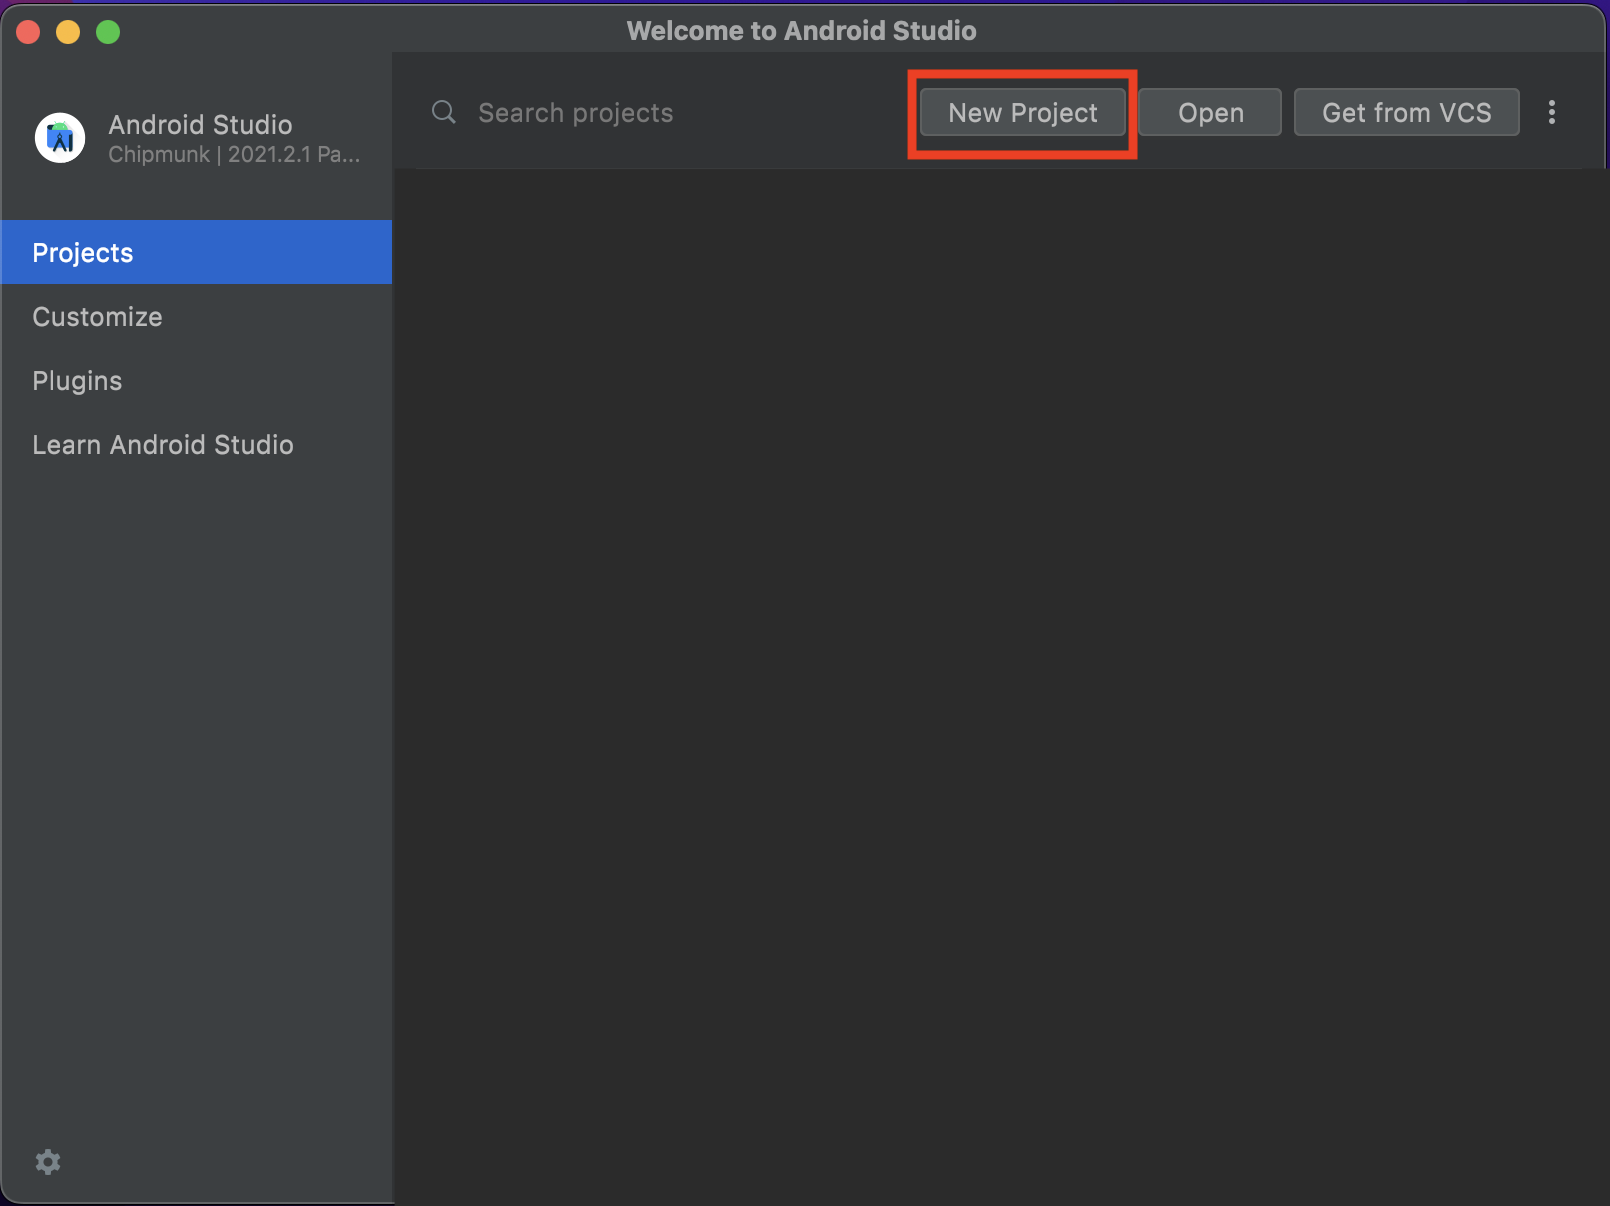
AndroidStudioを起動して New Project を選択してください。
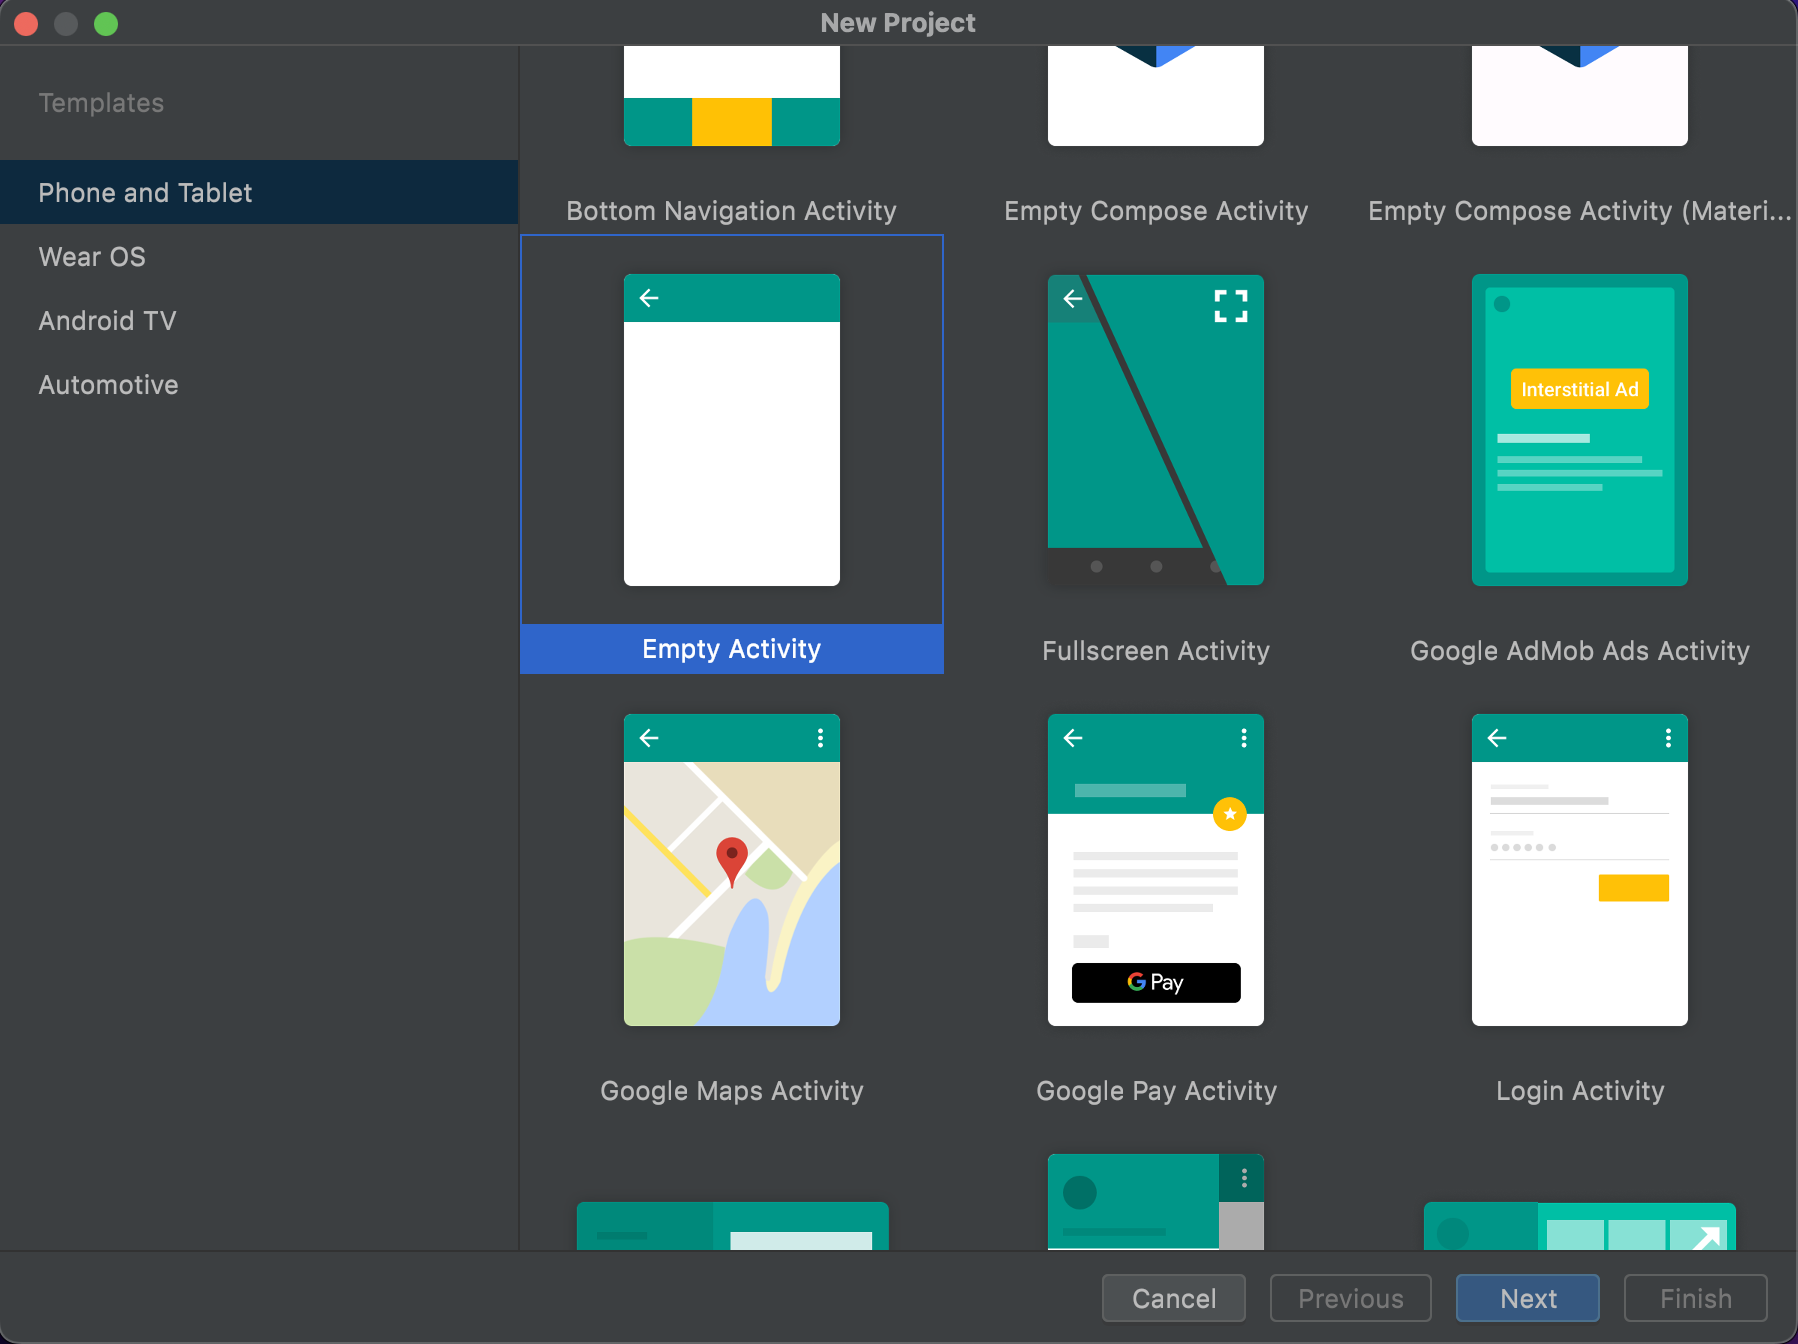
次は Empty Activity を選択してください。
次はアプリ情報の入力です。
アプリ名はなんでも構わないのですが、ここではStopWatchとしました。

これでプロジェクトの作成は完了です。
UI
Viewの配置
まずは activity_main.xml を開いてください。
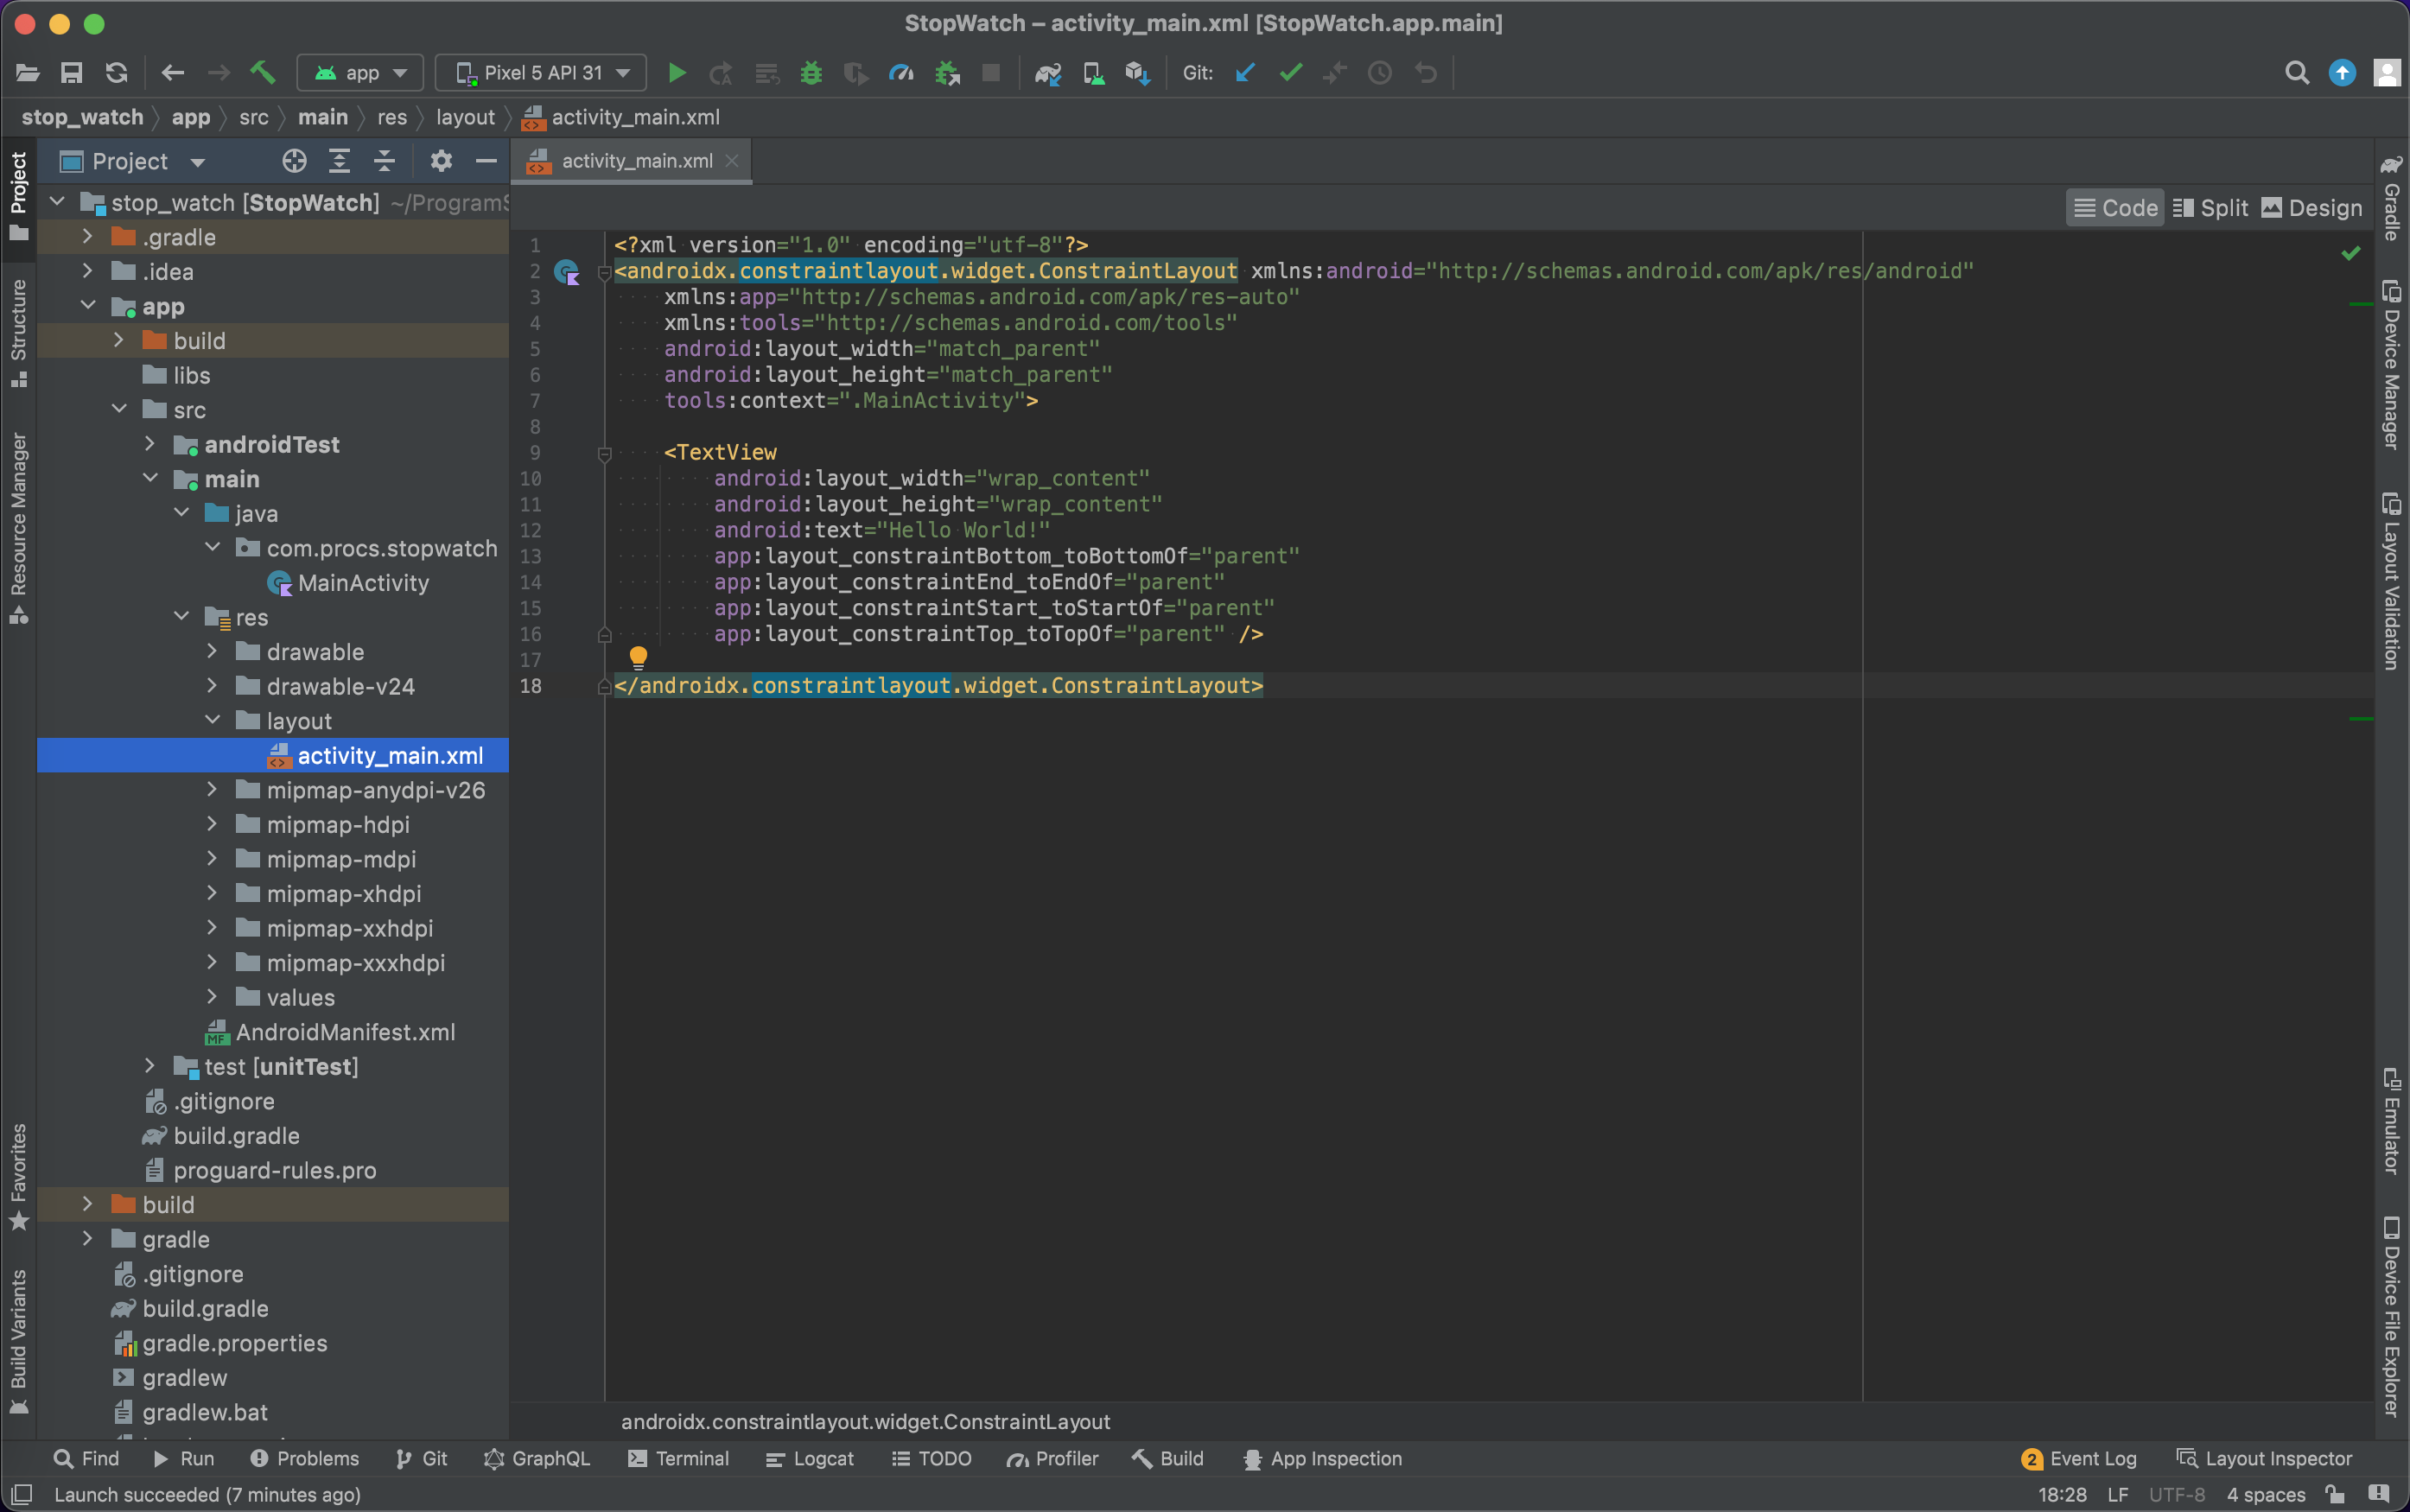
以下のように変更しましょう。
<?xml version="1.0" encoding="utf-8"?>
<androidx.constraintlayout.widget.ConstraintLayout xmlns:android="http://schemas.android.com/apk/res/android"
    xmlns:app="http://schemas.android.com/apk/res-auto"
    xmlns:tools="http://schemas.android.com/tools"
    android:layout_width="match_parent"
    android:layout_height="match_parent"
    tools:context=".MainActivity">

    <Button
        android:id="@+id/start_button"
        android:layout_width="wrap_content"
        android:layout_height="wrap_content"
        android:text="start"
        app:layout_constraintBottom_toBottomOf="parent"
        app:layout_constraintLeft_toLeftOf="parent"
        app:layout_constraintRight_toRightOf="parent"
        app:layout_constraintTop_toTopOf="parent" />

    <Button
        android:id="@+id/stop_button"
        android:layout_width="wrap_content"
        android:layout_height="wrap_content"
        android:layout_marginTop="16dp"
        android:text="stop"
        app:layout_constraintLeft_toLeftOf="parent"
        app:layout_constraintRight_toRightOf="parent"
        app:layout_constraintTop_toBottomOf="@id/start_button" />

    <TextView
        android:id="@+id/count_label"
        android:layout_width="wrap_content"
        android:layout_height="wrap_content"
        android:layout_marginBottom="16dp"
        android:text="Hello World!"
        app:layout_constraintBottom_toTopOf="@id/start_button"
        app:layout_constraintLeft_toLeftOf="parent"
        app:layout_constraintRight_toRightOf="parent" />

</androidx.constraintlayout.widget.ConstraintLayout>
スタートとストップの Button 2つと経過時間を表示する TextView が1つを実装しました。
スタートボタンが真ん中に来るように layout_constraintXxxx_toXxxxOf の全てを parent に設定しています。
次にストップボタンはスタートボタンの下に来るように layout_constraintTop_toBottomOf を start_button に指定しています。
最後に経過時間の TextView はスタートボタンの上に来るように layout_constraintBottom_toTopOf を start_button に指定しています。
これでレイアウトの設定は完了です。
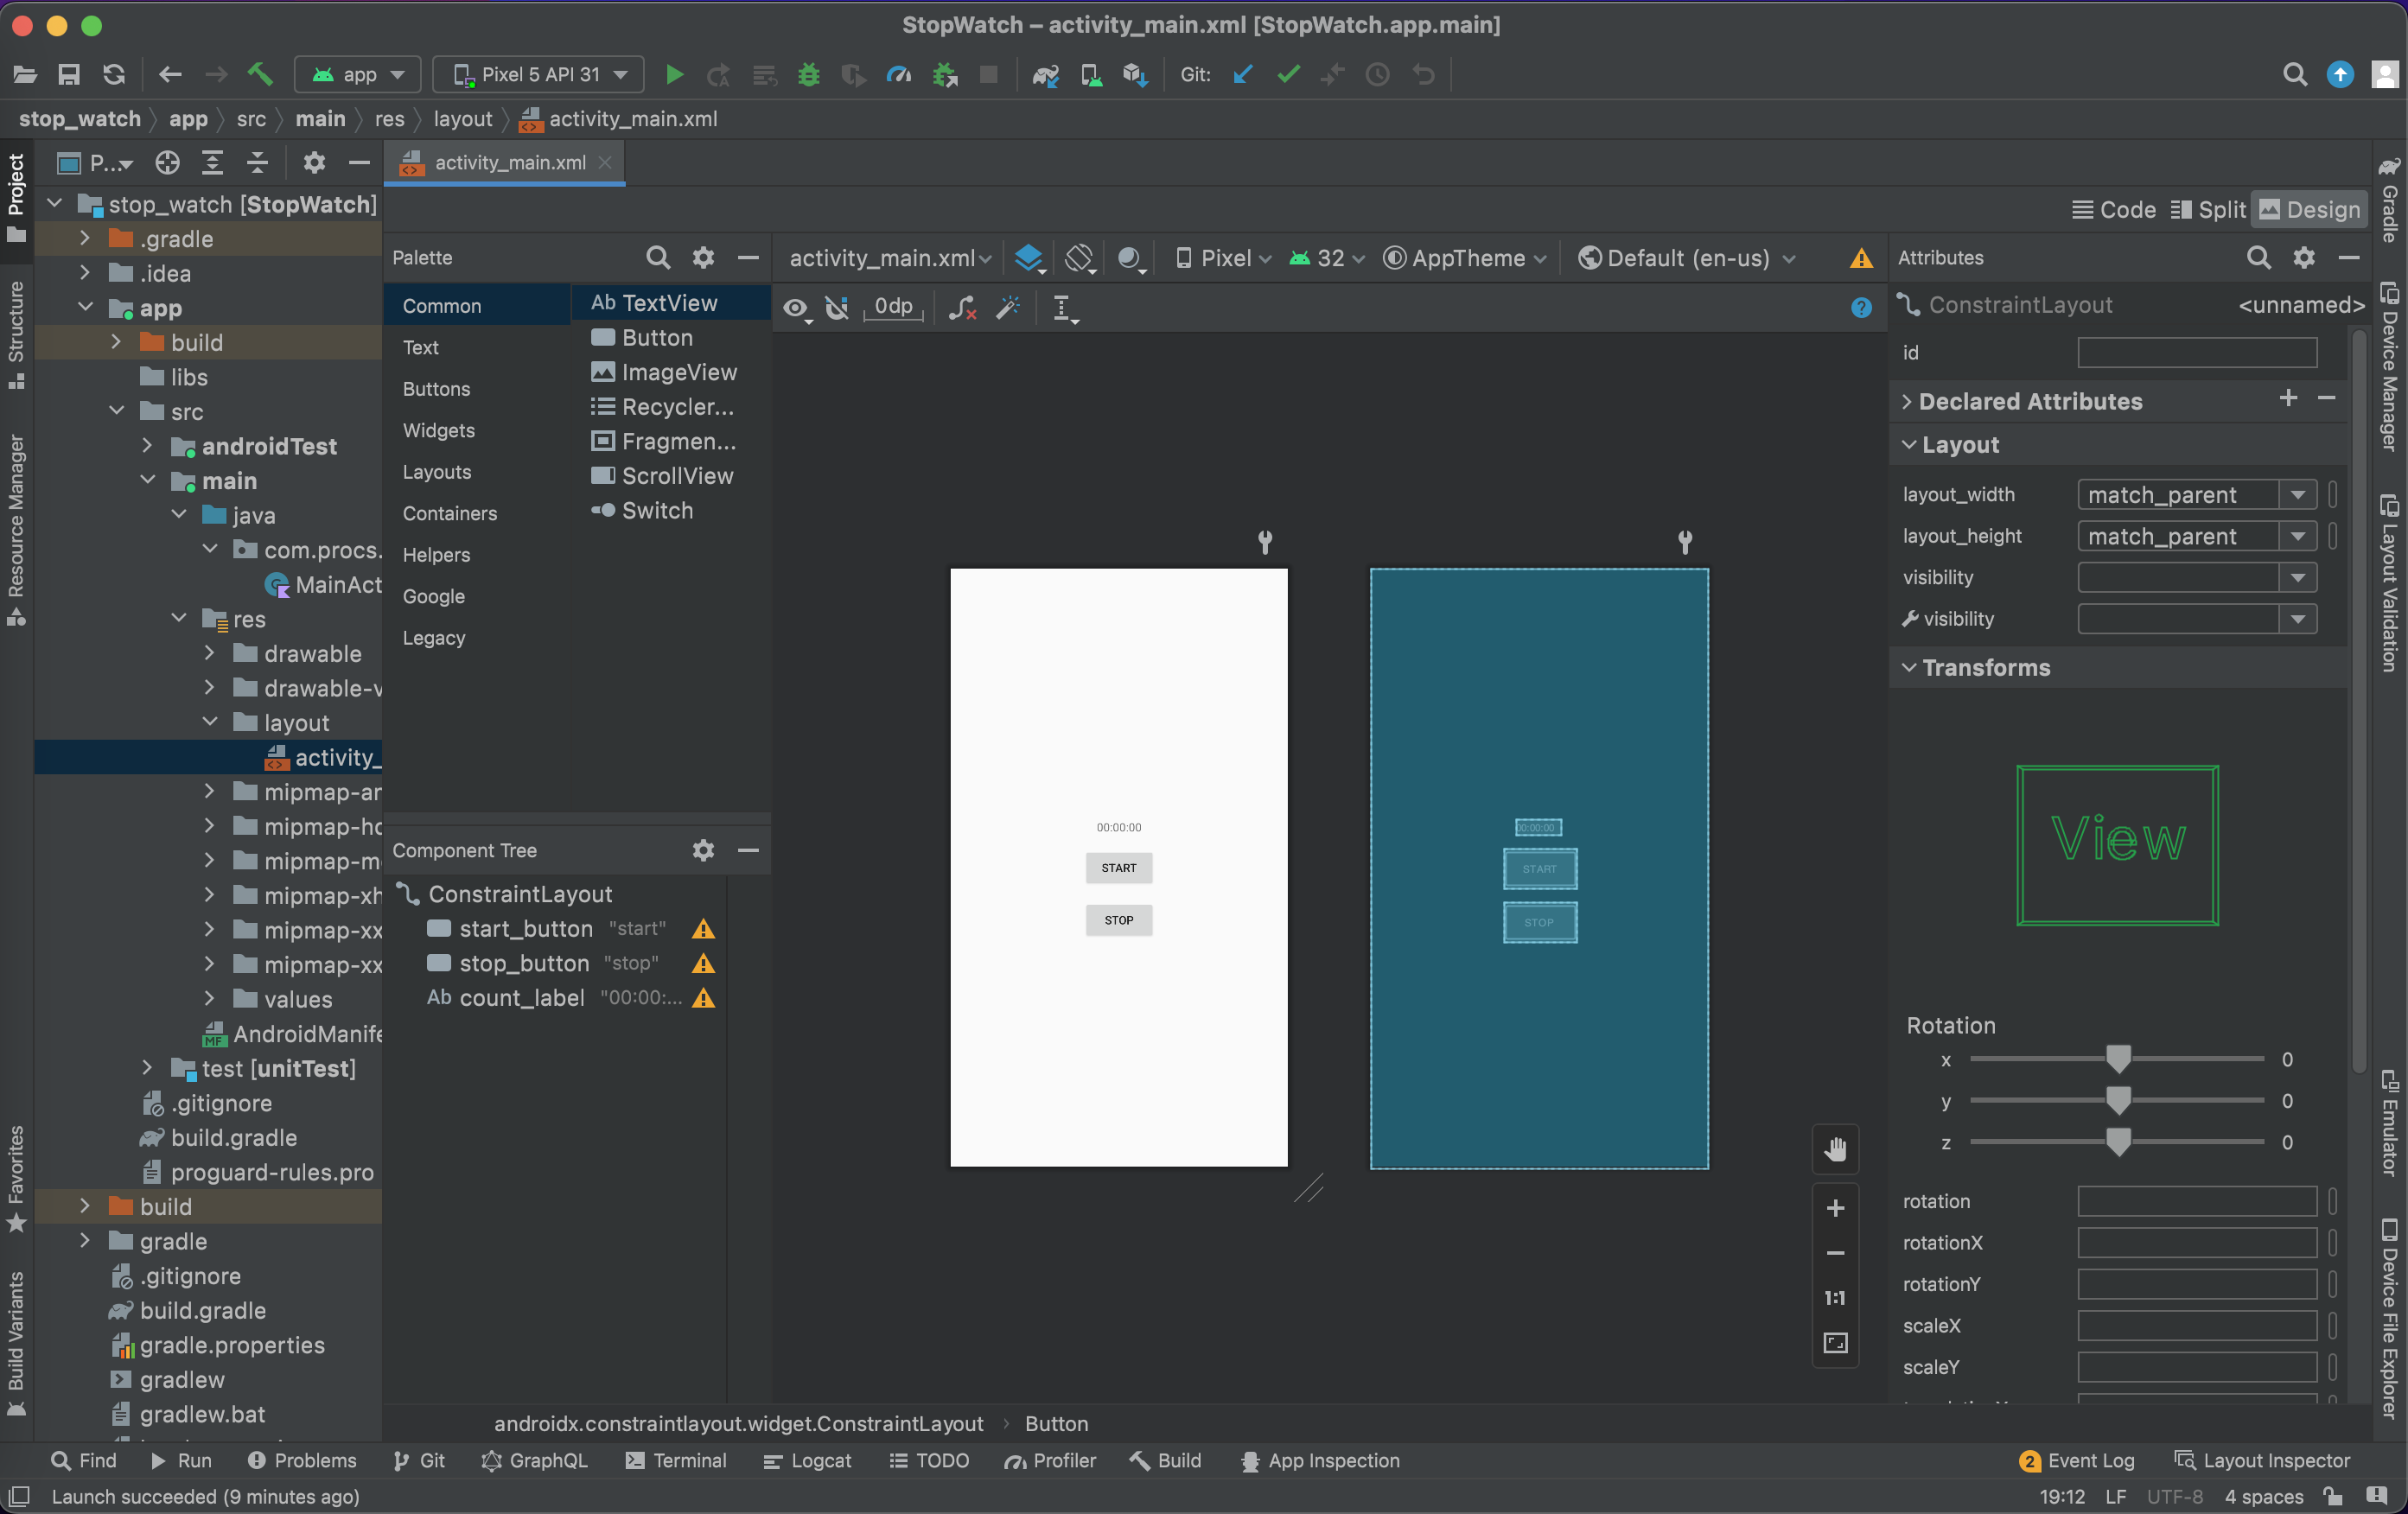
下に Design タブがあると思うのでそれで見た目を確認してみましょう。以下のようになっていればOKです。
タイマーロジック
それでは次にタイマーのロジックを書いていきましょう。
今回のアプリの要件を確認します。
START ボタンを押すと上に表示されている TextView に経過時間が表示されていきます。
適当なタイミングで STOP ボタンを押すと経過時間がボタンを押したタイミングで止まるようになります。
これを考慮した上で実装していきましょう。
MainActivity を開き次のように実装してください。
import androidx.appcompat.app.AppCompatActivity
import android.os.Bundle
import android.os.Handler
import android.widget.Button
import android.widget.TextView
import java.text.SimpleDateFormat
import java.util.*

class MainActivity : AppCompatActivity() {

    companion object {
        private const val TERM_MILLISECOND: Long = 100
    }

    override fun onCreate(savedInstanceState: Bundle?) {
        super.onCreate(savedInstanceState)
        setContentView(R.layout.activity_main)

        // Viewを定義
        val startButton = findViewById<Button>(R.id.start_button)
        val stopButton = findViewById<Button>(R.id.stop_button)
        val countText = findViewById<TextView>(R.id.count_label)

        // 経過時間
        var time = 0L
        val dataFormat = SimpleDateFormat("mm:ss.S", Locale.getDefault())

        // HandlerとRunnableを使ってタイマーを実現する
        val handler = Handler(Looper.getMainLooper())
        val timer = object : Runnable {
            override fun run() {
                // timeに0.1秒を追加
                time += TERM_MILLISECOND
                // countTextに時間を表示
                countText.text = dataFormat.format(time)
                // 0.1秒で再度呼ばれるようにする
                handler.postDelayed(this, TERM_MILLISECOND)
            }
        }

        // STARTボタンを押した時にtimerをpost
        startButton.setOnClickListener {
            handler.post(timer)
        }
        // STOPボタンでタイマーを削除
        stopButton.setOnClickListener {
            handler.removeCallbacks(timer)
        }
    }
}
Buttonの取得
まずは findViewById() メソッドによって Button を取得しています。
引数に id を指定していますが、これは先ほどxmlファイルで修正した時に指定した id です。
経過時間を保持するためのtime
次に経過時間を保持しておくための time を定義しています。
その下ではその time を時間として表示するための DataFormat を作っています。
タイマーロジックを定義
そしてその次は実際にタイマーのロジックを定義するところになります。
今回は Handler と Runnable を使用して実現しています。
HandlerとRunnable
Handler には postDelayed() というメソッドがあり、これは第1引数の Runnable を第2引数のミリ秒後に実行する、というメソッドです。
実際に呼ばれるのは override している run() メソッドです。
run() の中ではまず time に 100ミリ秒(0.1秒)を追加し、 countText にDataFormatを使って経過秒数を表示させています。
その下で postDelayed() の第1引数に自分自身を設定することで100ミリ秒後に再度 run() が呼ばれるという仕組みになっています。
また最初に run() を呼び出すためにスタートボタンが押されたタイミングで handler の post() メソッドを使い発火させています。
止める時には handler から removeCallbacks() を呼んであげれば止まるという仕組みになっています。
それではこの時点でビルドしてみましょう。
このような動きになっていれば完成です!
まとめ
お疲れ様でした!
今回のチュートリアルでは、Androidアプリ開発のUI部分について学習することができます。
重要な要素なので理解できるように学習していきましょう!