
Androidアプリ開発の基礎のButtonの使い方を解説していきます。
簡単なボタンを表示して、押した時のイベントを取得します。
プロジェクトの作成の方法はこちらで解説していますので、必要であれば読んでみてください。

バージョン
- Android Studio Chipmunk | 2021.2.1 Patch 1
- Kotlin 1.6.21
Buttonの配置
プロジェクトを作成したら activity_main.xml を開いて中身を以下のように変更しましょう。
<?xml version="1.0" encoding="utf-8"?>
<androidx.constraintlayout.widget.ConstraintLayout
        xmlns:android="http://schemas.android.com/apk/res/android"
        xmlns:tools="http://schemas.android.com/tools"
        xmlns:app="http://schemas.android.com/apk/res-auto"
        android:layout_width="match_parent"
        android:layout_height="match_parent"
        tools:context=".MainActivity">

    <Button
            android:id="@+id/button"
            android:layout_width="wrap_content"
            android:layout_height="wrap_content"
            android:text="クリック!"
            app:layout_constraintBottom_toBottomOf="parent"
            app:layout_constraintLeft_toLeftOf="parent"
            app:layout_constraintRight_toRightOf="parent"
            app:layout_constraintTop_toTopOf="parent"/>

</android.support.constraint.ConstraintLayout>デフォルトでは下記のようなTextView が配置されていますが、
<TextView
      android:layout_width="wrap_content"
      android:layout_height="wrap_content"
      android:text="Hello World!"
      app:layout_constraintBottom_toBottomOf="parent"
      app:layout_constraintLeft_toLeftOf="parent"
      app:layout_constraintRight_toRightOf="parent"
      app:layout_constraintTop_toTopOf="parent" />
それを Button に変えて text を クリック! に変更しています。
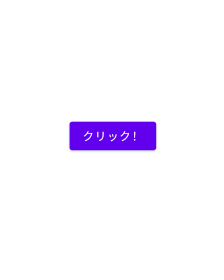
一度ビルドしてみましょう!
このようにボタンが画面の真ん中に表示されていればOKです!
クリックイベント
次にクリックイベントを受け取るように実装します。
まずは MainActivity を開いて onCreate() の中身を以下のように変更します。
package com.sampleapp

import androidx.appcompat.app.AppCompatActivity
import android.os.Bundle
import android.util.Log
import android.widget.Button

class MainActivity : AppCompatActivity() {

    override fun onCreate(savedInstanceState: Bundle?) {
        super.onCreate(savedInstanceState)
        setContentView(R.layout.activity_main)
        // ↓↓ここから
        val button = findViewById<Button>(R.id.button)
        button.setOnClickListener {
            Log.d("MainActivity", "クリック!")
        }
        // ↑↑ここまでを実装
    }
}
Button には setOnClickListener() というメソッドがあり、ここでクリックイベントを受け取ることができます。
今回はクリックした時にログ出力するようにしてみました。
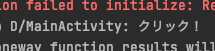
ビルドを実行し、ボタンを押しましょう。
Android Studioの「Logcat」を開き、ログが表示されていればOKです!
まとめ
Buttonの表示とクリックイベントの取得について解説しました。
簡単ですが基本になりますので、参考になれば幸いです。