
今回は、Androidアプリ開発のチュートリアルとして、カウントダウンアプリを一緒に作っていきましょう!
- UIの作り方
- UIとロジックの連動
- イベントの受け取り方
Androidアプリ開発初心者の方や、Kotlinでアプリ開発を始めたい方が主な対象です。
手を動かしながら作ってみてください。
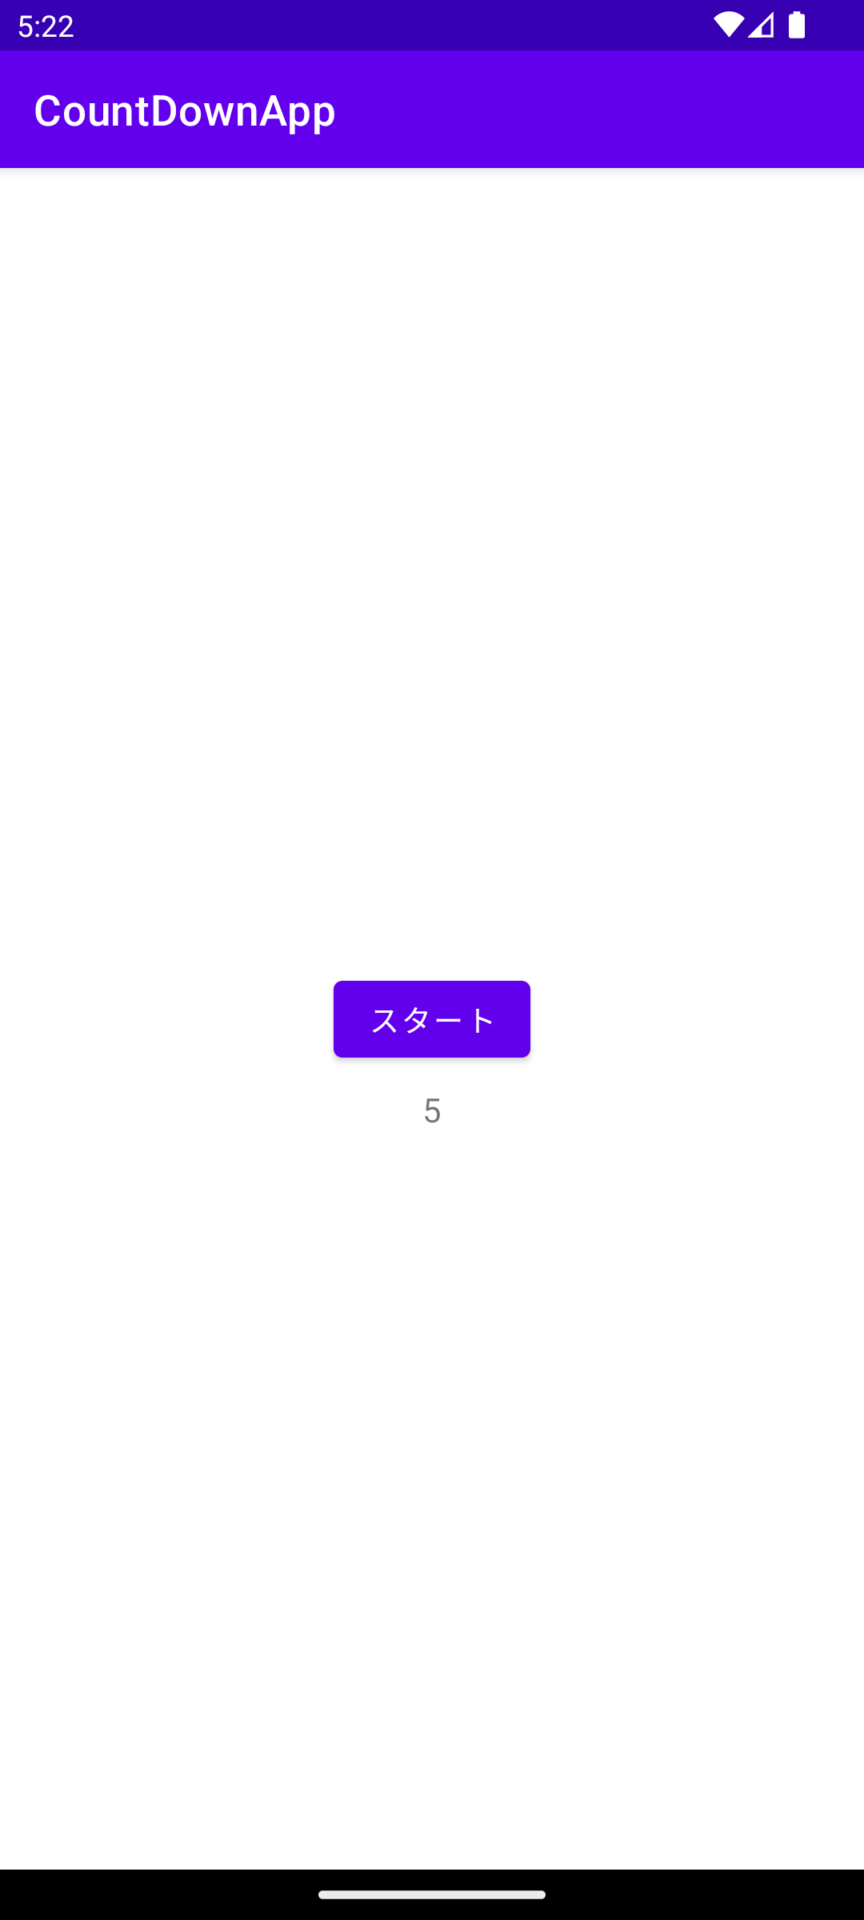
完成形はこちら!
ButtonとTextViewがあり、ボタンを押すと5秒後に終了のテキストが表示されるシンプルなアプリですが重要な要素が詰まっています。
- Android Studio Chipmunk | 2021.2.1 Patch 1
- Kotlin 1.6.21
プロジェクトの作成
それではプロジェクトを作成していきます。
プロジェクトの作成については、こちらの記事で解説していますので、必要があれば参照してください。

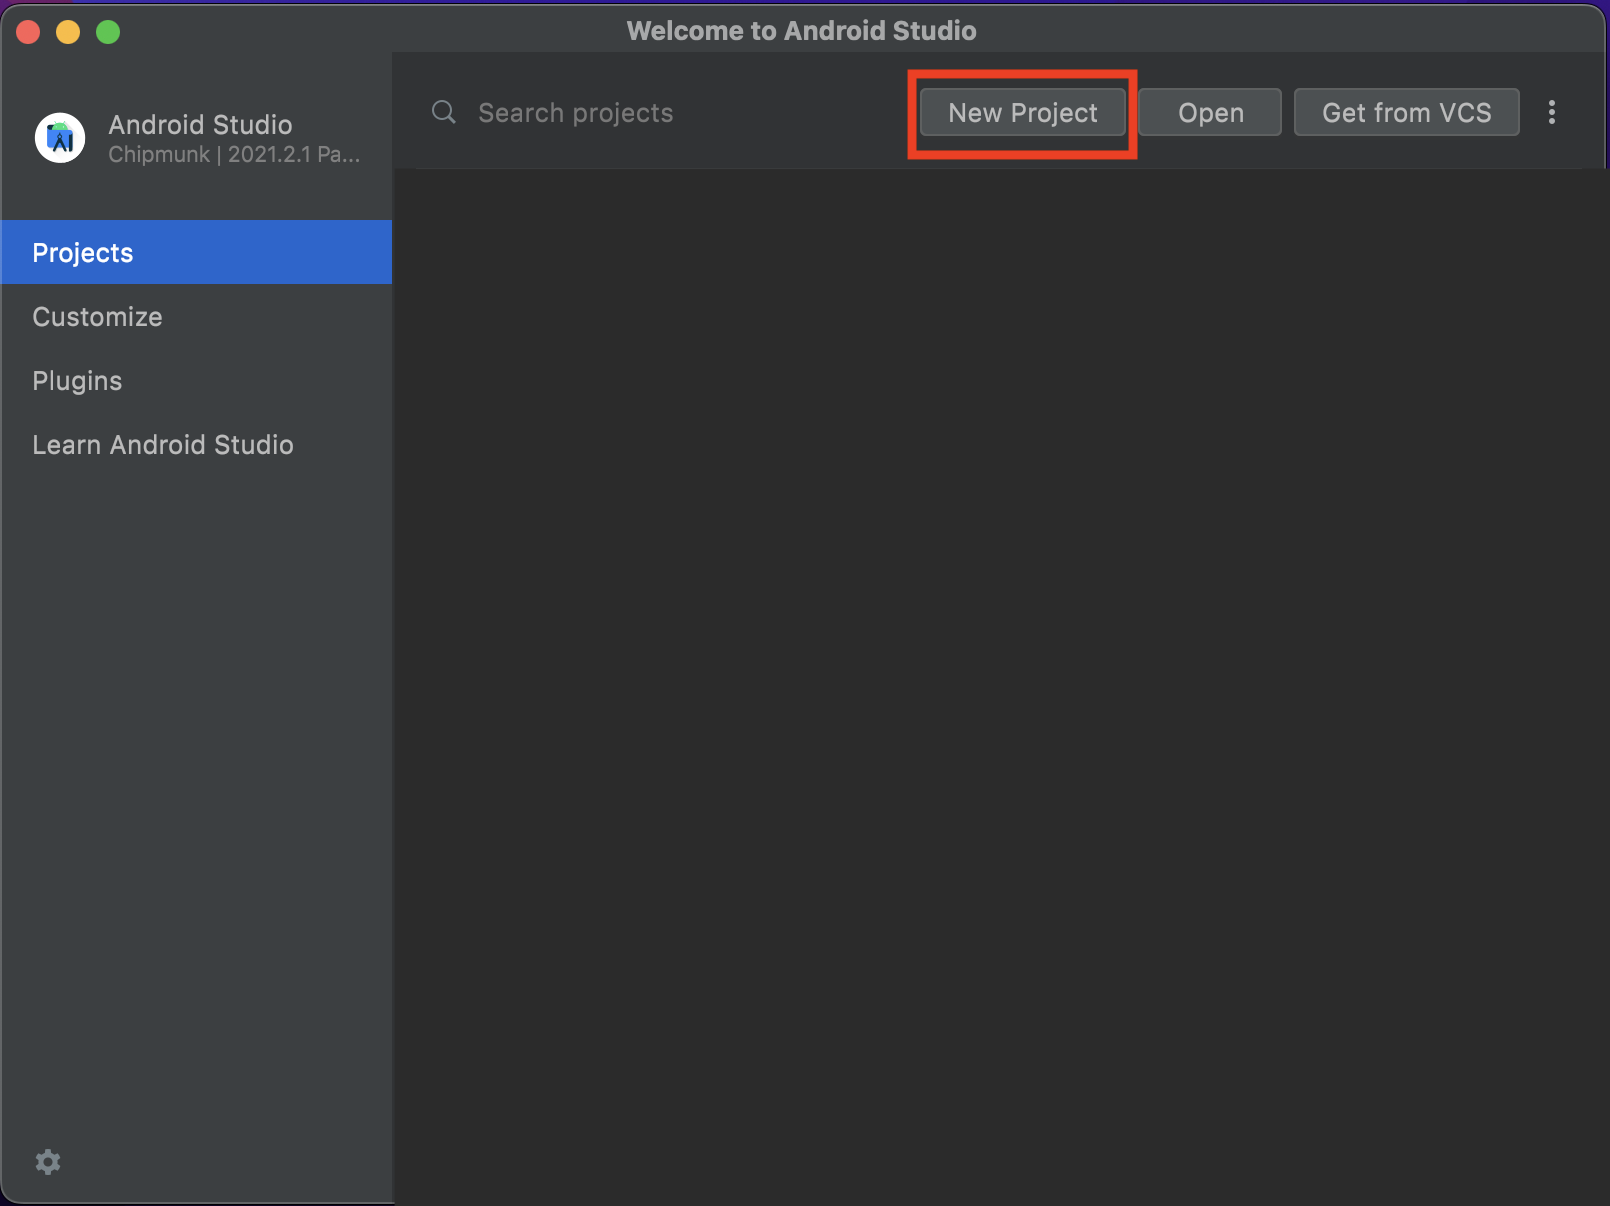
まずはAndroidStudioを起動して New Project を選択してください。
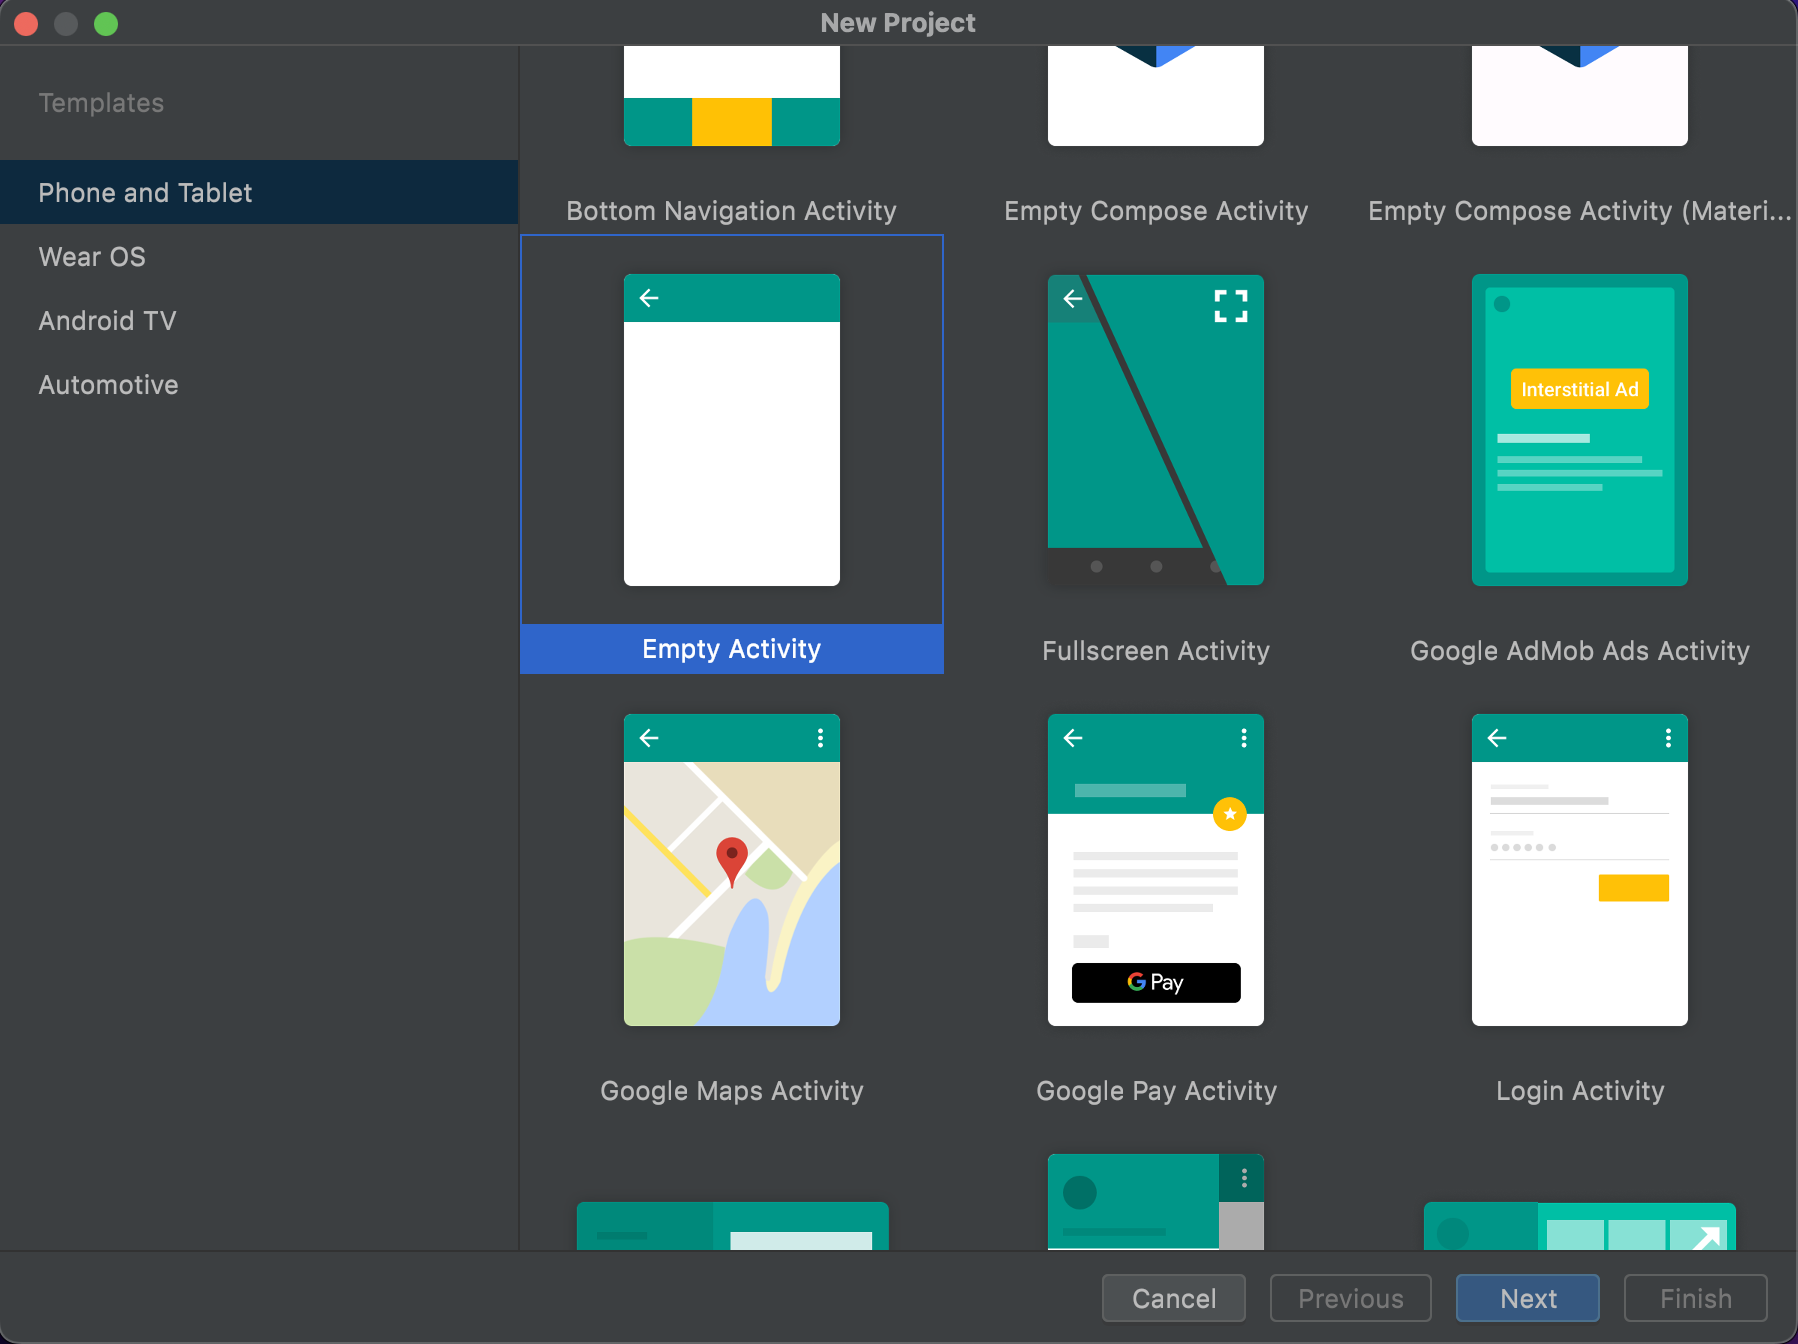
次は Empty Activity を選択してください。
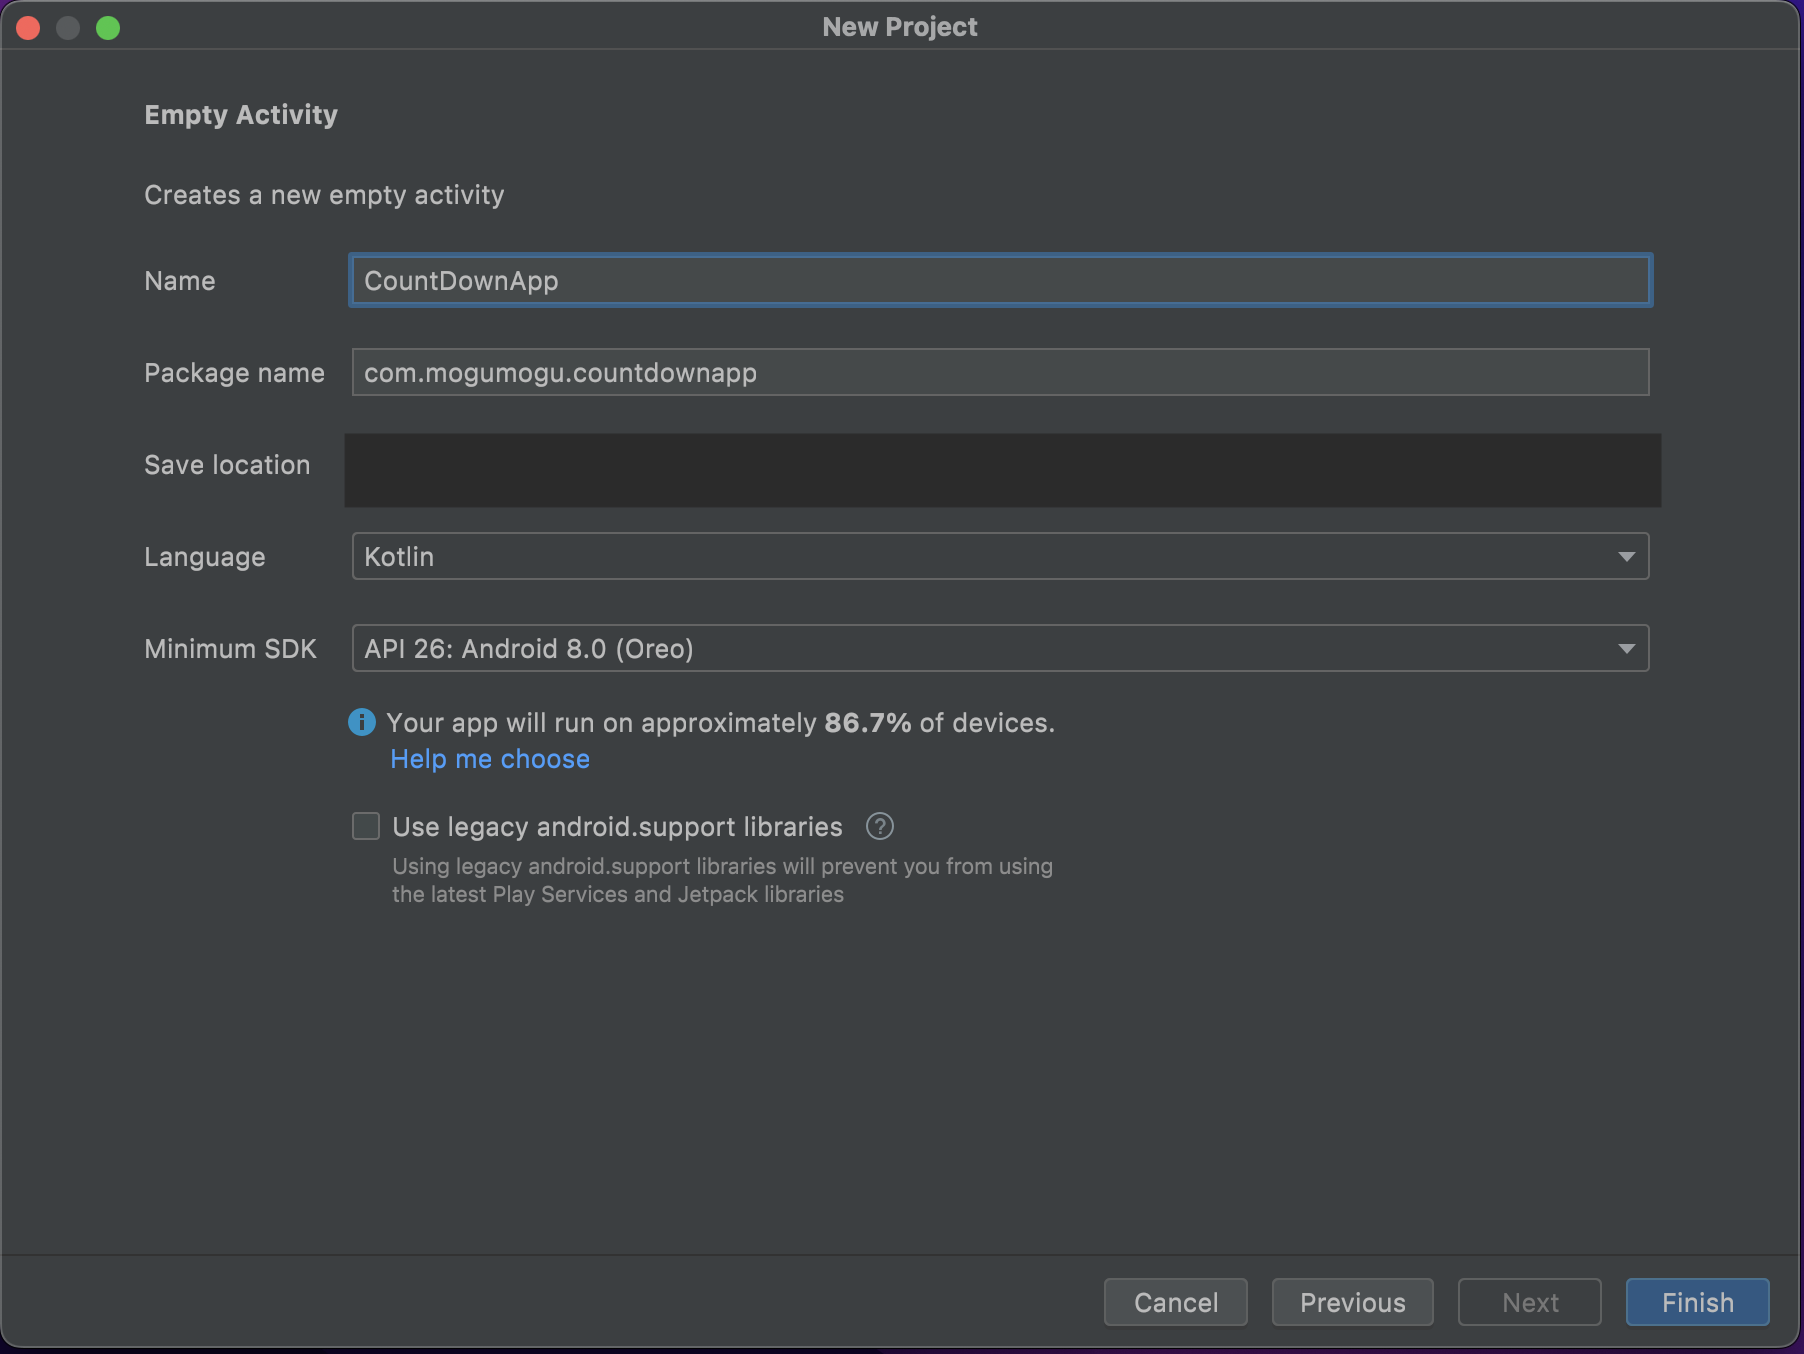
次はアプリ情報の入力です。
アプリ名はなんでも構わないのですが、ここではCountDownAppとしました。
これでプロジェクトの作成は完了です。
ここでビルドをした時に Android Gradle plugin requires Java 11 to run のエラーが出た時にはこの記事を参考にしてください。
UI実装
Viewの配置
まずは activity_main.xml を開いてください。
デフォルトで TextView が配置されていると思いますが、次のように変更しましょう。
<?xml version="1.0" encoding="utf-8"?>
<androidx.constraintlayout.widget.ConstraintLayout xmlns:android="http://schemas.android.com/apk/res/android"
    xmlns:app="http://schemas.android.com/apk/res-auto"
    xmlns:tools="http://schemas.android.com/tools"
    android:layout_width="match_parent"
    android:layout_height="match_parent"
    tools:context=".MainActivity">

    <Button
        android:id="@+id/count_down_button"
        android:layout_width="wrap_content"
        android:layout_height="wrap_content"
        android:text="スタート"
        app:layout_constraintBottom_toBottomOf="parent"
        app:layout_constraintLeft_toLeftOf="parent"
        app:layout_constraintRight_toRightOf="parent"
        app:layout_constraintTop_toTopOf="parent" />

    <TextView
        android:id="@+id/finished_text"
        android:layout_width="wrap_content"
        android:layout_height="wrap_content"
        android:layout_marginBottom="16dp"
        android:text="終了"
        android:textSize="32sp"
        android:visibility="invisible"
        app:layout_constraintBottom_toTopOf="@+id/count_down_button"
        app:layout_constraintLeft_toLeftOf="parent"
        app:layout_constraintRight_toRightOf="parent"
        />

    <TextView
        android:id="@+id/count_label"
        android:layout_width="wrap_content"
        android:layout_height="wrap_content"
        android:layout_marginTop="8dp"
        android:text="5"
        android:textSize="16sp"
        app:layout_constraintLeft_toLeftOf="parent"
        app:layout_constraintRight_toRightOf="parent"
        app:layout_constraintTop_toBottomOf="@id/count_down_button"
        />

</androidx.constraintlayout.widget.ConstraintLayout>
1つ1つ説明していきます。
Button
まずは一番上にある Button についてです。
このボタンを押した時にカウントダウンが開始されるような仕組みにしていきます。
この Button は画面の真ん中に表示されるようにしています。
やり方としては縦方向と横方向がどちらも中央に来るように配置することで実現しています。
まず縦方向の中央に配置したい場合にはlayout_constraintTop_toTopOf とlayout_constraintBottom_toBottomOfをparentに指定。
次に横方向の中央に配置したい場合ですが、考え方は縦方向と同様で layout_constraintLeft_toLeftOfとlayout_constraintRight_toRightOfをparentに指定。
このように設定することで縦・横それぞれで画面の中央に配置することが可能になります。
TextView (finished_text)
次は id が finished_text となっている TextView です。
これはカウントダウンが終わった時に表示されるテキストです。
そのため最初に表示された時には非表示になってて欲しいわけですね。
そのための設定として visibility の属性に invisible を指定しています。
TextView (count_label)
最後に id が count_label となっている TextView です。
これは残りの時間が表示されます。そのため初期表示は 5 にしています。
それではここで一度ビルドしてみましょう。
このように真ん中にボタンとテキストが表示されていればOKです。
カウントダウンロジック実装
Viewの取得
まずはそれぞれの View を取得していきます。
MainActivity を以下のように変更してください。
import androidx.appcompat.app.AppCompatActivity
import android.os.Bundle
import android.widget.Button
import android.widget.TextView

class MainActivity : AppCompatActivity() {

    override fun onCreate(savedInstanceState: Bundle?) {
        super.onCreate(savedInstanceState)
        setContentView(R.layout.activity_main)

        val button = findViewById<Button>(R.id.count_down_button)
        val finishedTextView = findViewById<TextView>(R.id.finished_text)
        val countTextView = findViewById<TextView>(R.id.count_label)
    }
}
元々は onCreate() でsetContentView() だけをしていたと思うのですが、
それに加えて各 View に対して findViewById() メソッドを呼んでいます。
Viewの取得はこれで完了です。
タイマー
次はタイマーを設定していきます。
MainActivity を以下のように変更してください。
import androidx.appcompat.app.AppCompatActivity
import android.os.Bundle
import android.os.CountDownTimer
import android.view.View
import android.widget.Button
import android.widget.TextView
import kotlin.math.ceil

class MainActivity : AppCompatActivity() {

    companion object {
        private const val COUNT_DOWN_MILLISECOND: Long = 5000
        private const val INTERVAL_MILLISECOND: Long = 1000
    }

    override fun onCreate(savedInstanceState: Bundle?) {
        super.onCreate(savedInstanceState)
        setContentView(R.layout.activity_main)

        val button = findViewById<Button>(R.id.count_down_button)
        val finishedTextView = findViewById<TextView>(R.id.finished_text)
        val countTextView = findViewById<TextView>(R.id.count_label)

        val timer = object : CountDownTimer(COUNT_DOWN_MILLISECOND, INTERVAL_MILLISECOND) {
            override fun onTick(millisUntilFinished: Long) {
                // 1秒ごとにテキストを更新
                val second = ceil(millisUntilFinished / 1000.0).toInt()
                countTextView.text = second.toString()
            }

            override fun onFinish() {
                // 各Viewの終了設定
                button.isEnabled = true
                finishedTextView.visibility = View.VISIBLE
                countTextView.text = "0"
            }
        }

        button.setOnClickListener {
            // 各Viewの初期設定
            button.isEnabled = false
            finishedTextView.visibility = View.INVISIBLE
            countTextView.text = "5"
            // timerのスタート
            timer.start()
        }
    }
}
それでは1つ1つ説明していきます。
CountDownTimerクラスのtimer
まずは CountDownTimer というクラスの timer 変数です。
CountDownTimer クラスはその名の通りにカウントダウンを測定できるクラスです。
コンストラクタの1つ目が測定したい時間で2つ目がインターバルの時間です。
今回の場合では測定したい時間を5000ミリ秒(5秒)間としてインターバルを1000ミリ秒(1秒)と指定しています。
そうすることでインターバルごとに onTick() メソッドが呼ばれ測定したい時間が経つと onFinish() が呼ばれます。
整理
ここでこのアプリで実現したいことを分解すると以下の2つになりますね。
- 1秒ごとにテキストの数字を1つずつ下げる
- 5秒経った時に「終了」のテキストを表示させる
1つ目ですが、これは onTick() で実現させます。 onTick() の引数である millisUntilFinished は残りの秒数です。
となるとこの秒数をそのまま表示させればいいわけです。
しかし millisUntilFinished はアバウトな数値が入ってくるので ceil() メソッドを使って数字を切り上げる必要があります。
その切り上げた数字を countTextView に代入させてあげればOKです(ceil()を使わないとどうなるかを見てみるのも良いと思います)。
次に2つ目の「終了」テキスト表示は onFinish() で行います。
この中で finishedTextView.visibility を View.VISIBLE に変更することで見えるようになります。
その他には button を有効にすることと countTextView.text に「0」を代入しています。
buttonのクリックイベント
最後に button のクリックイベントです。
Button クラスには setOnClickListener メソッドでクリックイベント取得することができます。
この中ではカウントダウンを始めるための準備と timer の開始をさせています。
初期設定としては button の無効化、 finishedTextView を見えないようにし、 countTextView に「5」を代入しています。
timer の開始は timer.start() です。
それではここまで実装できたらビルドしてみましょう。
このような動きになれば完成です!
まとめ
お疲れ様でした!
カウントダウンアプリ完成しましたでしょうか?
UIの基礎的なところやロジック実装など重要な要素が詰まっているので何度か作成して理解していってみてください。
アニメーションの追加チュートリアル
今回のカウントダウンアプリにアニメーションを追加したチュートリアルも用意しています。
気になる方はぜひチェックしてみてください!