Android(Kotlin)でメモアプリを作成していくチュートリアルを解説していきます。
特徴としては、Realmというデータベースを利用することです。
Realmはアプリ開発でよく使われるので、ここで使い方を学習していきましょう。
今回はKotlin SDKを使用しています。Java SDKを使って同じアプリを作る記事もあるので興味があれば見てみてください!

完成形
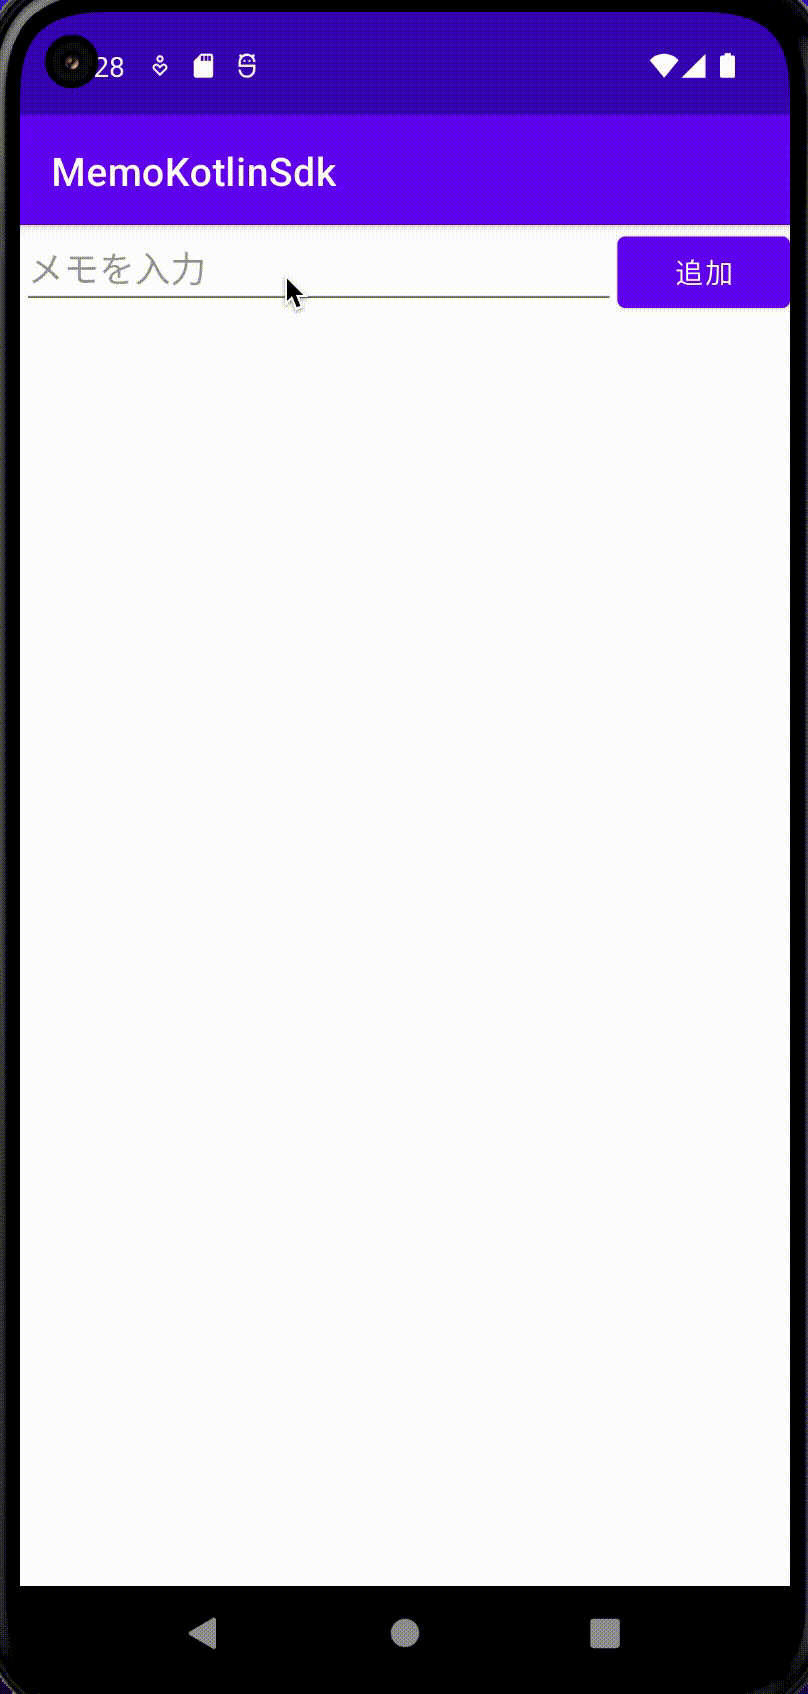
テキストのメモを入力ができ、追加ボタンを押すと一覧に表示されていくアプリです。
- Realm(Kotlin SDK)の使い方
- ローカルDBの理解
- ローカルDBを使ったアプリの作成方法
- Android Studio Chipmunk | 2021.2.1 Patch 1
- Kotlin 1.7.20
- Realm 1.4.0
プロジェクトの作成
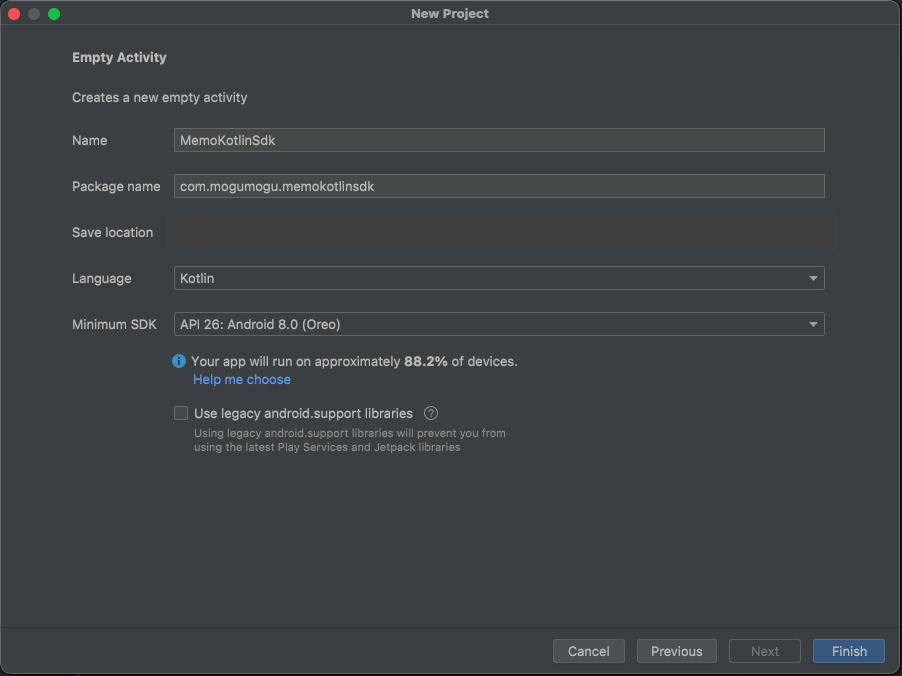
まずは、プロジェクトを作成していきましょう。
詳細な説明はこちらにありますので、必要があれば参考にしてください。

Choose your project は Empty Activity を選択してください。
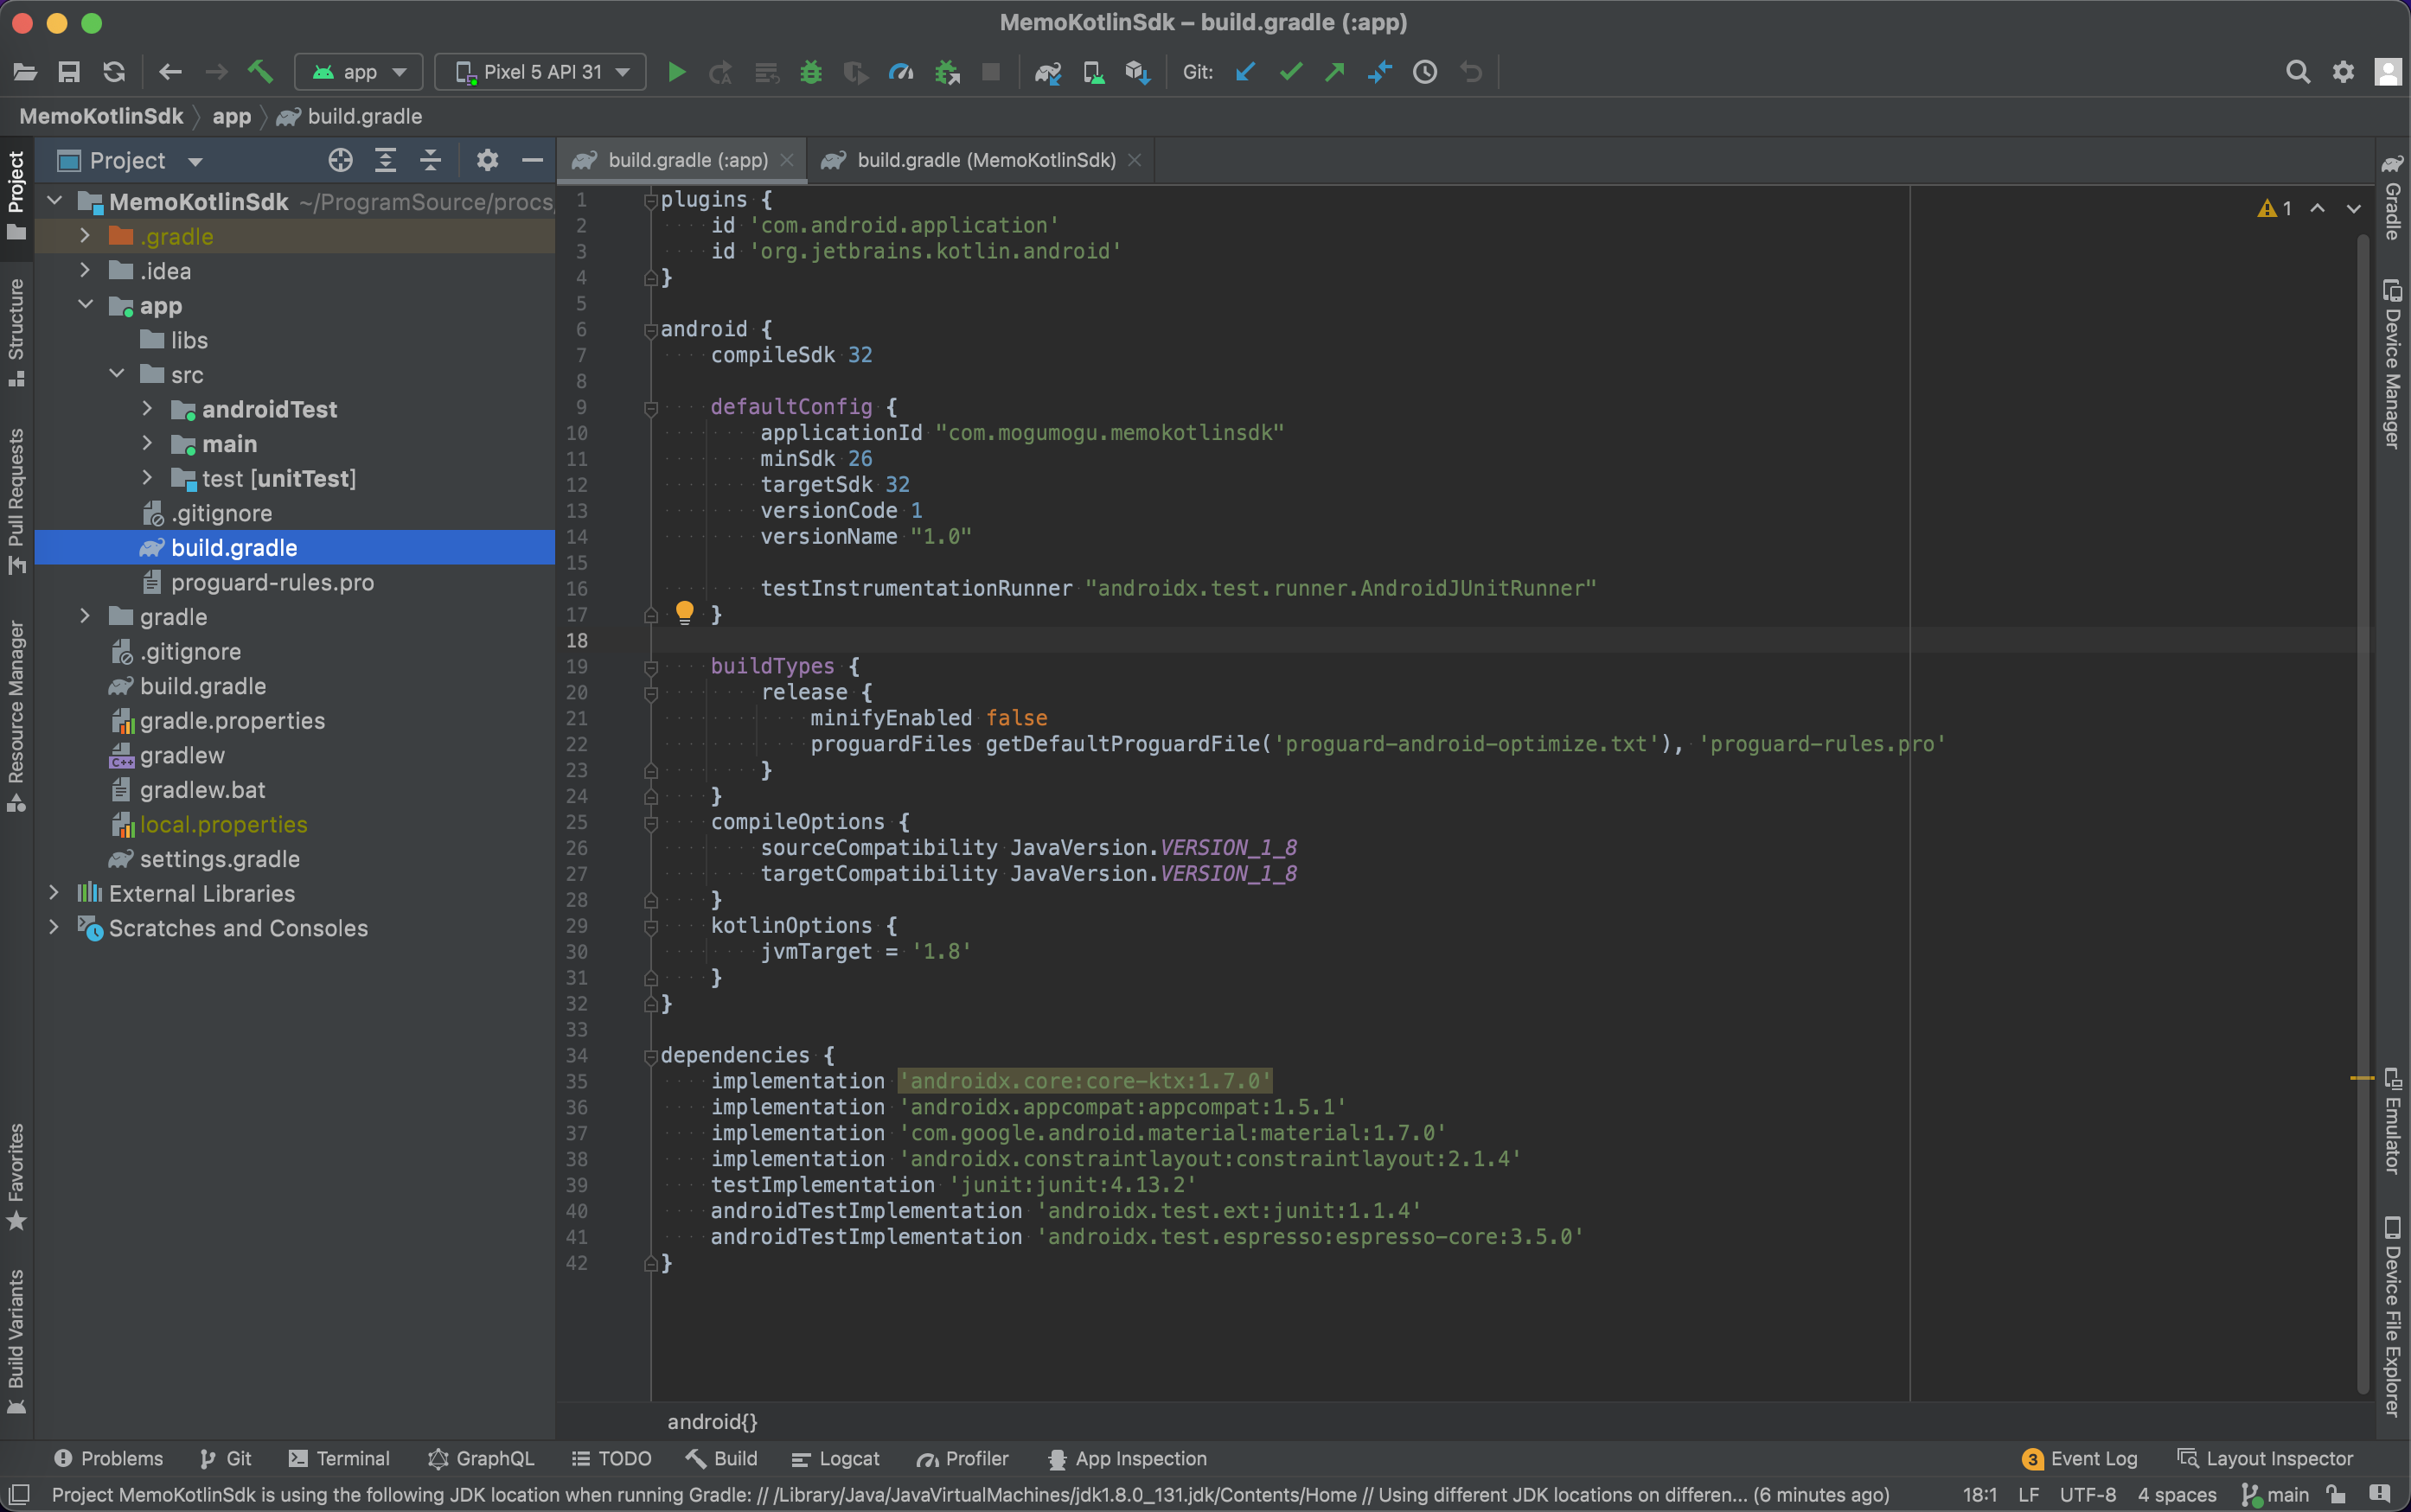
アプリ名はなんでもOKです。ここではMemoKotlinSdkとしましたが Memo などの方がわかりやすいと思います。
ここでビルドをした時に Android Gradle plugin requires Java 11 to run のエラーが出た時にはこの記事を参考にしてください。
Realm導入
早速Realm の導入をしていきましょう。
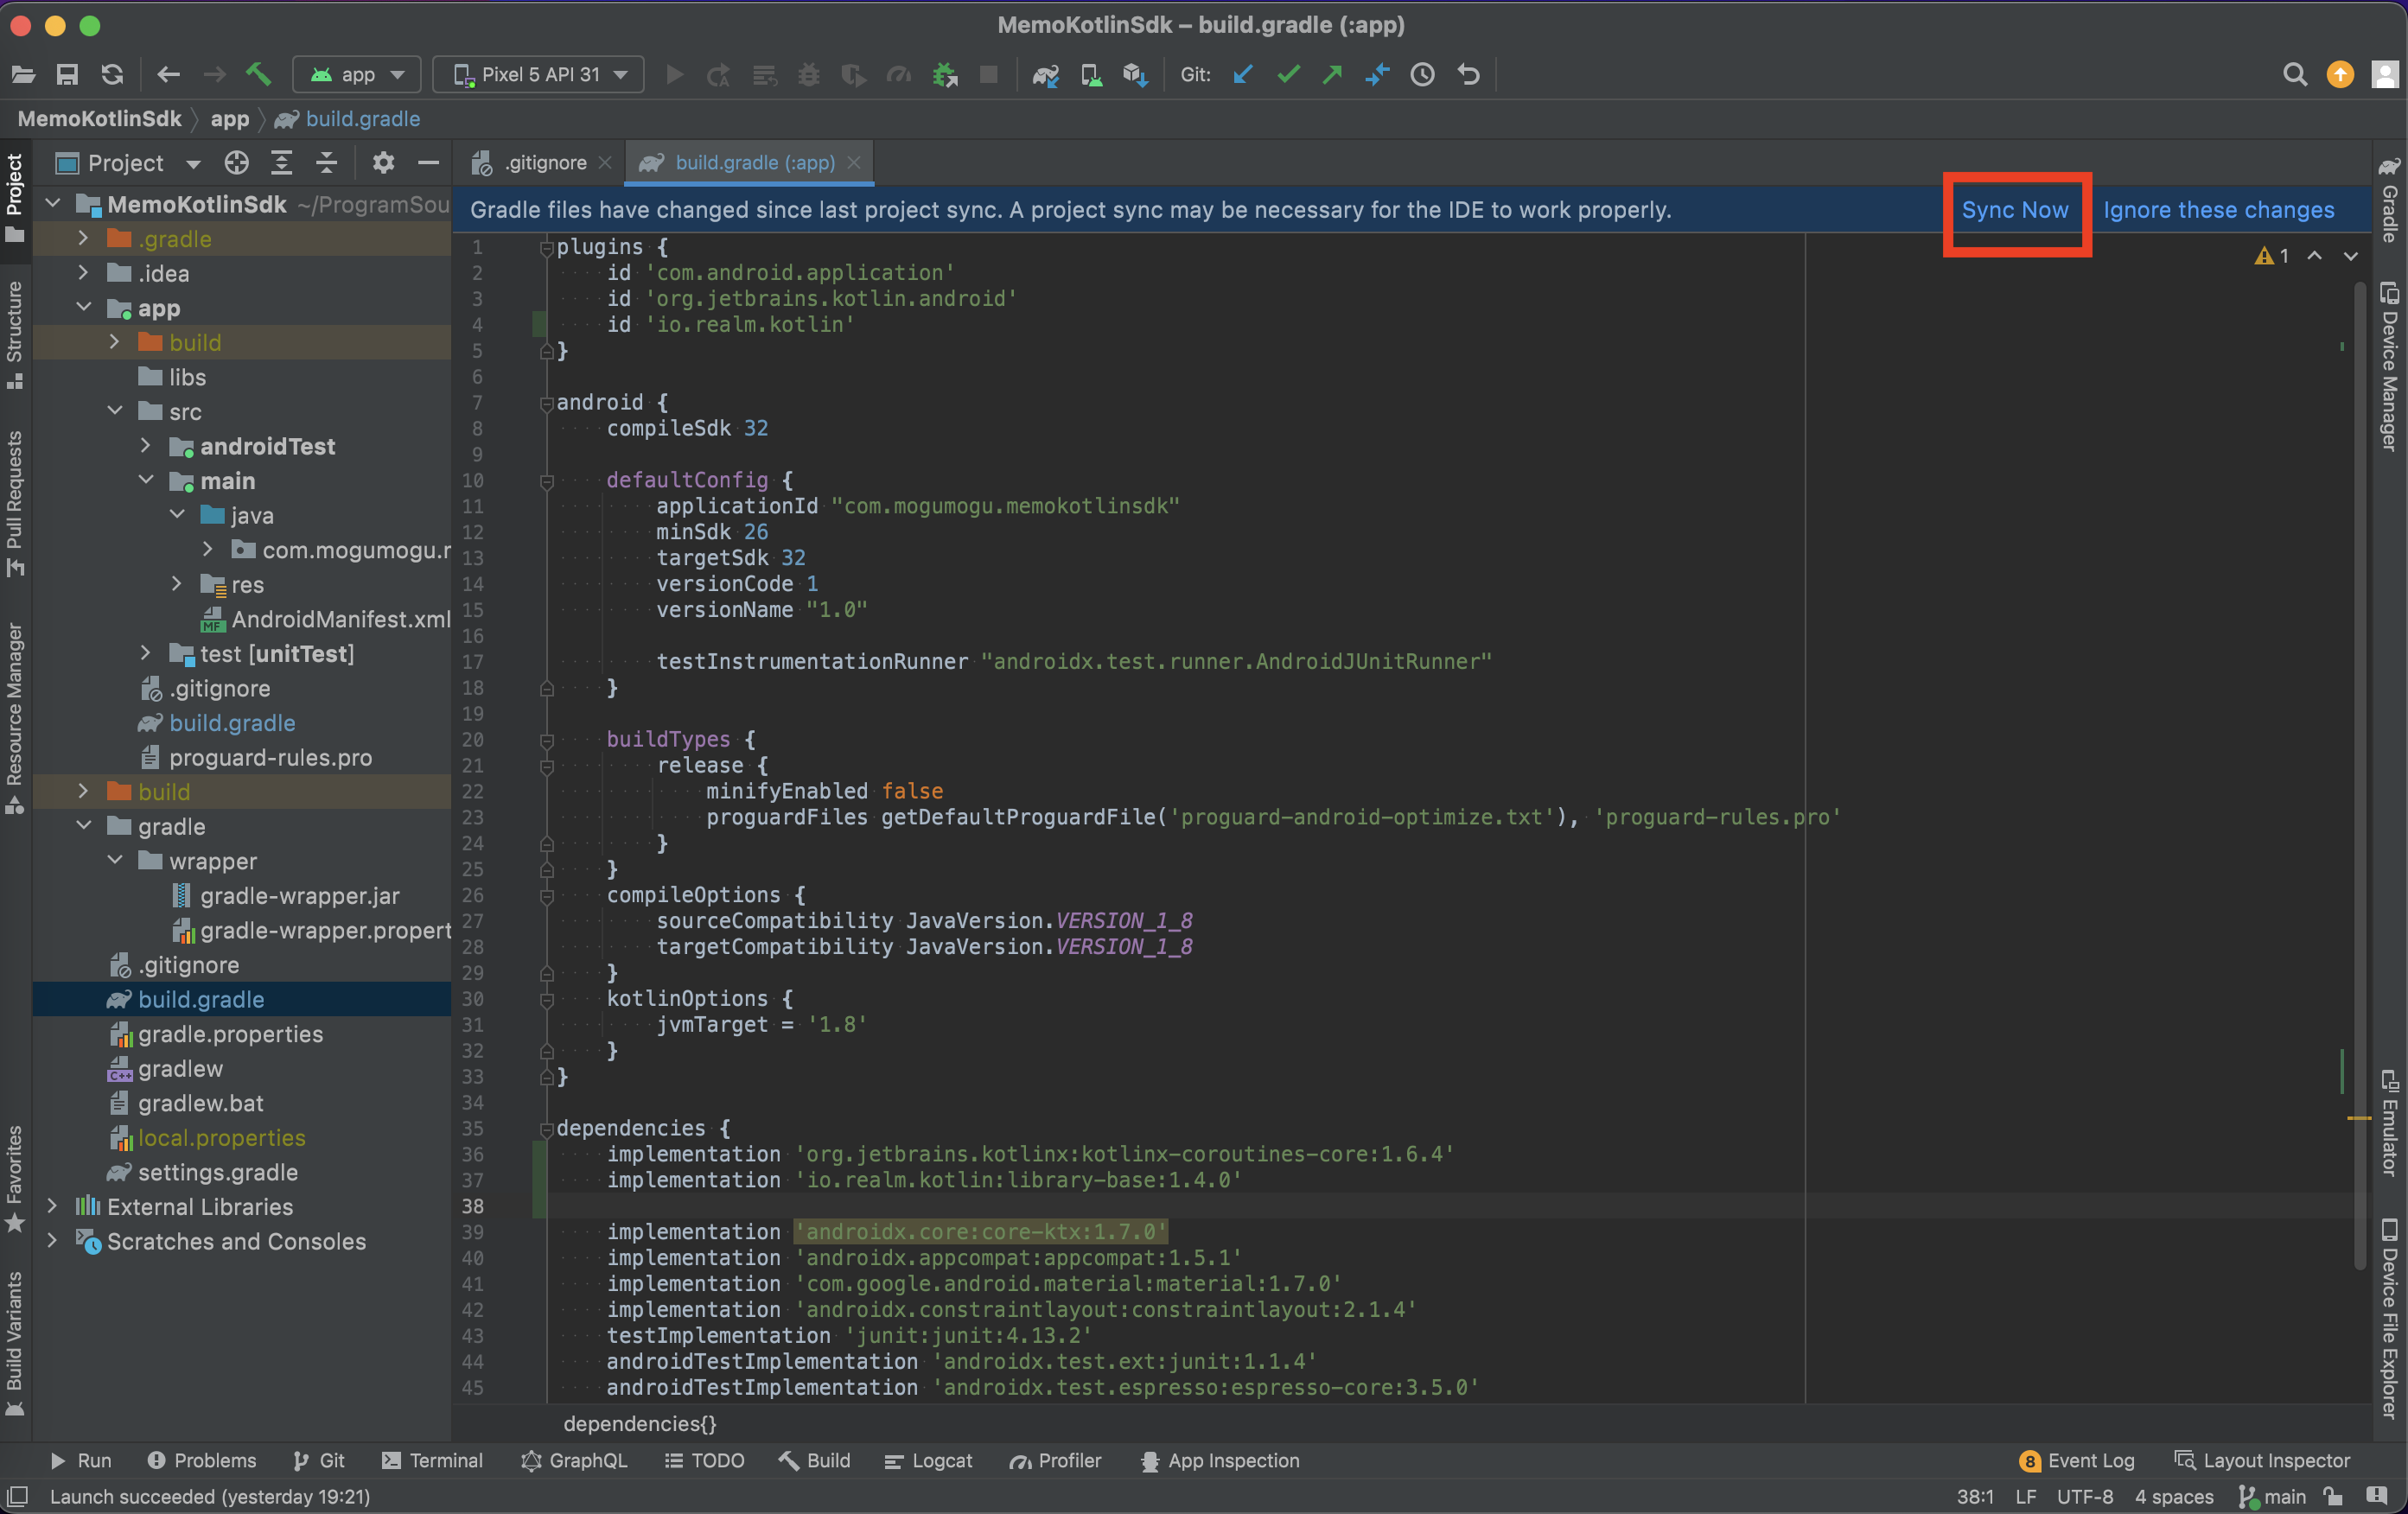
root配下にある build.gradle を開いてください。
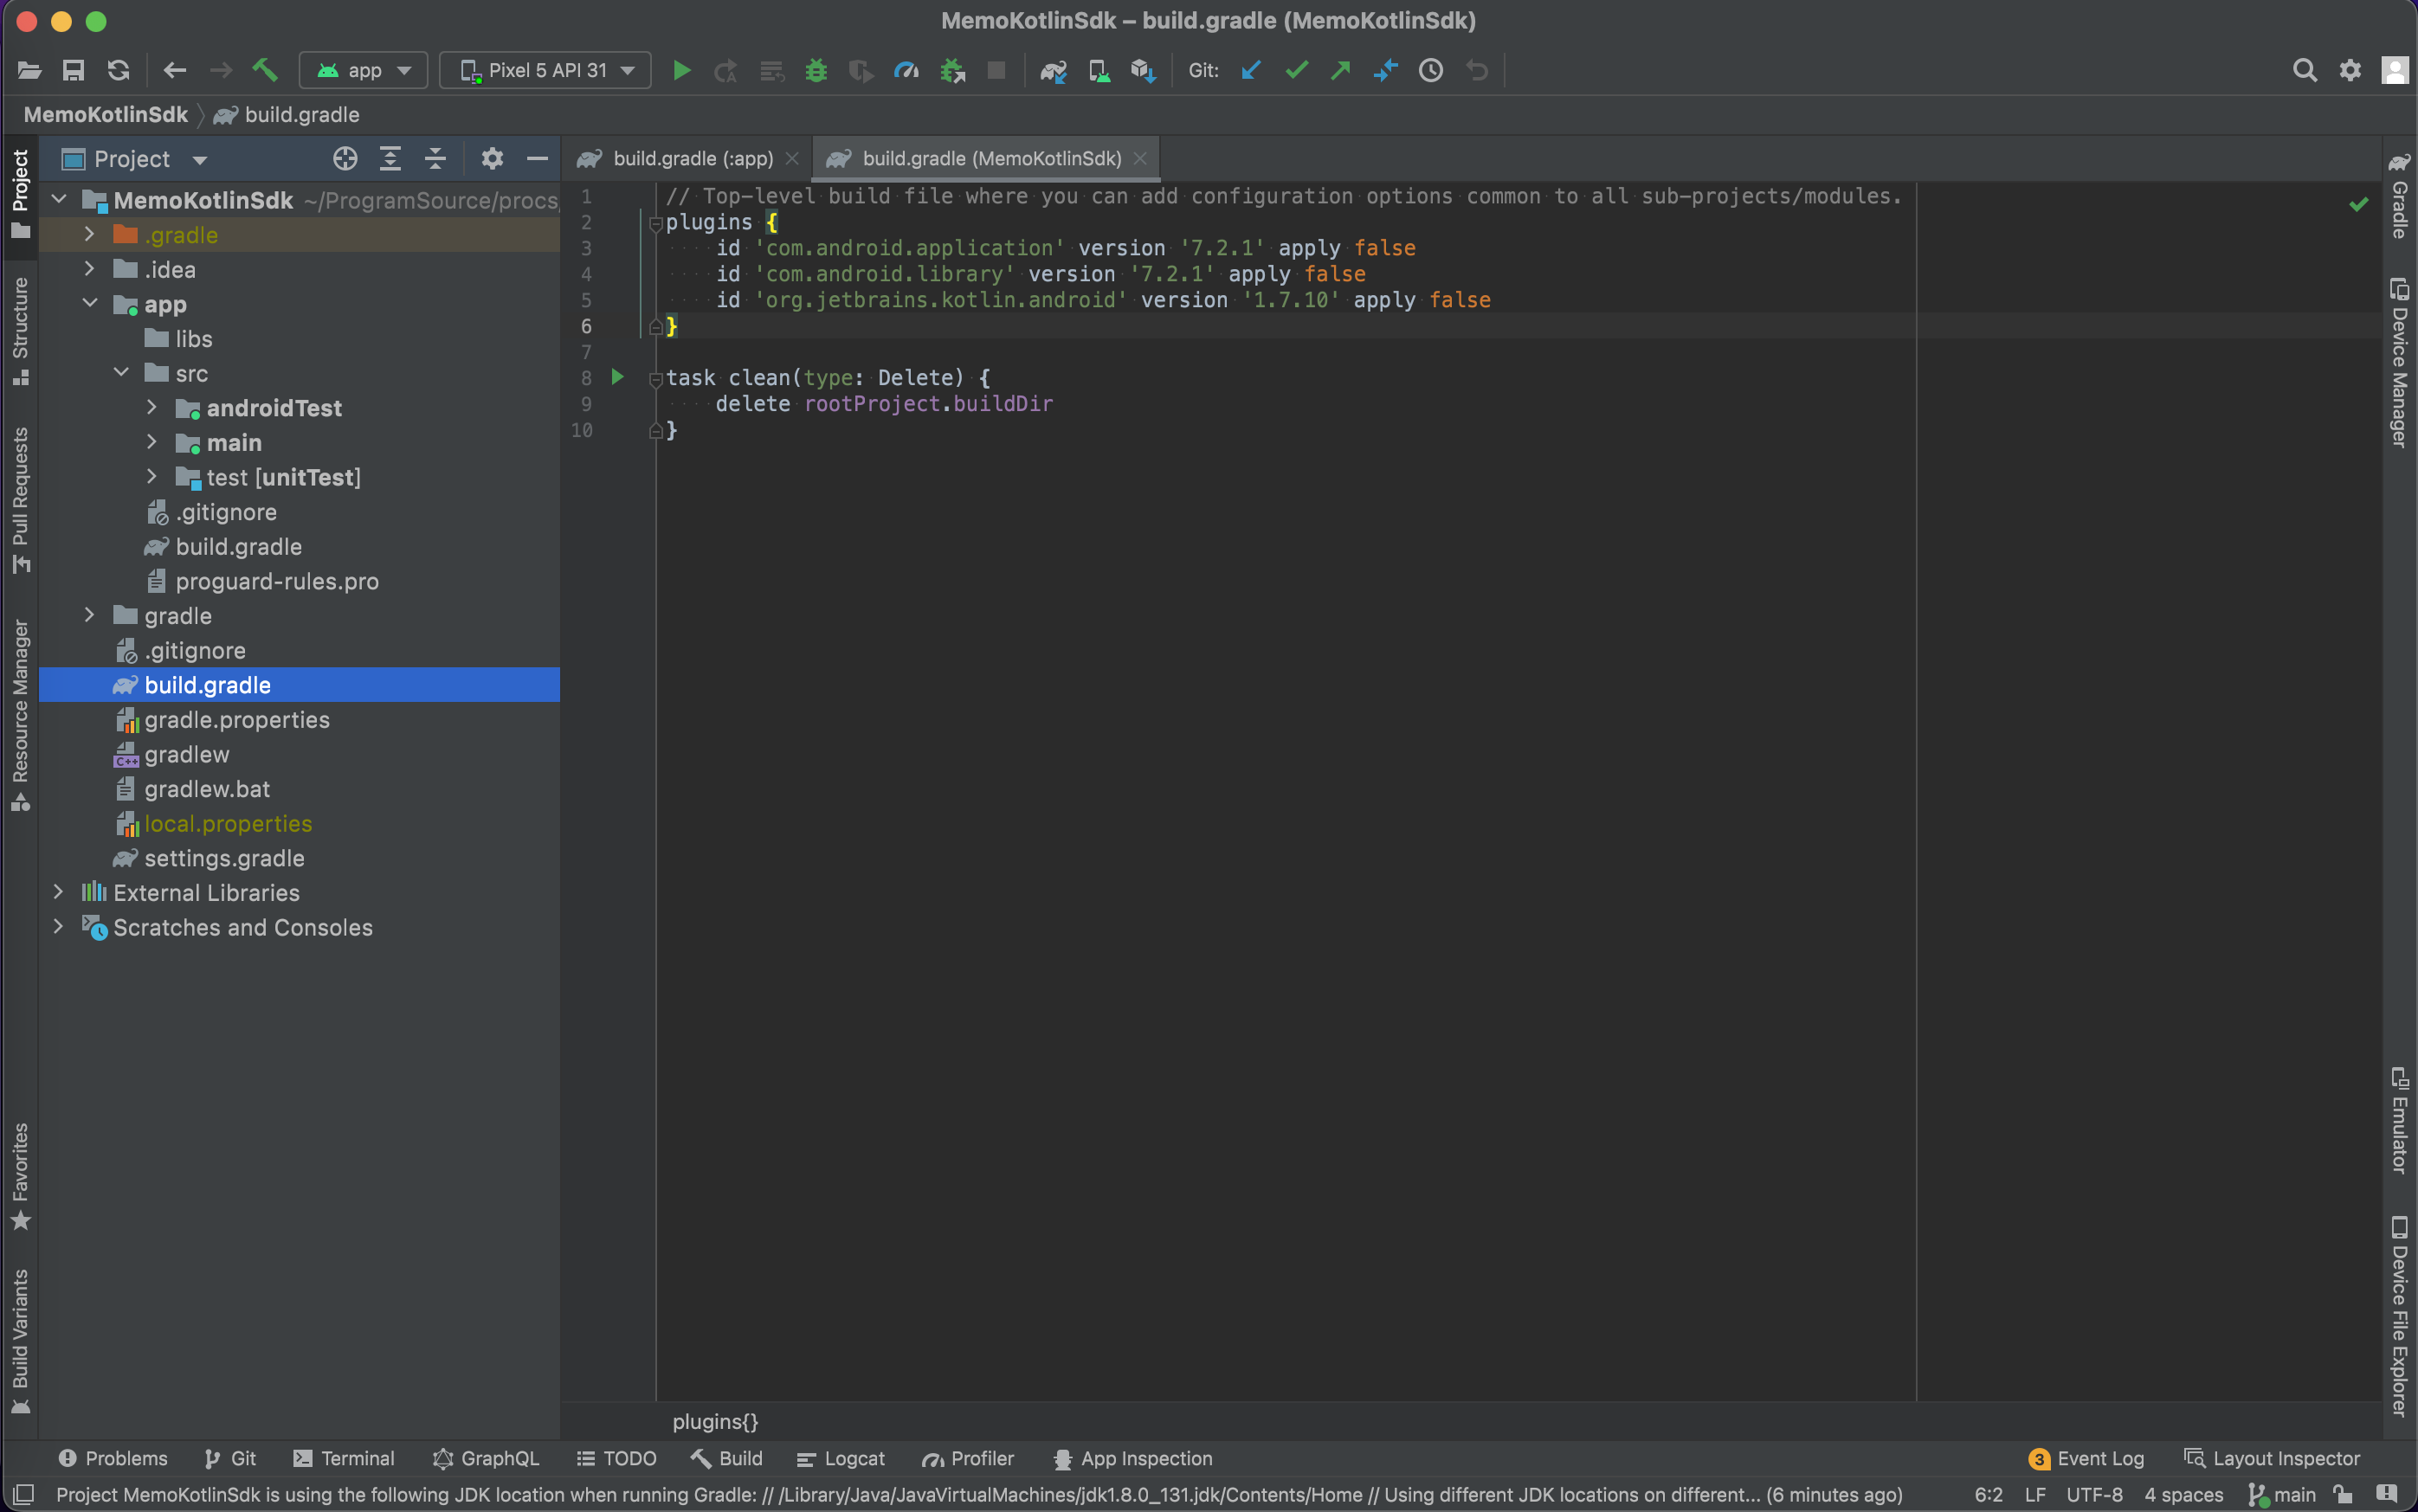
pluginsの中にrealmを追加してあげます。
またKotlinのバージョンも1.7.20 にしてあげましょう。
// Top-level build file where you can add configuration options common to all sub-projects/modules.
plugins {
    id 'com.android.application' version '7.2.1' apply false
    id 'com.android.library' version '7.2.1' apply false
    // kotlinのバージョンを1.7.20にする
    id 'org.jetbrains.kotlin.android' version '1.7.20' apply false
    // この行を追加する
    id 'io.realm.kotlin' version '1.4.0' apply false
}

task clean(type: Delete) {
    delete rootProject.buildDir
}
次に app 配下にある build.gradle を開いてください。
一番上の plugins と下の方にある dependencies に以下のように追加してあげます。
plugins {
    id 'com.android.application'
    id 'org.jetbrains.kotlin.android'
    // この行を追加する
    id 'io.realm.kotlin'
}
...
dependencies {
    // この2行を追加する
    implementation 'org.jetbrains.kotlinx:kotlinx-coroutines-core:1.6.4'
    implementation 'io.realm.kotlin:library-base:1.4.0'
    ...
}
最後に上部に Sync Now というボタンが表示されていると思います。
こちらを押してください。
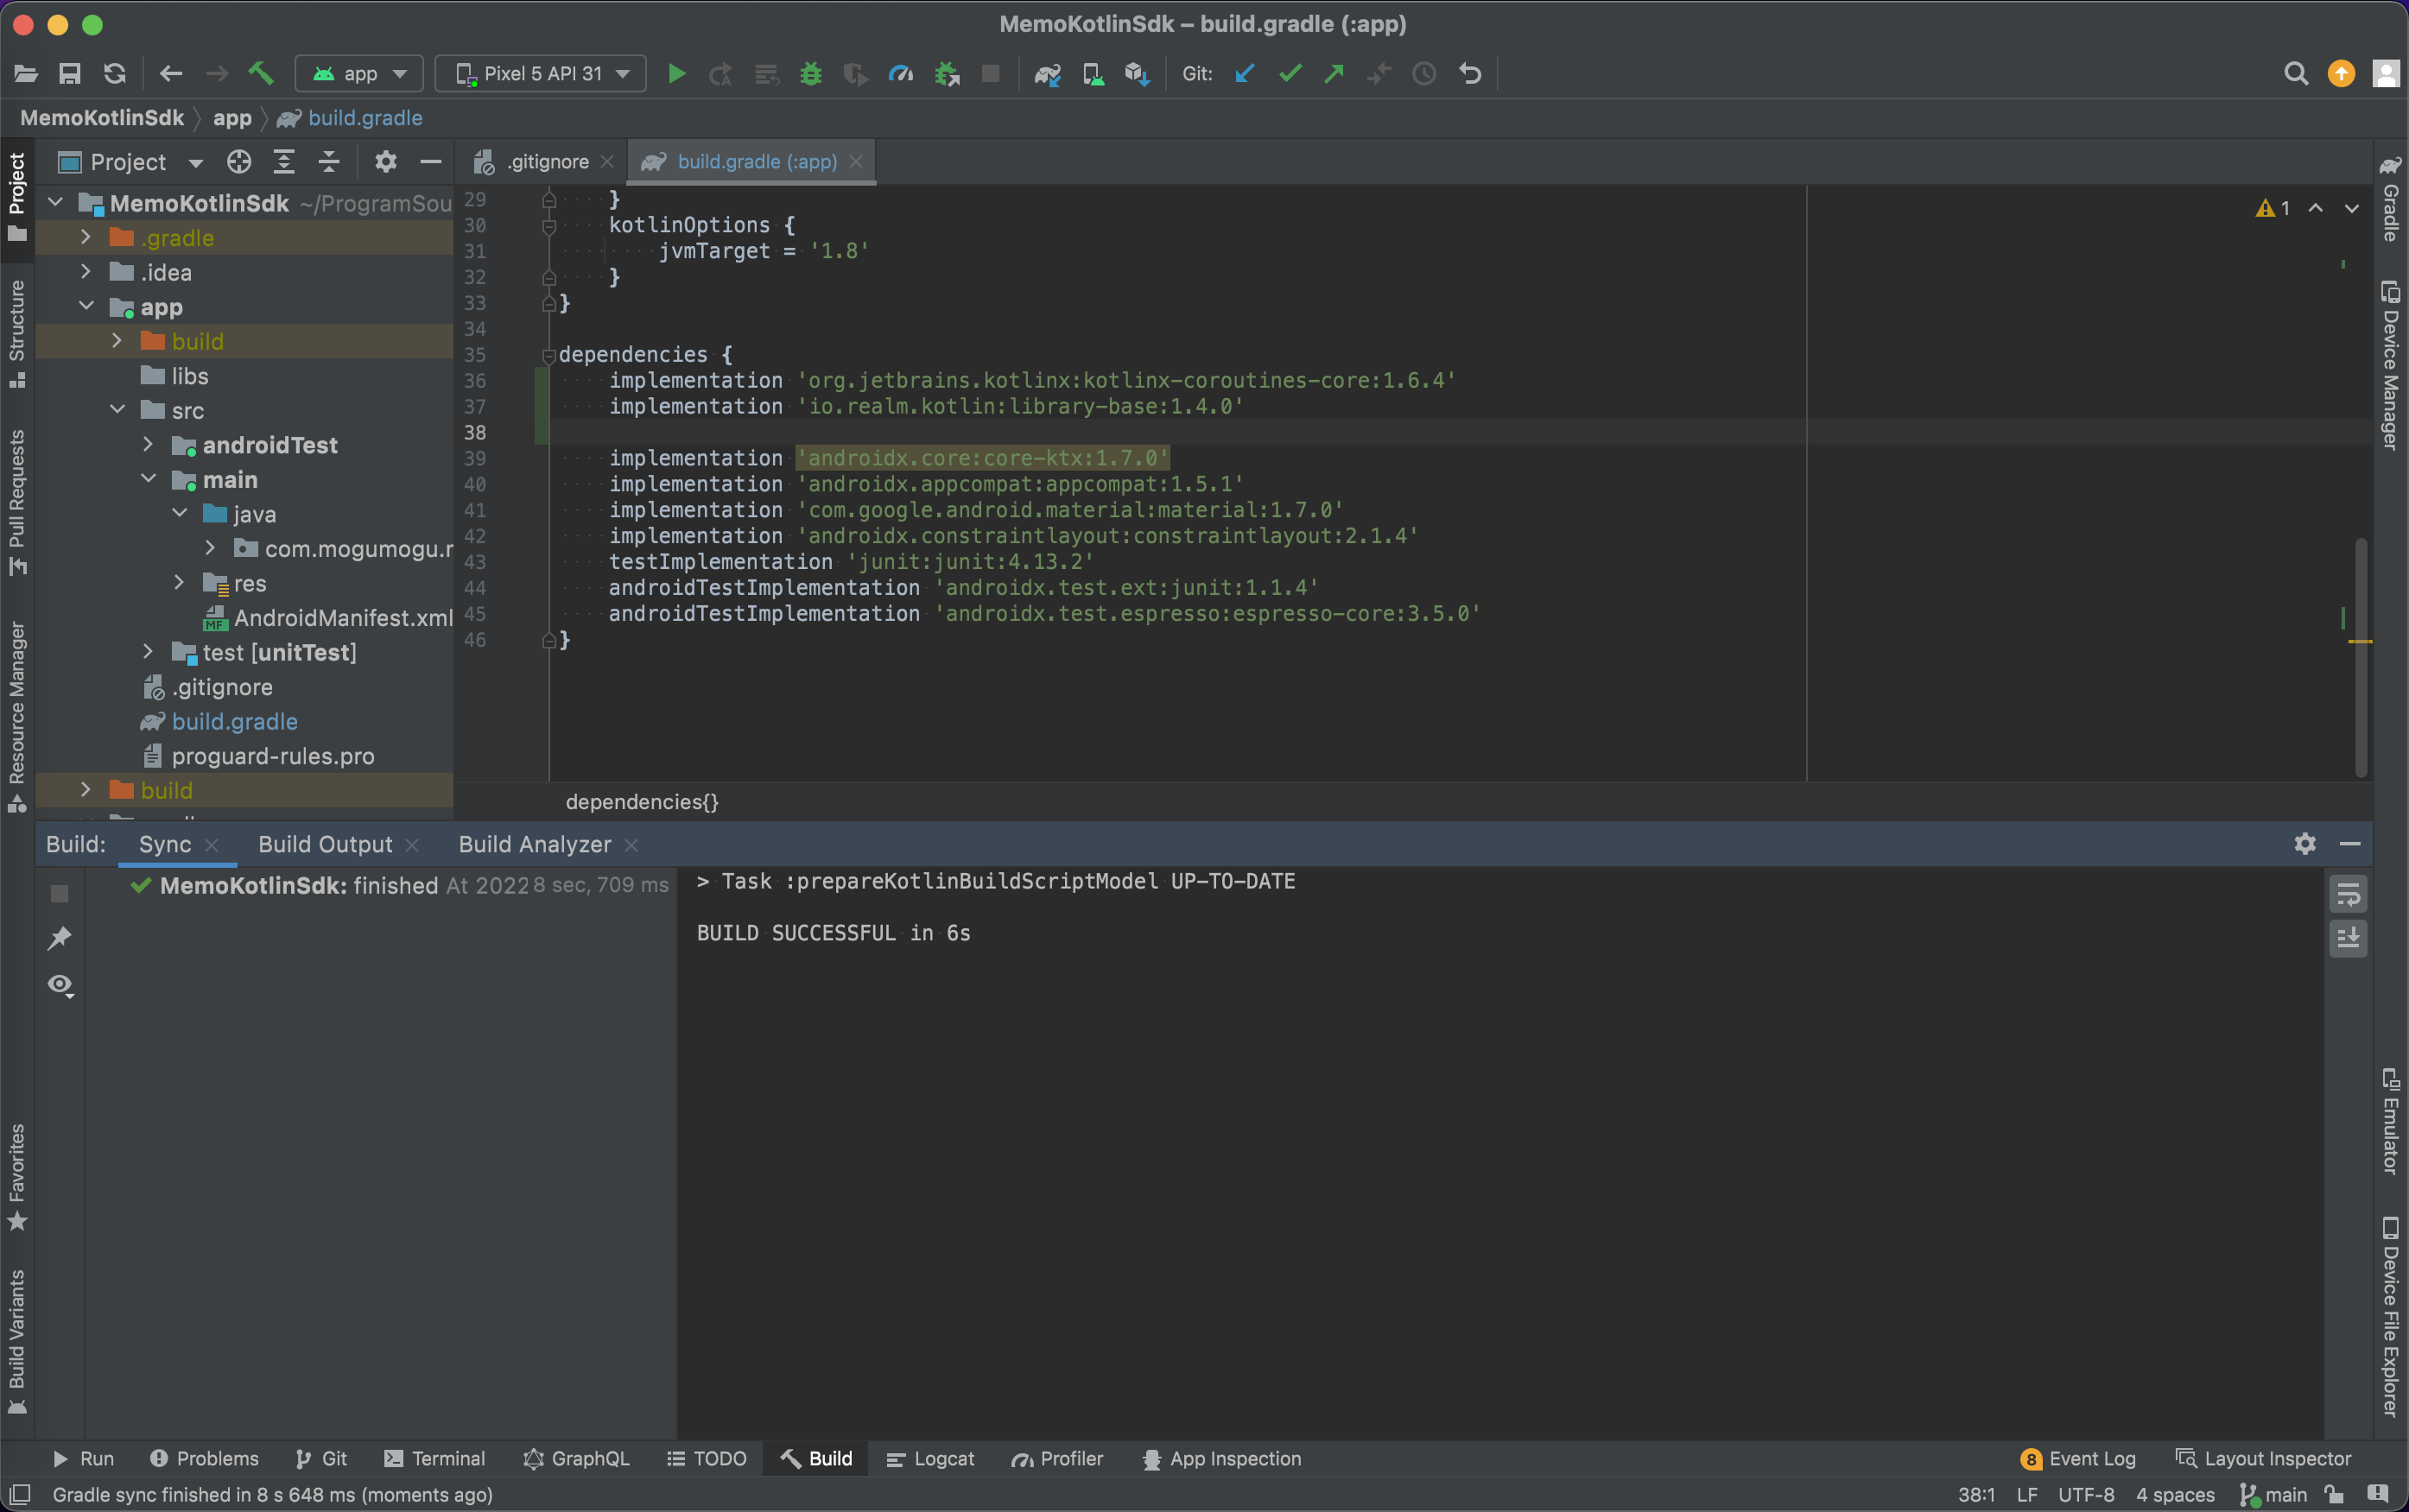
しばらくしてこのような表示が出ればOKです。
レイアウト
次はレイアウトを作成していきましょう。
今回はレイアウトにこだわらないので、簡単に実装していきます。
RecyclerViewの追加
今回はメモリストを用意するのでリスト表示のできる RecyclerView を使っていきましょう。
まずはライブラリの追加です。先ほども app 配下にある build.gradle を開きましょう。
dependencies 内に下記のように1行追加して下さい。
dependencies {
    implementation 'org.jetbrains.kotlinx:kotlinx-coroutines-core:1.6.4'
    implementation 'io.realm.kotlin:library-base:1.4.0'
    // この行を追加する
    implementation 'androidx.recyclerview:recyclerview:1.2.1'
    ...
}
また先ほどと同様に Sync Now ボタンが表示されるはずなので押しましょう。
これで RecyclerView の準備は完了です。
画面レイアウト
次に画面のレイアウトを実装しましょう。
activity_main を開いて以下のように実装して下さい。
<?xml version="1.0" encoding="utf-8"?>
<androidx.constraintlayout.widget.ConstraintLayout xmlns:android="http://schemas.android.com/apk/res/android"
xmlns:app="http://schemas.android.com/apk/res-auto"
xmlns:tools="http://schemas.android.com/tools"
android:layout_width="match_parent"
android:layout_height="match_parent"
tools:context=".MainActivity">
<EditText
android:id="@+id/memo_edit_text"
android:layout_width="0dp"
android:layout_height="wrap_content"
android:hint="メモを入力"
app:layout_constraintEnd_toStartOf="@id/add_button"
app:layout_constraintStart_toStartOf="parent"
app:layout_constraintTop_toTopOf="parent" />
<Button
android:id="@+id/add_button"
android:layout_width="wrap_content"
android:layout_height="wrap_content"
android:text="追加"
app:layout_constraintEnd_toEndOf="parent"
app:layout_constraintTop_toTopOf="parent" />
<androidx.recyclerview.widget.RecyclerView
android:id="@+id/memo_list"
android:layout_width="0dp"
android:layout_height="0dp"
app:layoutManager="androidx.recyclerview.widget.LinearLayoutManager"
app:layout_constraintBottom_toBottomOf="parent"
app:layout_constraintEnd_toEndOf="parent"
app:layout_constraintStart_toStartOf="parent"
app:layout_constraintTop_toBottomOf="@+id/memo_edit_text" />
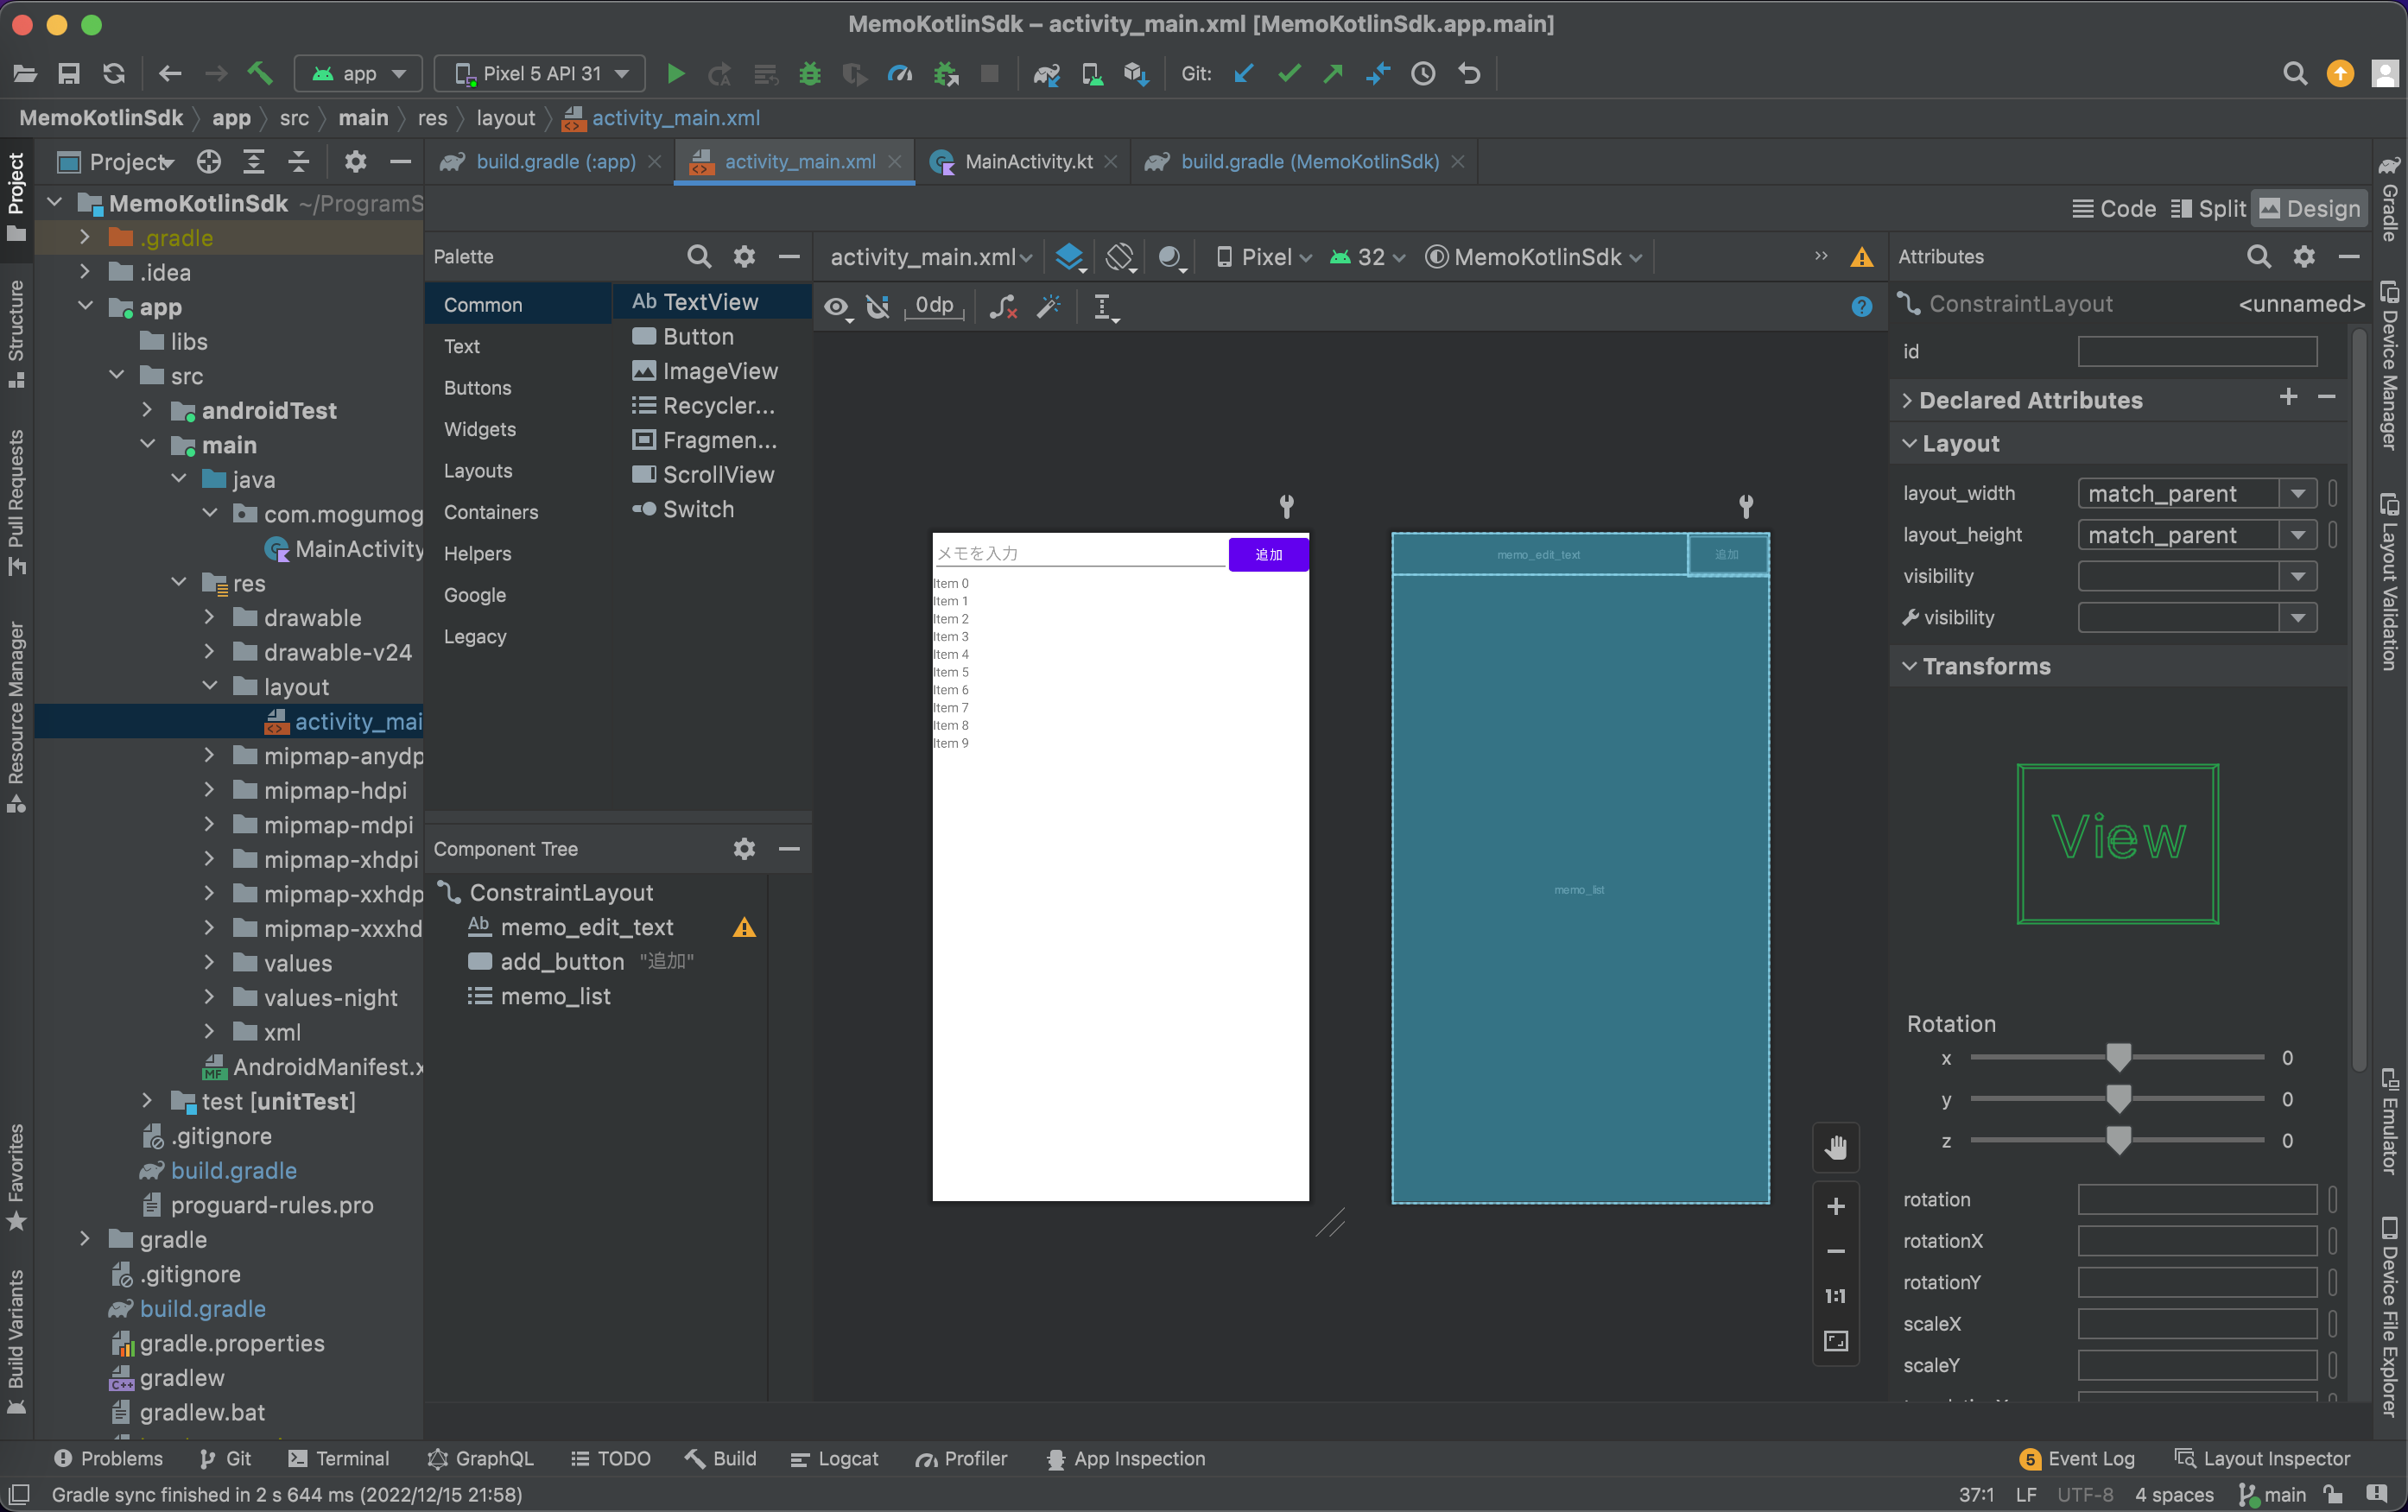
</androidx.constraintlayout.widget.ConstraintLayout>Design タブを開いてこのようになっていればOKです。
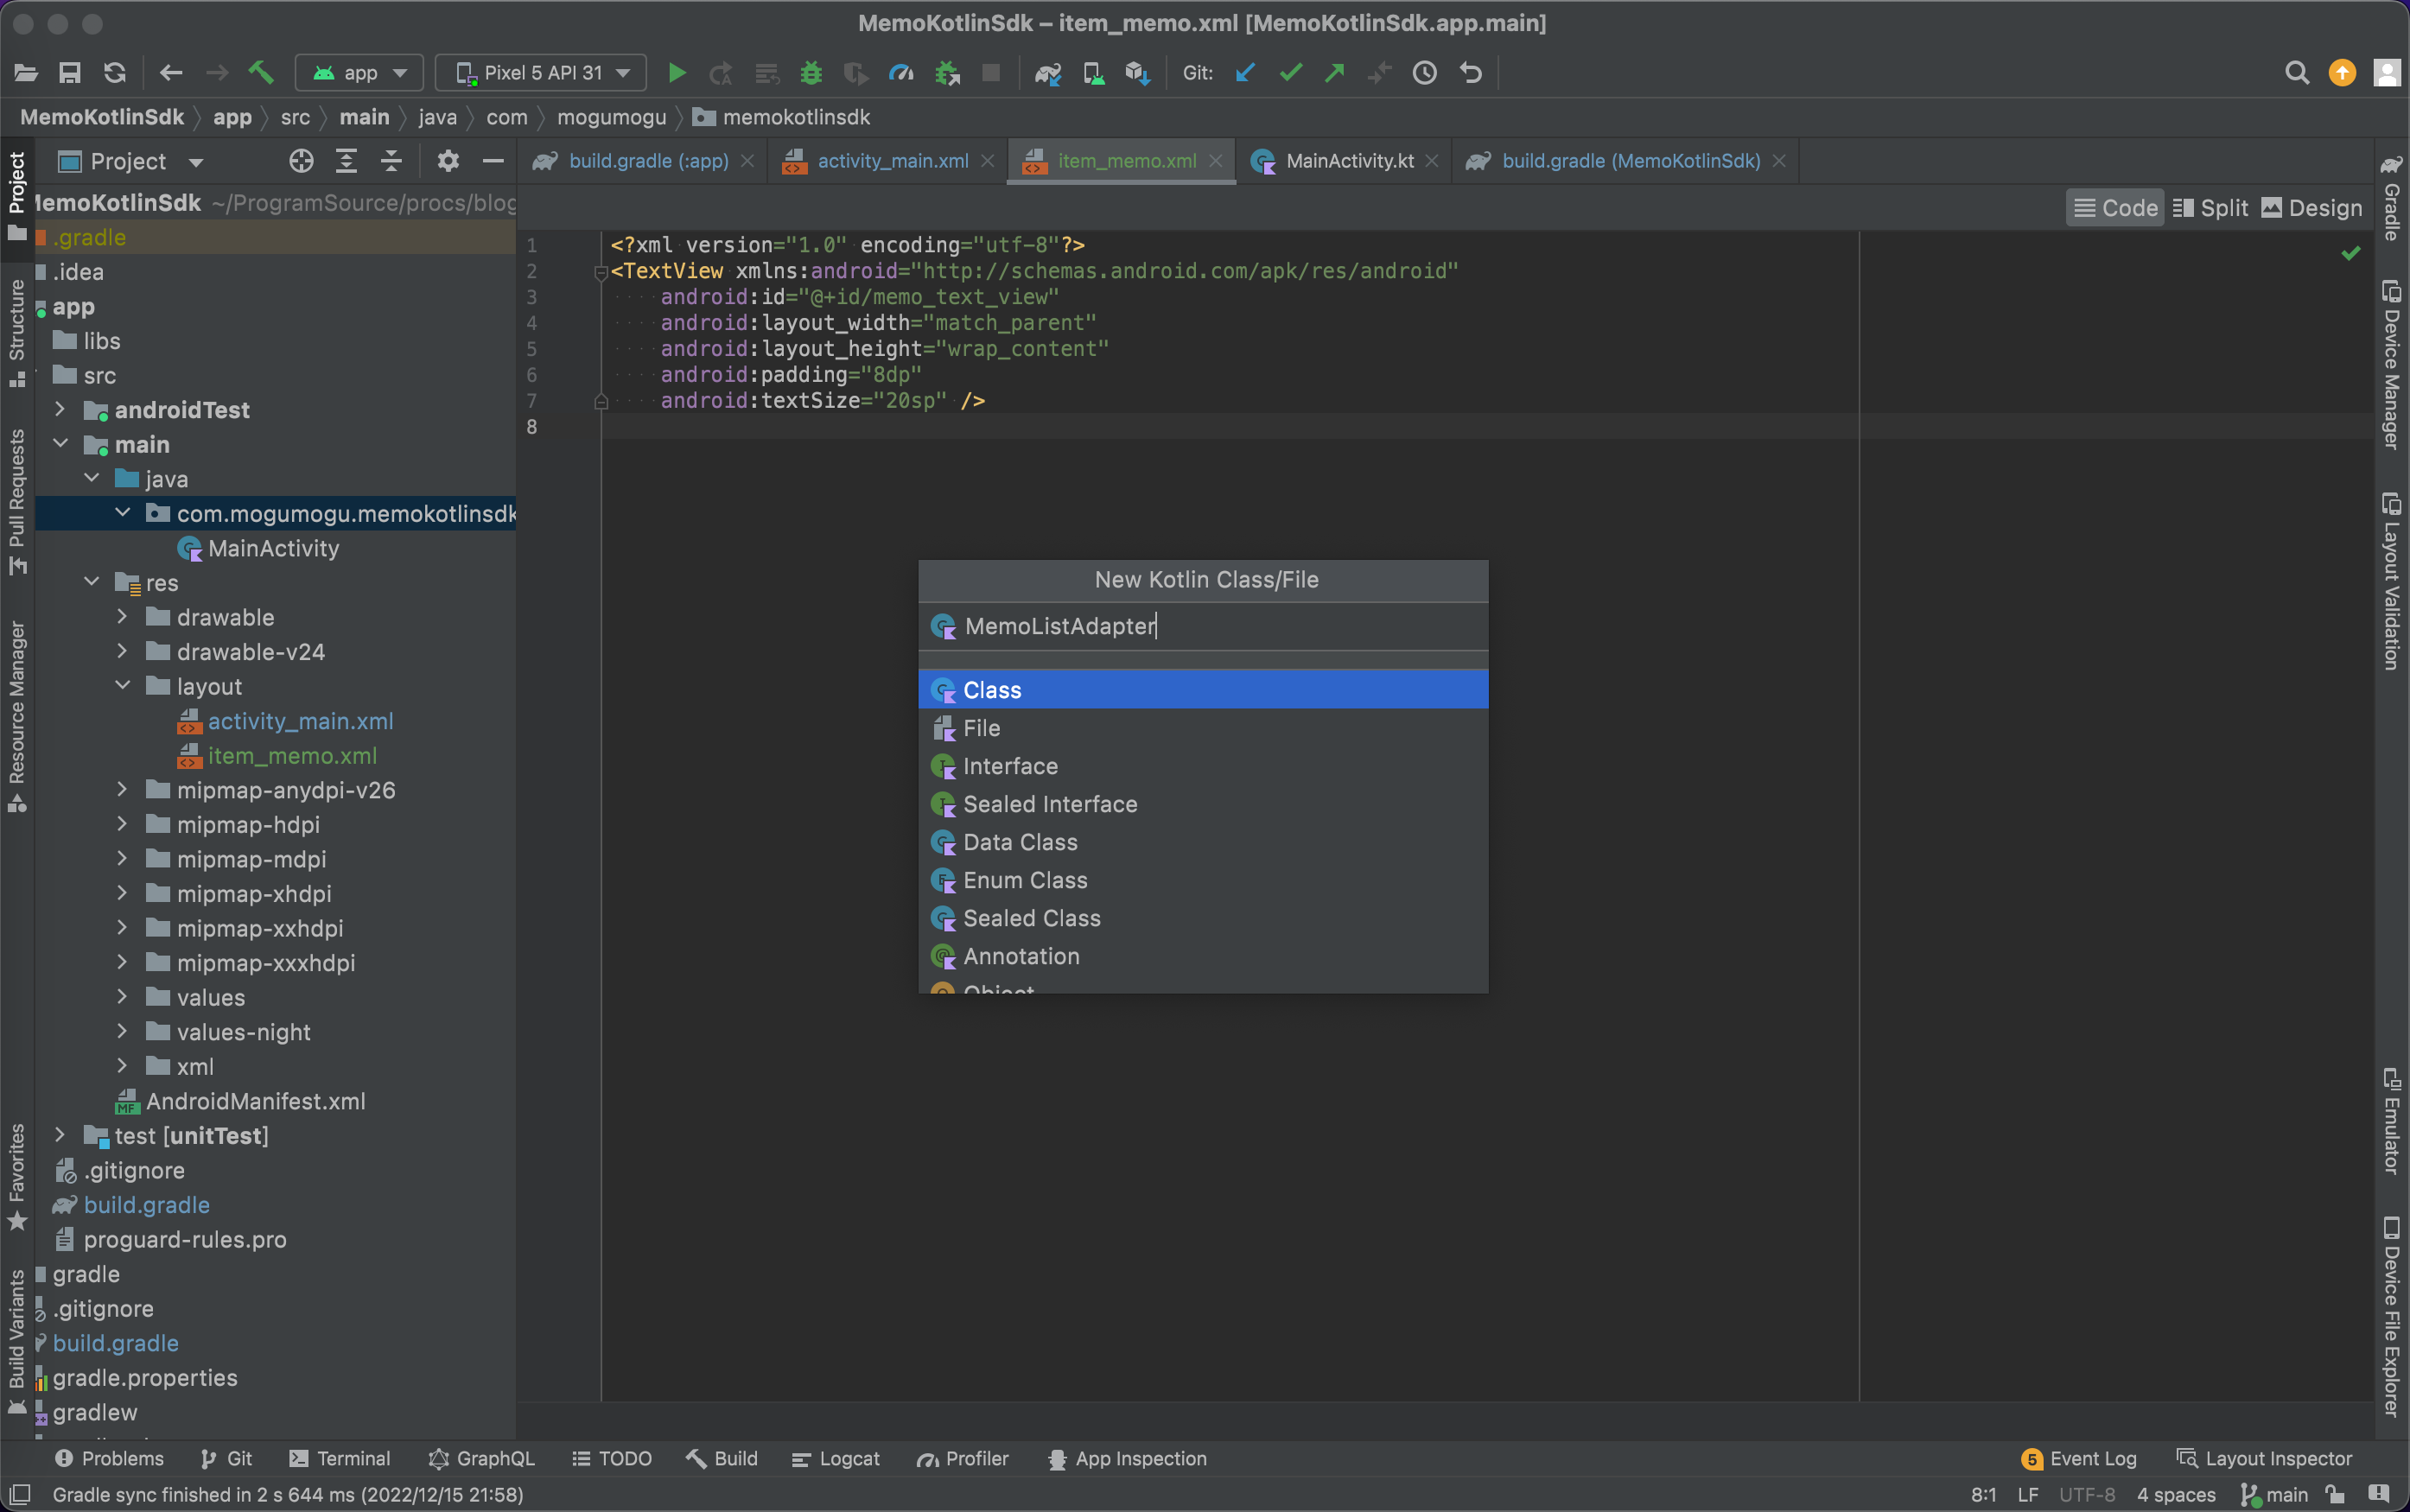
次はリストのアイテムです。
item_memo.xml というファイルを作成して下さい。
中身の実装は以下のような TextView だけで十分です。
<?xml version="1.0" encoding="utf-8"?>
<TextView xmlns:android="http://schemas.android.com/apk/res/android"
    android:id="@+id/memo_text_view"
    android:layout_width="match_parent"
    android:layout_height="wrap_content"
    android:padding="8dp"
    android:textSize="20sp" />
これでレイアウトの実装は完了しました。
RecyclerViewAdapter実装
次はAdapterを実装していきます。
MemoListAdapter というクラスを作成して下さい。
中身は以下のように実装して下さい。 onBindViewHolder() の中で MemoViewHolder の bind() を呼んでいます。これで TextView に文字列を入れています。
import android.view.LayoutInflater
import android.view.View
import android.view.ViewGroup
import android.widget.TextView
import androidx.recyclerview.widget.RecyclerView

class MemoListAdapter: RecyclerView.Adapter<MemoListAdapter.MemoViewHolder>() {
    private val memoList = mutableListOf<String>()

    override fun onCreateViewHolder(parent: ViewGroup, viewType: Int): MemoViewHolder {
        val view = LayoutInflater.from(parent.context).inflate(R.layout.item_memo, parent, false)
        return MemoViewHolder(view)
    }

    override fun onBindViewHolder(holder: MemoViewHolder, position: Int) {
        holder.bind(memoList[position])
    }

    override fun getItemCount(): Int = memoList.size

    fun updateMemoList(memoList: List<String>) {
        // 一度クリアしてから新しいメモに入れ替える
        this.memoList.clear()
        this.memoList.addAll(memoList)
        // データに変更があったことをadapterに通知
        notifyDataSetChanged()
    }

    class MemoViewHolder(view: View): RecyclerView.ViewHolder(view) {
        fun bind(memo: String) {
            val textView = itemView.findViewById<TextView>(R.id.memo_text_view)
            textView.text = memo
        }
    }
}
Adapterの作成が完了したら RecyclerView にセットしていきます。
MainActivity を開いて以下のように実装して下さい。
import androidx.appcompat.app.AppCompatActivity
import android.os.Bundle
import androidx.recyclerview.widget.RecyclerView

class MainActivity : AppCompatActivity() {

    private lateinit var adapter: MemoListAdapter

    override fun onCreate(savedInstanceState: Bundle?) {
        super.onCreate(savedInstanceState)
        setContentView(R.layout.activity_main)
        adapter = MemoListAdapter()
        val recyclerView = findViewById<RecyclerView>(R.id.memo_list)
        recyclerView.adapter = adapter
    }
}
ここでは MemoListAdapter の adapter を定義しておき、 onCreate() で代入しています。
さらに findViewById() メソッドで activity_main の memo_list を取得し、先ほど作成した adapter を代入しています。
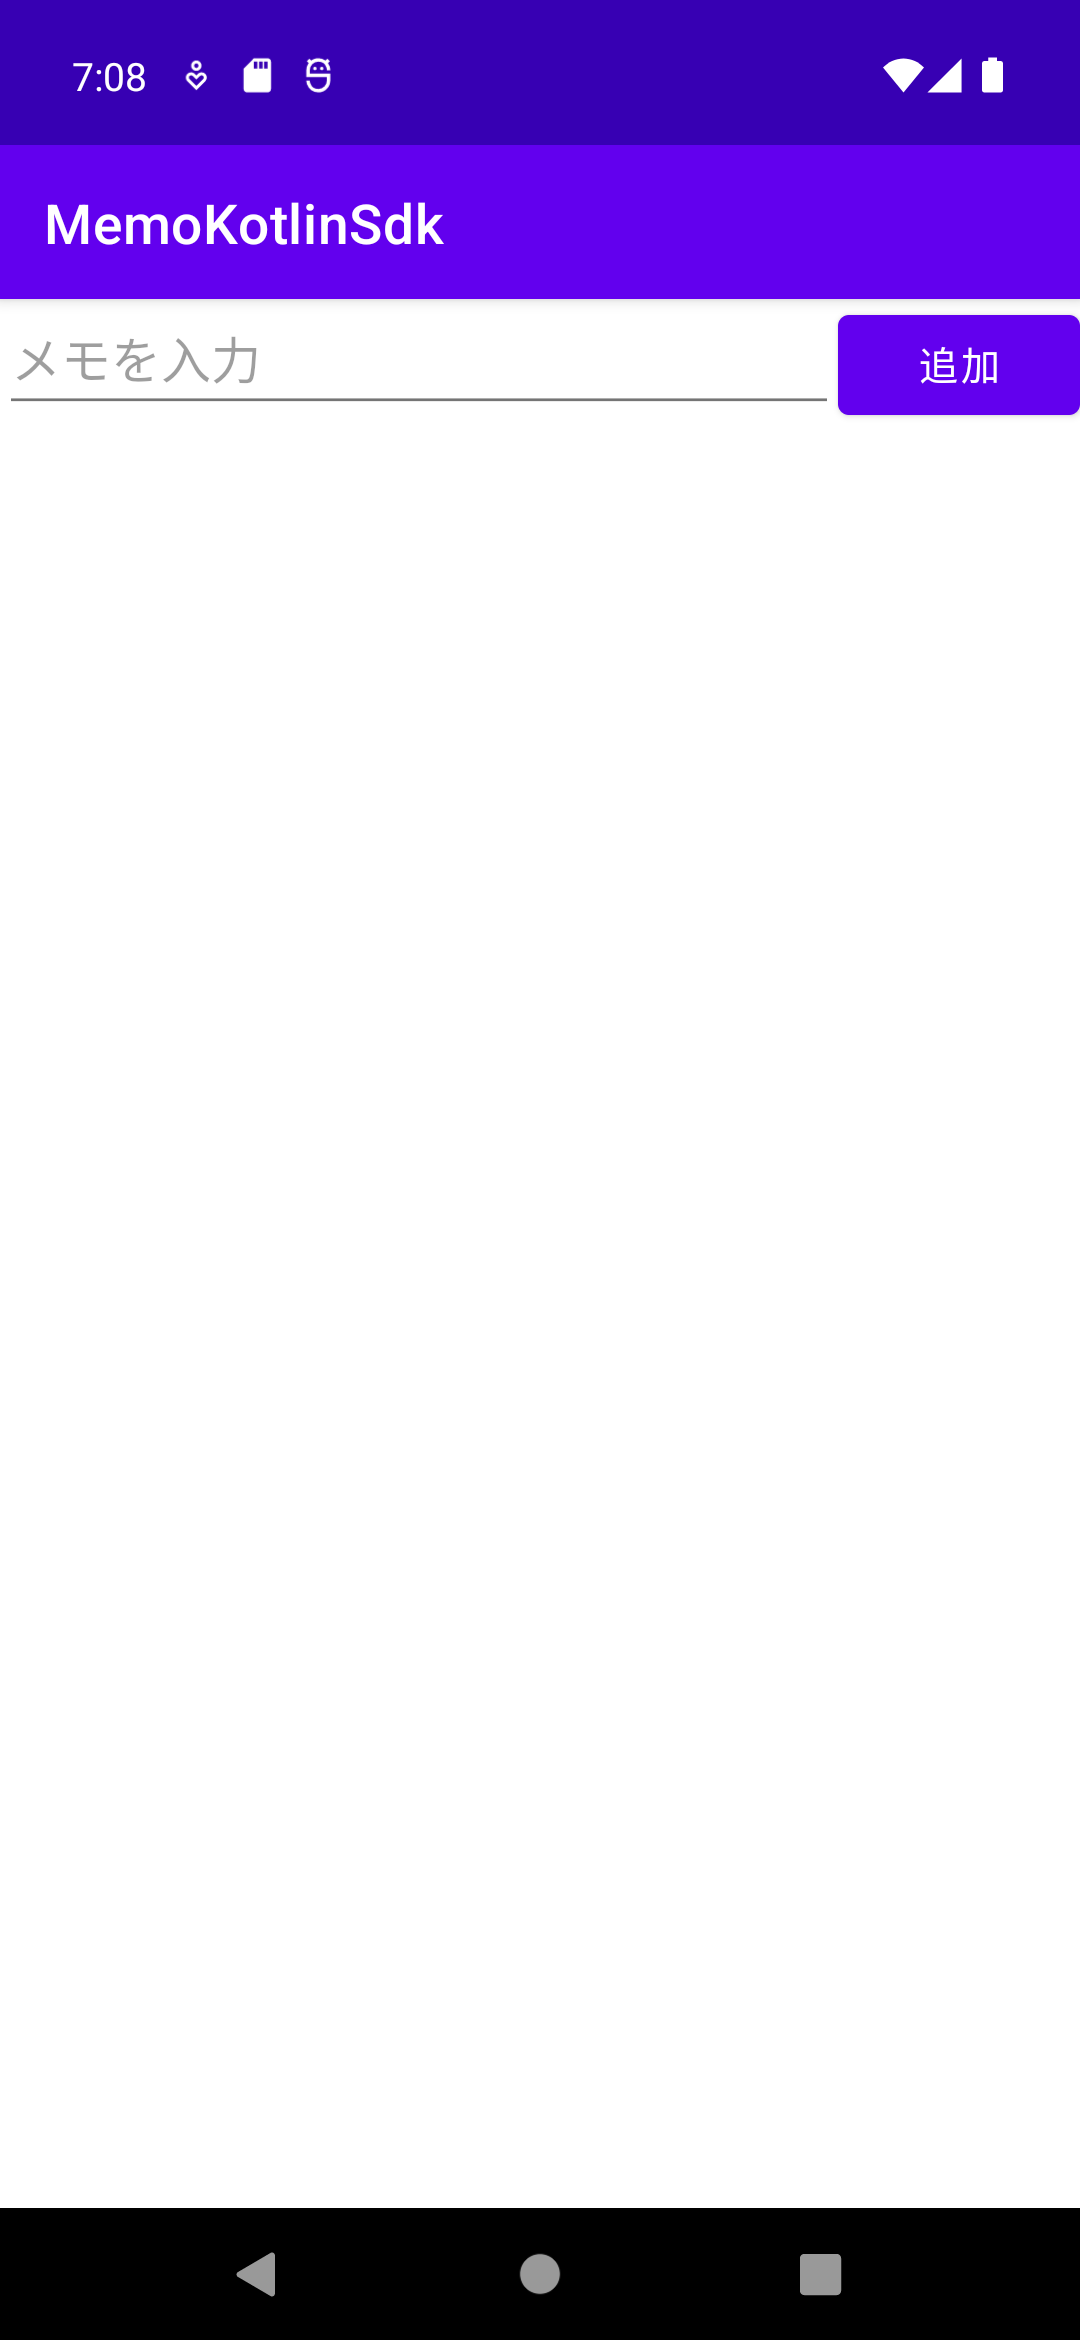
ここで一度ビルドしてみましょう。このようになればOKです!
データベースとの連携
それでは次にデータベースと連携していきましょう。
まずは保存するデータ形式を定義していきます。
Memo というクラスを作成してください。
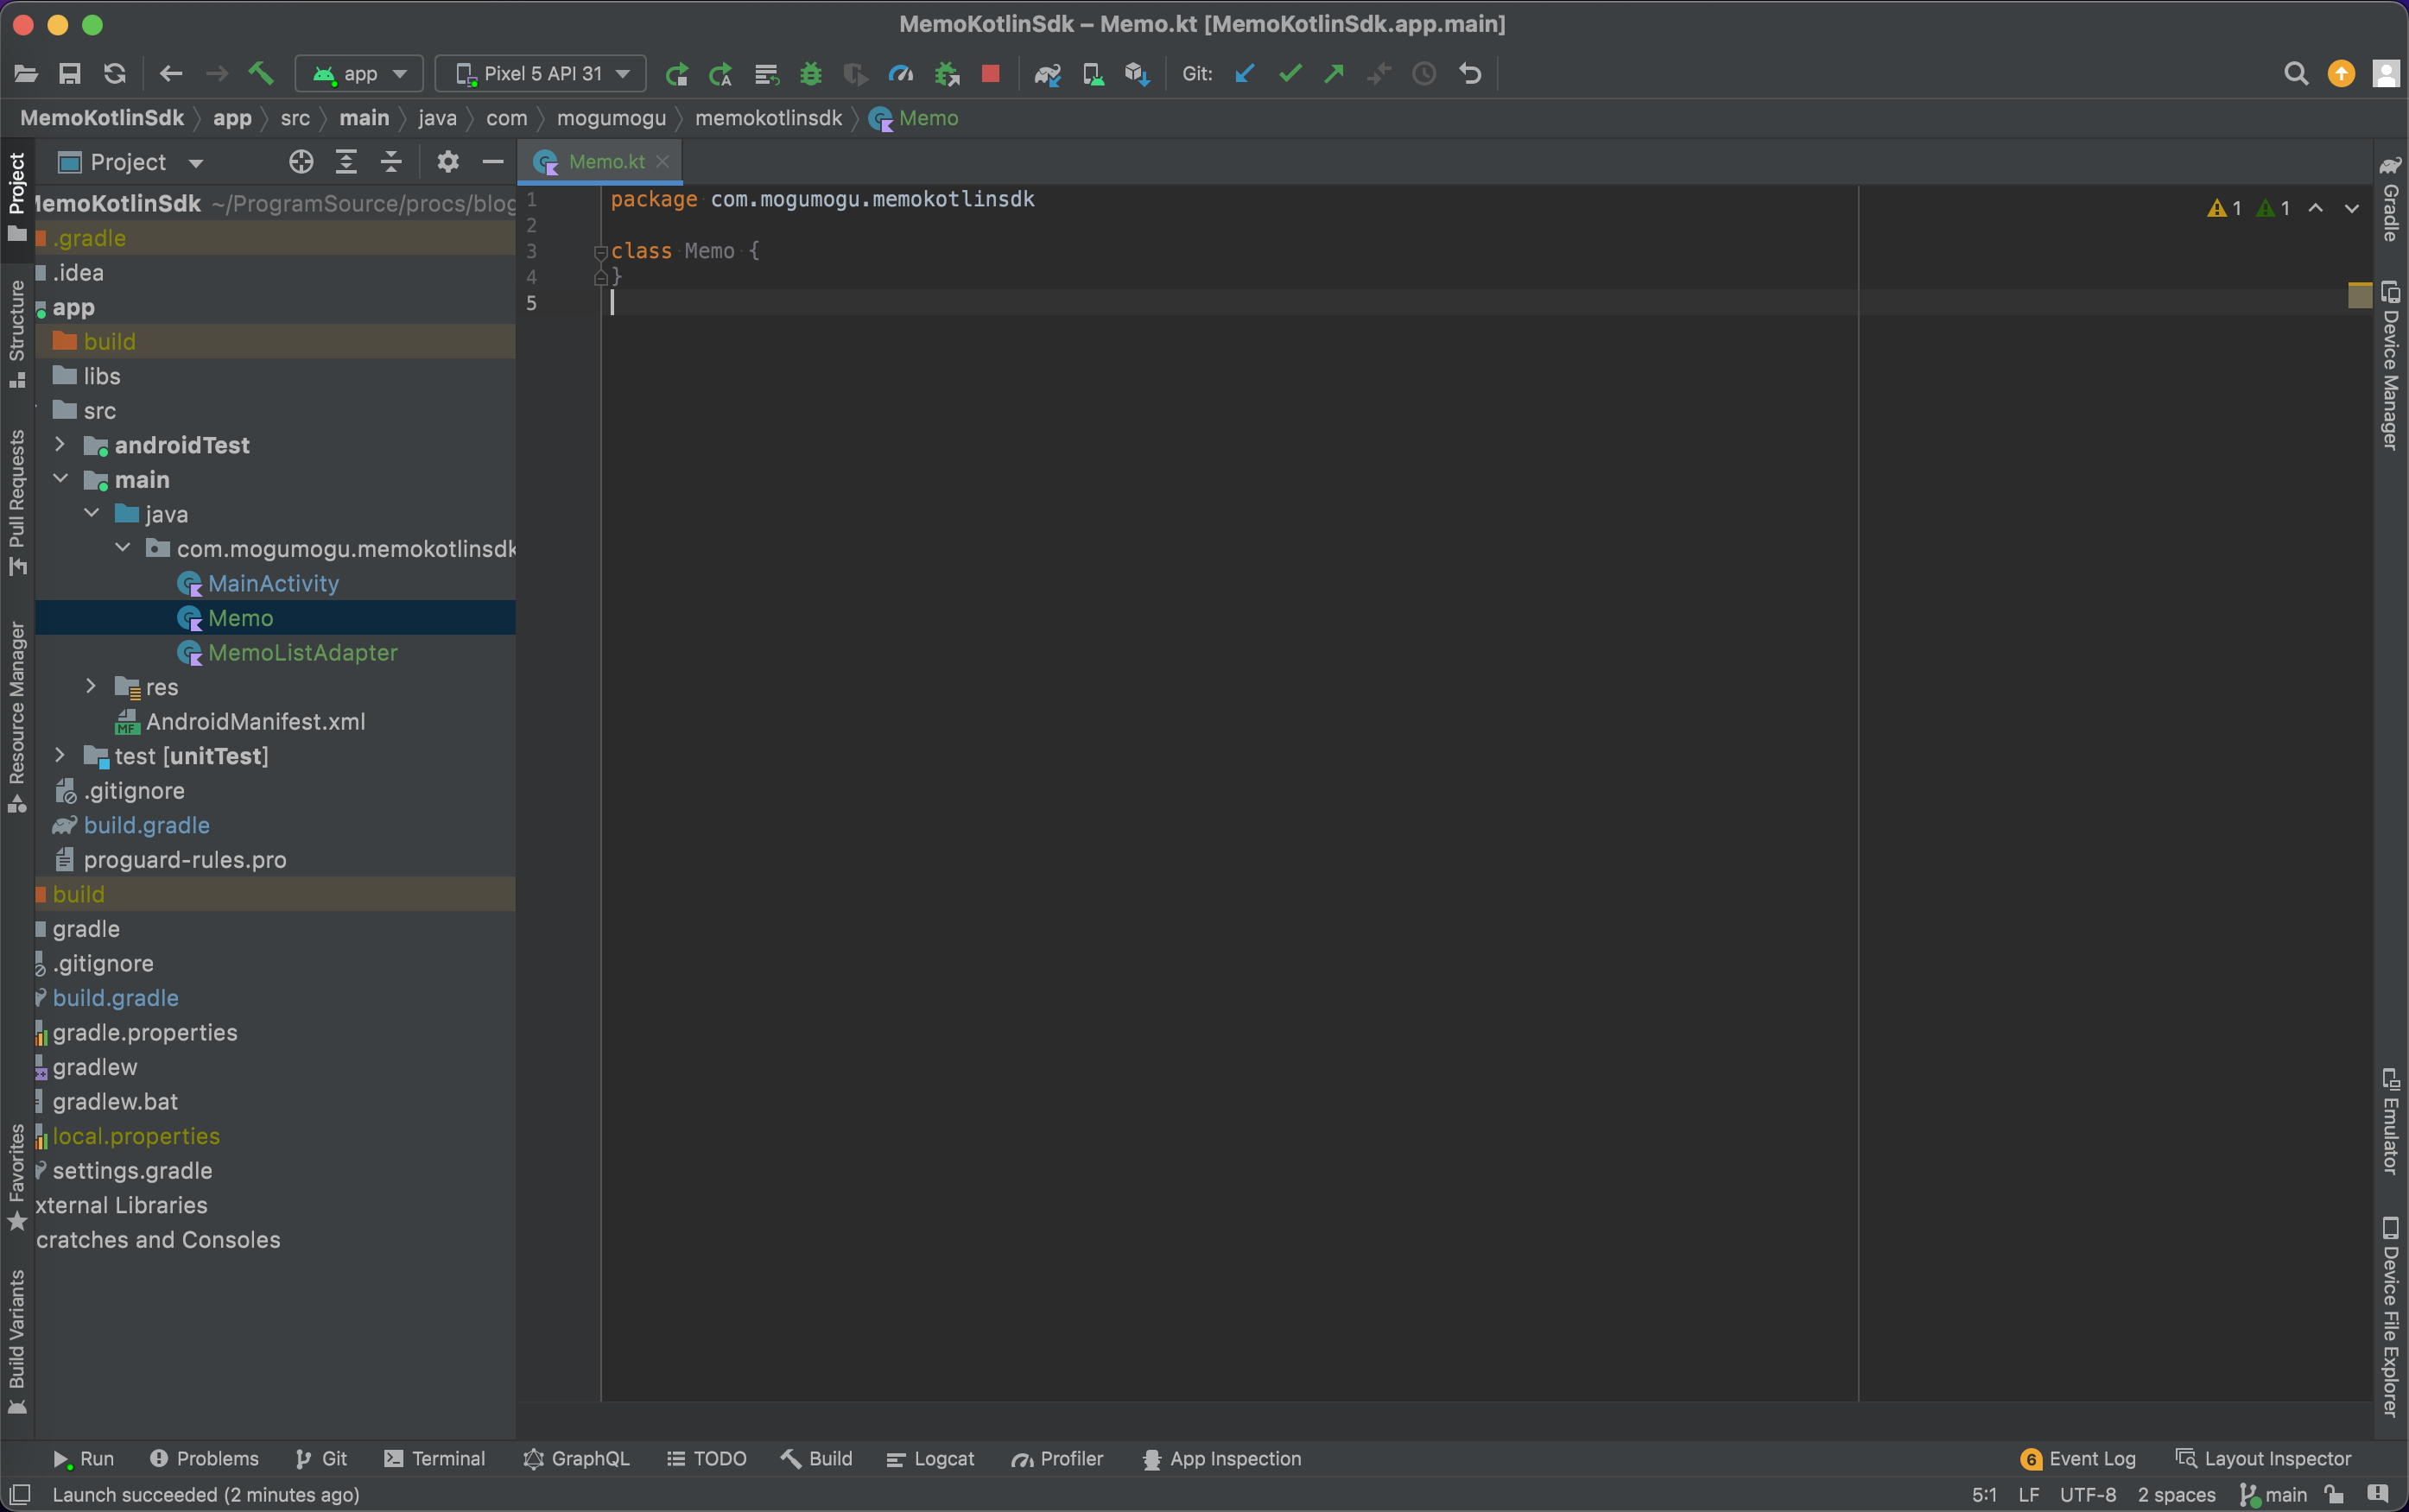
中身は以下のように実装してください。
import io.realm.kotlin.types.RealmObject

class Memo(): RealmObject {
  var name: String = ""

  constructor(name: String) : this() {
    this.name = name
  }
}このMemoというクラスがDBへ書き込むための形式となります。
今回は入力されるメモだけを保存すれば良いのでnameだけになっています。
気をつけることは RealmObject を継承していることです。Realmライブラリの中で処理をするために必要となります。
次は EditText に文字列が入力されている状態で 追加 ボタンを押すと一覧に追加されていくように実装していきます。
それでは MainActivity を開き、以下のように実装してみてください。
import androidx.appcompat.app.AppCompatActivity
import android.os.Bundle
import android.widget.Button
import android.widget.EditText
import androidx.recyclerview.widget.RecyclerView
import io.realm.kotlin.Realm
import io.realm.kotlin.RealmConfiguration
import io.realm.kotlin.ext.query
import io.realm.kotlin.notifications.InitialResults
import io.realm.kotlin.notifications.UpdatedResults
import io.realm.kotlin.query.RealmResults
import kotlinx.coroutines.CoroutineScope
import kotlinx.coroutines.Dispatchers
import kotlinx.coroutines.Job
import kotlinx.coroutines.launch
import kotlinx.coroutines.withContext

class MainActivity : AppCompatActivity() {

  private lateinit var adapter: MemoListAdapter
  private lateinit var job: Job

  override fun onCreate(savedInstanceState: Bundle?) {
    super.onCreate(savedInstanceState)
    setContentView(R.layout.activity_main)
    adapter = MemoListAdapter()
    val recyclerView = findViewById<RecyclerView>(R.id.memo_list)
    recyclerView.adapter = adapter

    val editText = findViewById<EditText>(R.id.memo_edit_text)
    val addButton = findViewById<Button>(R.id.add_button)

    val config = RealmConfiguration.Builder(schema = setOf(Memo::class)).build()
    val realm = Realm.open(config)

    addButton.setOnClickListener {
      val text = editText.text.toString()
      if (text.isEmpty()) {
        // テキストが空の場合には無視
        return@setOnClickListener
      }
      // DBへ書き込みするための準備
      realm.writeBlocking {
        // DBへの書き込み
        copyToRealm(Memo(name = text))
      }
      // テキストを空にする
      editText.text.clear()
    }
    val items: RealmResults<Memo> = realm.query<Memo>().find()
    job = CoroutineScope(Dispatchers.Default).launch {
      items.asFlow().collect {
        when (it) {
          // 更新時
          is UpdatedResults -> updateList(it.list)
          // 起動時
          is InitialResults -> updateList(it.list)
          else -> {}
        }
      }
    }
  }

  private suspend fun updateList(memos: List<Memo>) {
    withContext(Dispatchers.Main) {
      // メインスレッドでリストを更新する
      adapter.updateMemoList(memos.map { it.name })
    }
  }

  override fun onDestroy() {
    super.onDestroy()
    job.cancel()
  }
}
それでは1つ1つ説明してきます。
val editText = findViewById<EditText>(R.id.memo_edit_text)
val addButton = findViewById<Button>(R.id.add_button)
まずは View の取得です。 findViewById() メソッドによって EditText と Button を取得しています。
val config = RealmConfiguration.Builder(schema = setOf(Memo::class)).build()
val realm = Realm.open(config)
次は Realm のインスタンス取得です。これはRealmに対して操作を行う場合には必ず行う操作です。
Builderには他にもできることはありますが今回はMemoに関する操作できれば十分です。
取得できた Realm インスタンスに対して処理をしていきます。
addButton.setOnClickListener {
  val text = editText.text.toString()
  if (text.isEmpty()) {
    // テキストが空の場合には無視
    return@setOnClickListener
  }
  // DBへ書き込みするための準備
  realm.writeBlocking {
    // DBへの書き込み
    copyToRealm(Memo(name = text))
  }
  // テキストを空にする
  editText.text.clear()
}
次に addButton を押した時の処理です。
addButton を押した時は editText に入力されている文字列を Realm に保存させます。
まず最初に行なっているのは入力された文字列が空かどうかをチェックしています。空の時には Realm に保存させたくないので無視しているわけですね。
次に realm.writeBlocking() を呼んでいる箇所です。 writeBlocking() の引数はリスナーですが、Kotlinだと {} で書けるようになっています。
ここの中での this は MutableRealm ですので、この this に対して処理を書いていけばOKです。
処理の内容を以下に抜き出すと、
// DBへの書き込み
copyToRealm(Memo(name = text))
となっています。
まず Memo(name = text) でMemoのインスタンスを生成しており、それを copyToRealm() で Realmに書き込んでいます。
最後の editText.text.clear() は editText の中身を空にさせておき、次のメモの入力をしやすくさせるためにしています。
// MemoListAdapter
private fun updateMemoList(memoList: List<Memo>) {
    val items = memoList.map { it.name }
    // 一度クリアしてから新しいメモに入れ替える
    adapter.memoList.clear()
    adapter.memoList.addAll(items)
    // データに変更があったことをadapterに通知
    adapter.notifyDataSetChanged()
}
次は場所が変わりますが MemoListAdapter の updateMemoList() です。
これは引数の memoList を元に RecyclerView の中身を更新しています。
1度 adapter の memoList を空にしてから新しいリストを追加しています。
最後の行では更新したことを自身の Adapter に伝えるために notifyDataSetChanged() メソッドを呼んでいます。
private suspend fun updateList(memos: List<Memo>) {
  withContext(Dispatchers.Main) {
    // メインスレッドでリストを更新する
    adapter.updateMemoList(memos.map { it.name })
  }
}
また MainActivity に戻ってきまして updateList() です。
これは先ほどの MemoListAdapter に対してリストを更新させるための処理を行ってます。
後述するDBへメモが追加された際の処理に合わせてsuspend関数としています。
またメインスレッドでリストを更新する必要があるため Dispatchers.Main を使用しています。
val items: RealmResults<Memo> = realm.query<Memo>().find()
job = CoroutineScope(Dispatchers.Default).launch {
  items.asFlow().collect {
    when (it) {
      // 更新時
      is UpdatedResults -> updateList(it.list)
      // 起動時
      is InitialResults -> updateList(it.list)
      else -> {}
    }
  }
}
最後にDBの監視です。
リストを更新したいタイミングが2つあり、1つ目が起動時で2つ目がMemoが追加された時(更新時)です。
これを監視するために1行目の realm.query().find() で RealmResults を取得します。
このクラスには asFlow() という関数があるのでこれを使用します。
こうすることで更新時・起動時の監視ができます。
またコルーチンのお作法として CoroutineScope を使い、jobのライフサイクルを onCreate() ~ onDestroy() としています。

それではここでビルドしてみましょう。このような動きになれば完成です!
まとめ
お疲れ様でした!
メモアプリを作成していきました。データベースはほとんどのアプリで利用されています。
アプリを作りながら使い方を覚えていきましょう!