iOSアプリチュートリアルとして、Qiitaのクライアントアプリを一緒に作っていきましょう。
UIの表示からAPI連携、そしてWebViewなど開発に必要な要素が詰まっていますので手を動かしながらやっていきましょう!
チュートリアルは、3部作に分かれていてそれぞれ下記のようになっております。


今回のUI編完成形はこちら
参考記事
チュートリアル上で出てくるいくつかのスキルは下記記事で詳細に解説してますので必要であれば参考にしてください。
 iOSアプリプロジェクト作成手順
  UITableViewの基本的な使い方を解説
  【iOSアプリ開発入門】Storyboardを利用したUILabelの使い方
  【iOSアプリ開発入門】UIImageViewの使い方
  【Storyboard】AutoLayoutを使いこなす
プロジェクトの作成
まずはプロジェクトを作成していきましょう。
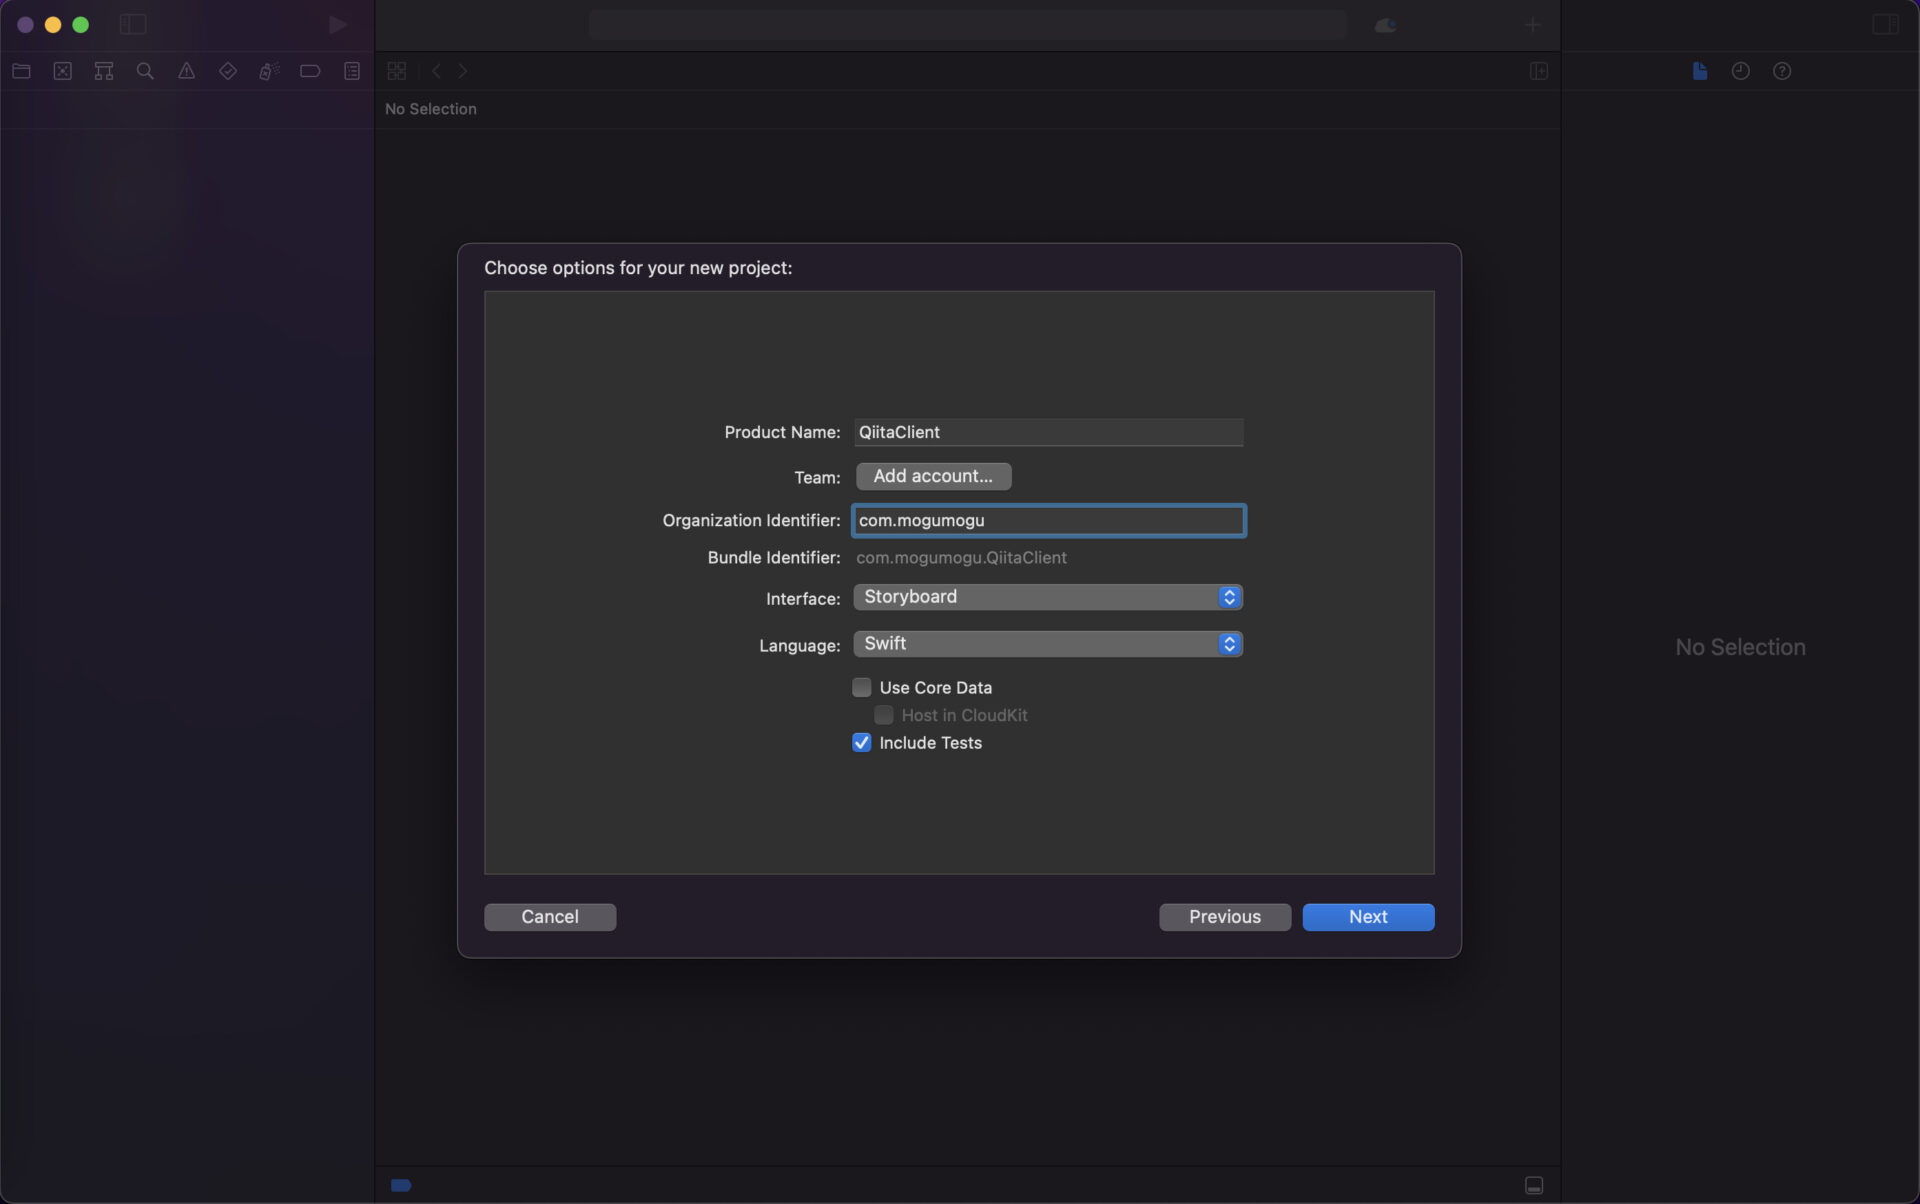
アプリ名はなんでも構わないのですが、
ここではQiitaClientとしました。
UITableView
それでは早速作っていきましょう。
今回のアプリではQiita記事の一覧を表示するUITableViewと
そのTableViewに乗せるUITableViewCellが必要です。
UITableViewの配置
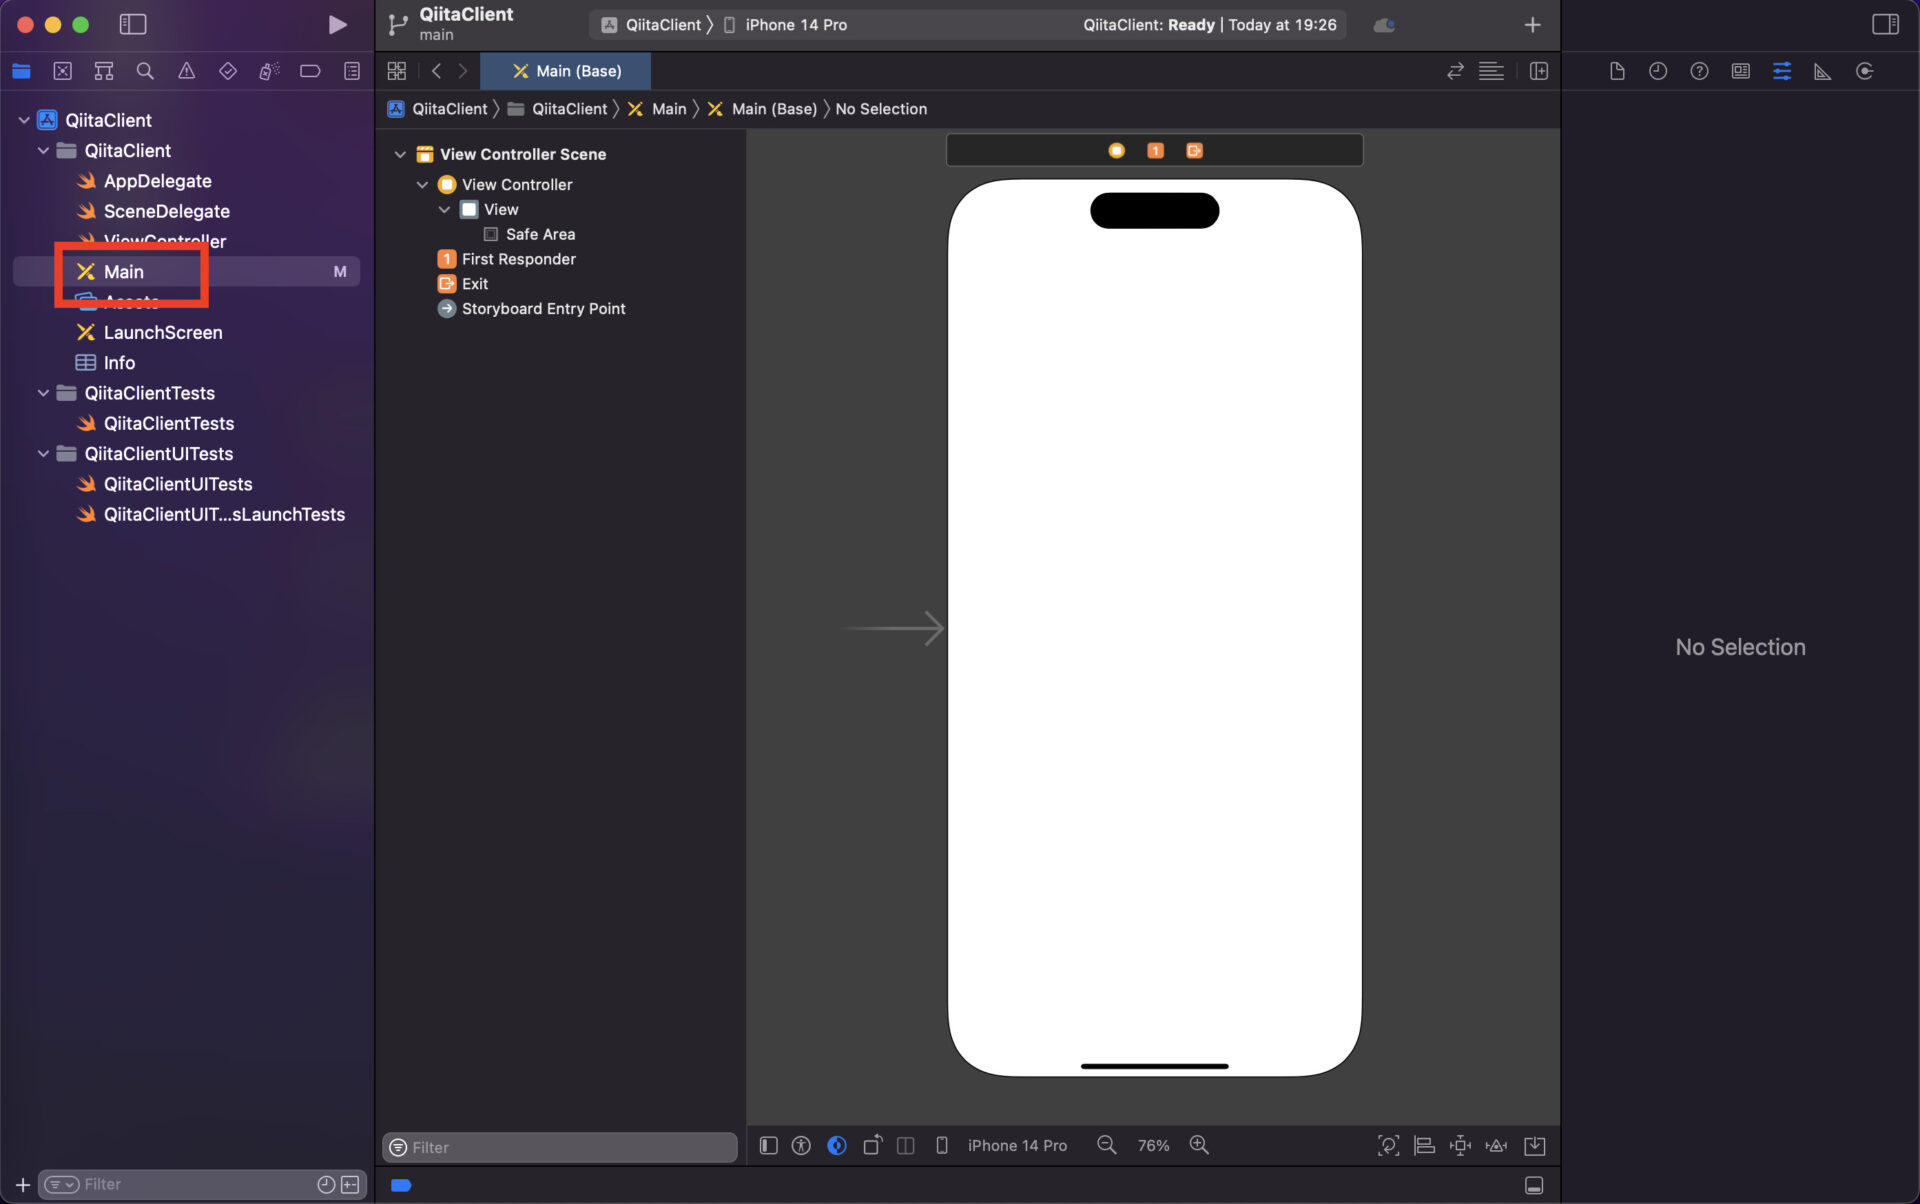
まずはMain.storyboardを開いて下さい。
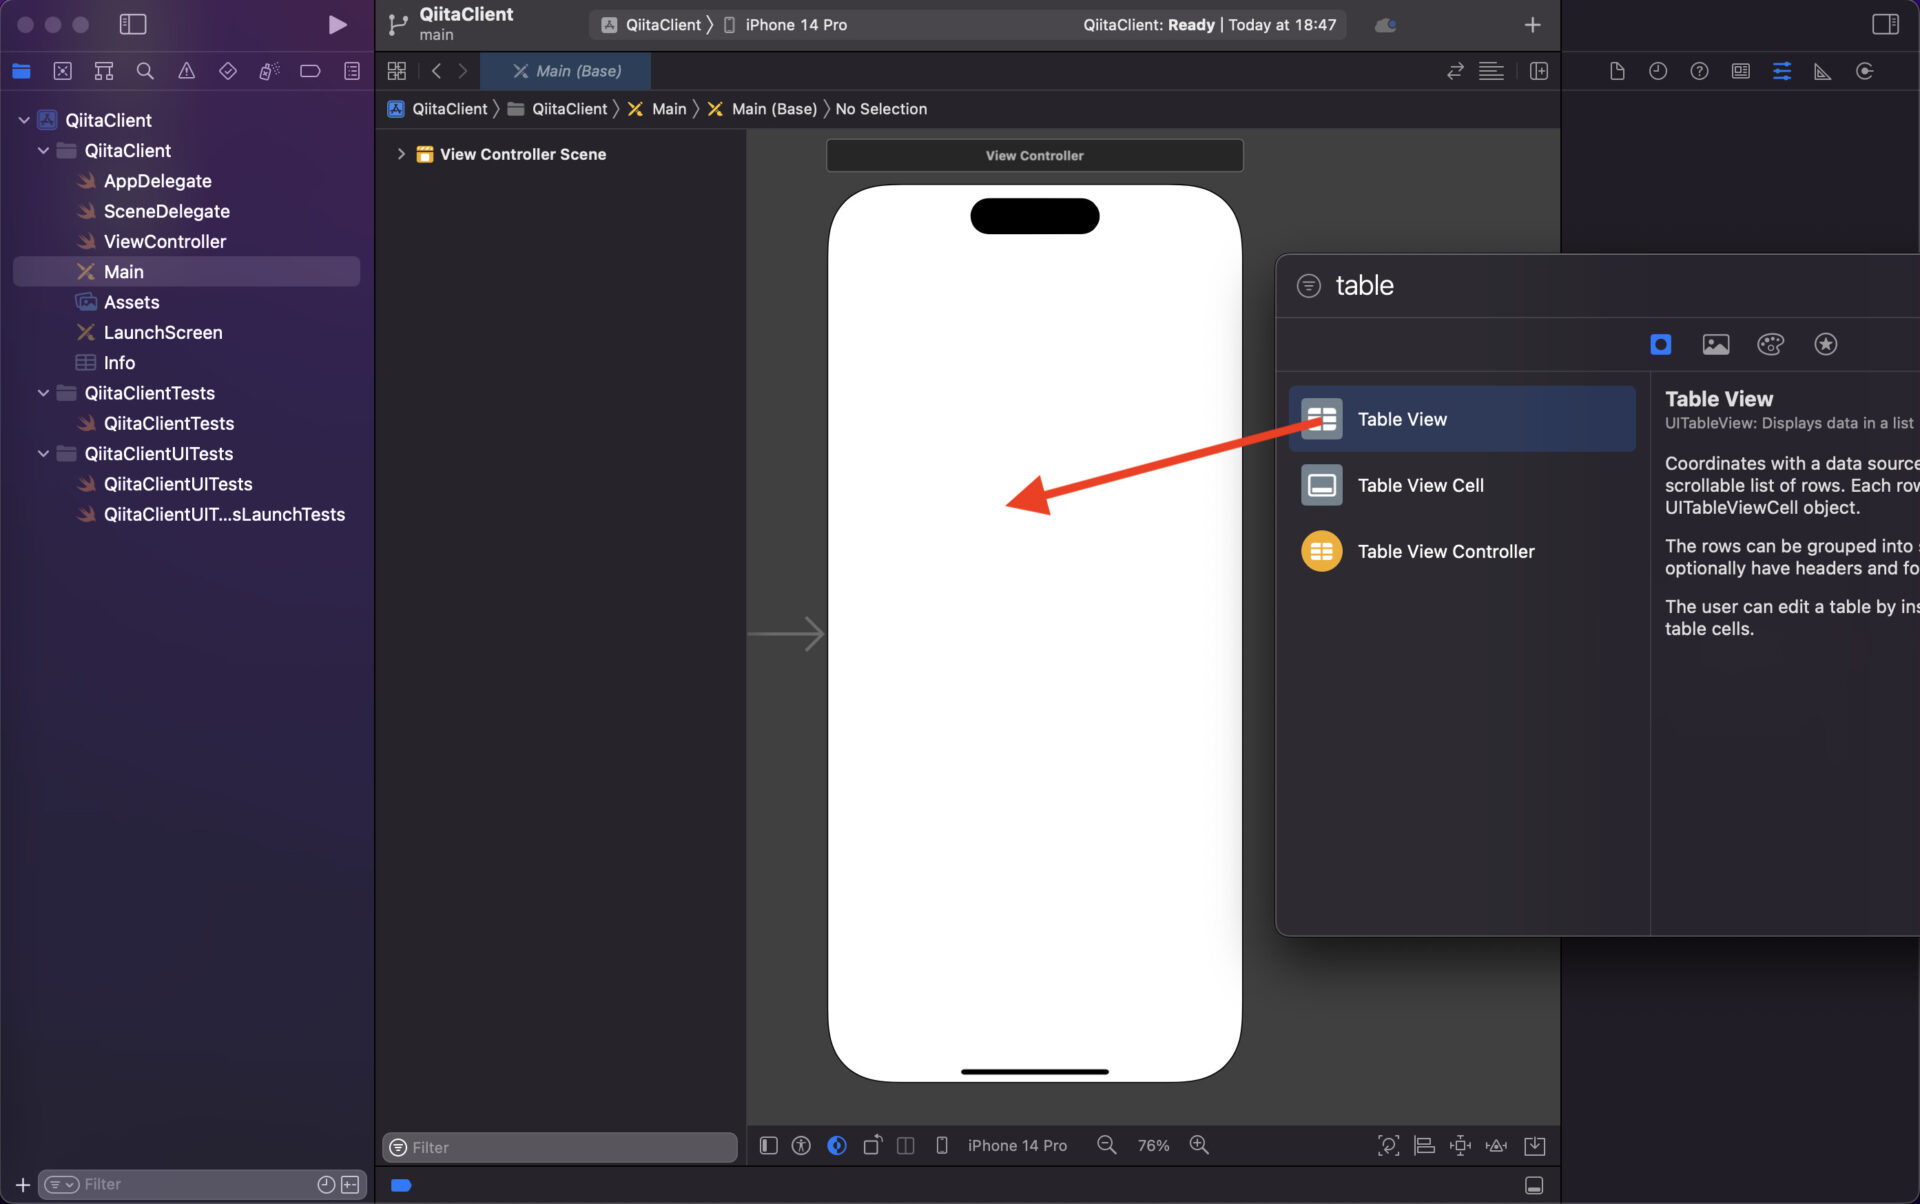
次にTableViewの配置していきます。
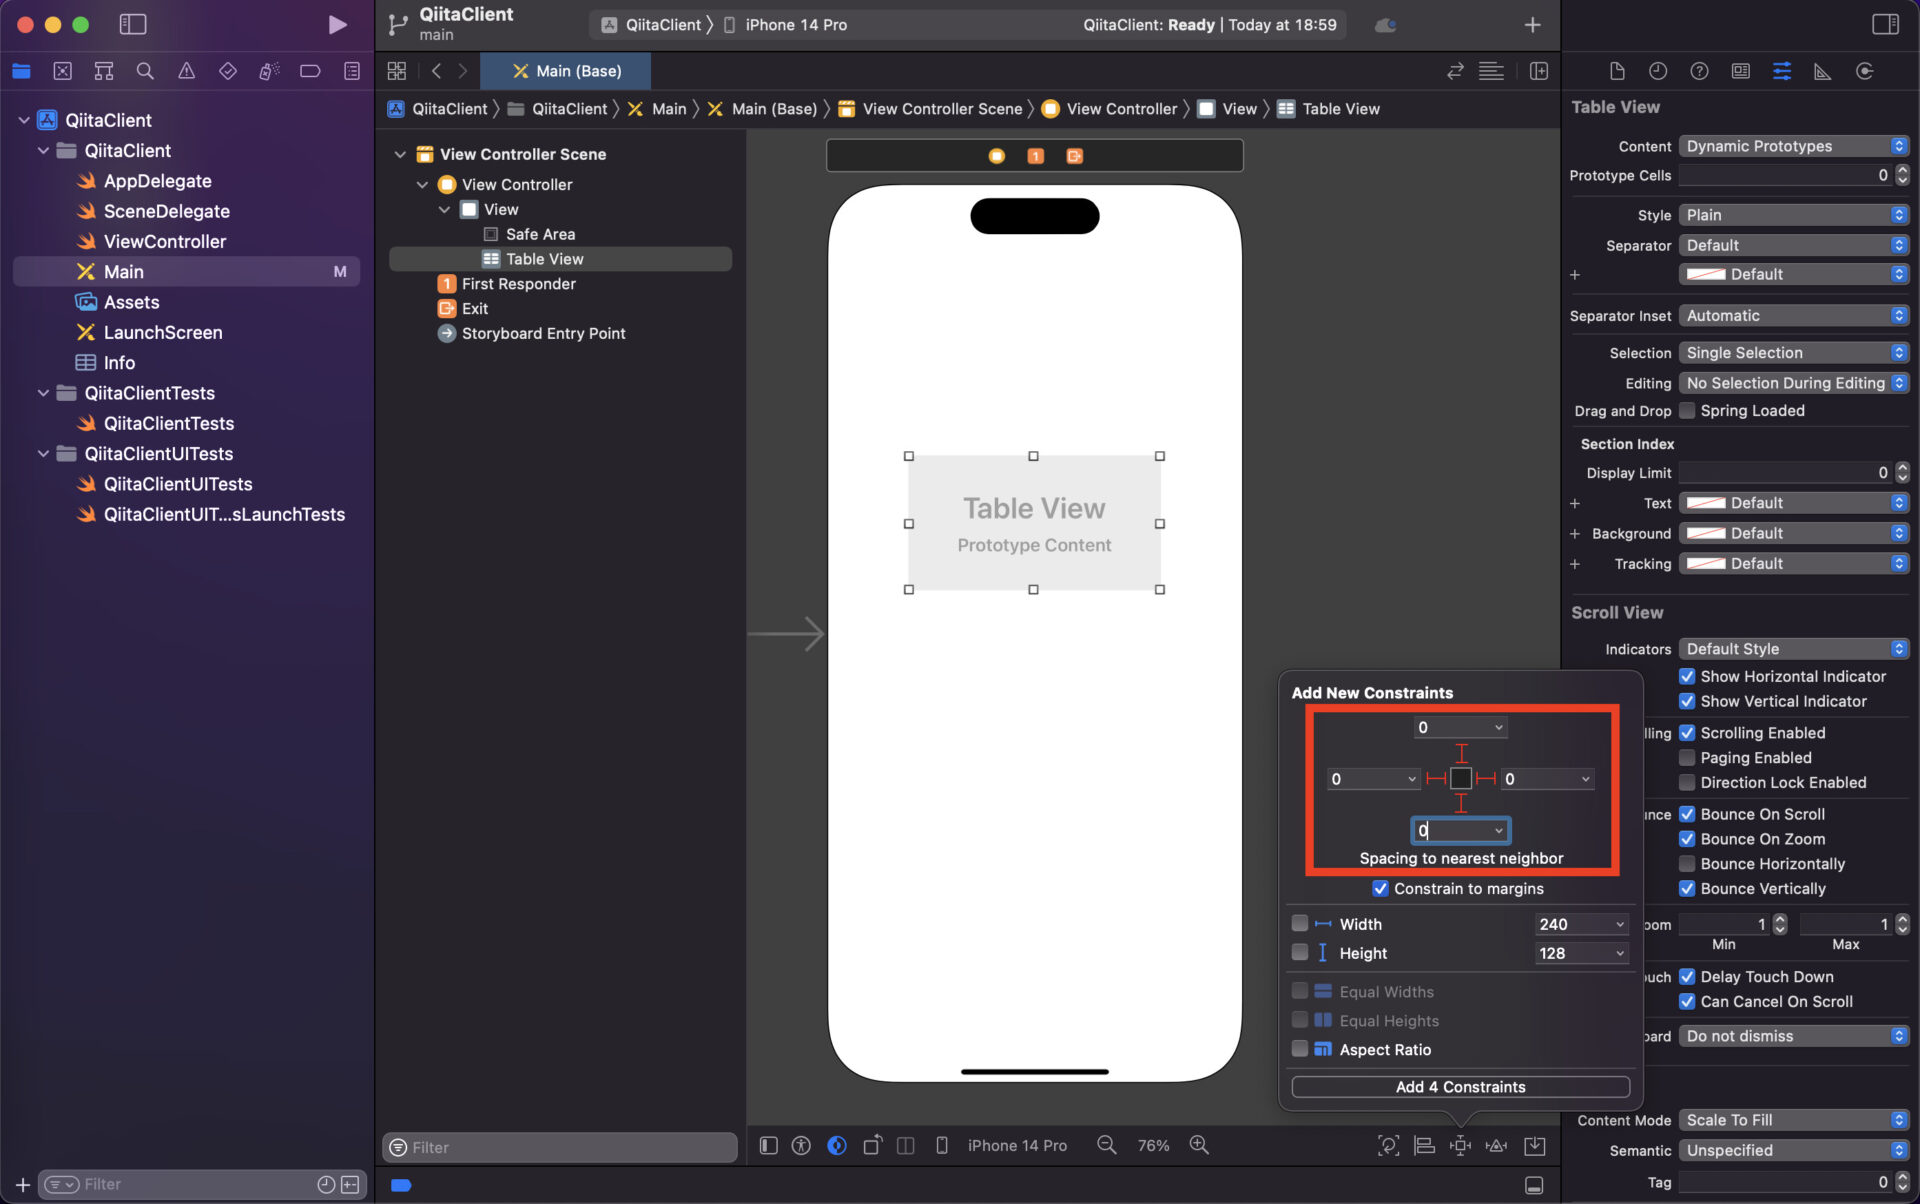
AutoLayoutの設定は上下左右が画面にぴったりくっつくようにして下さい。
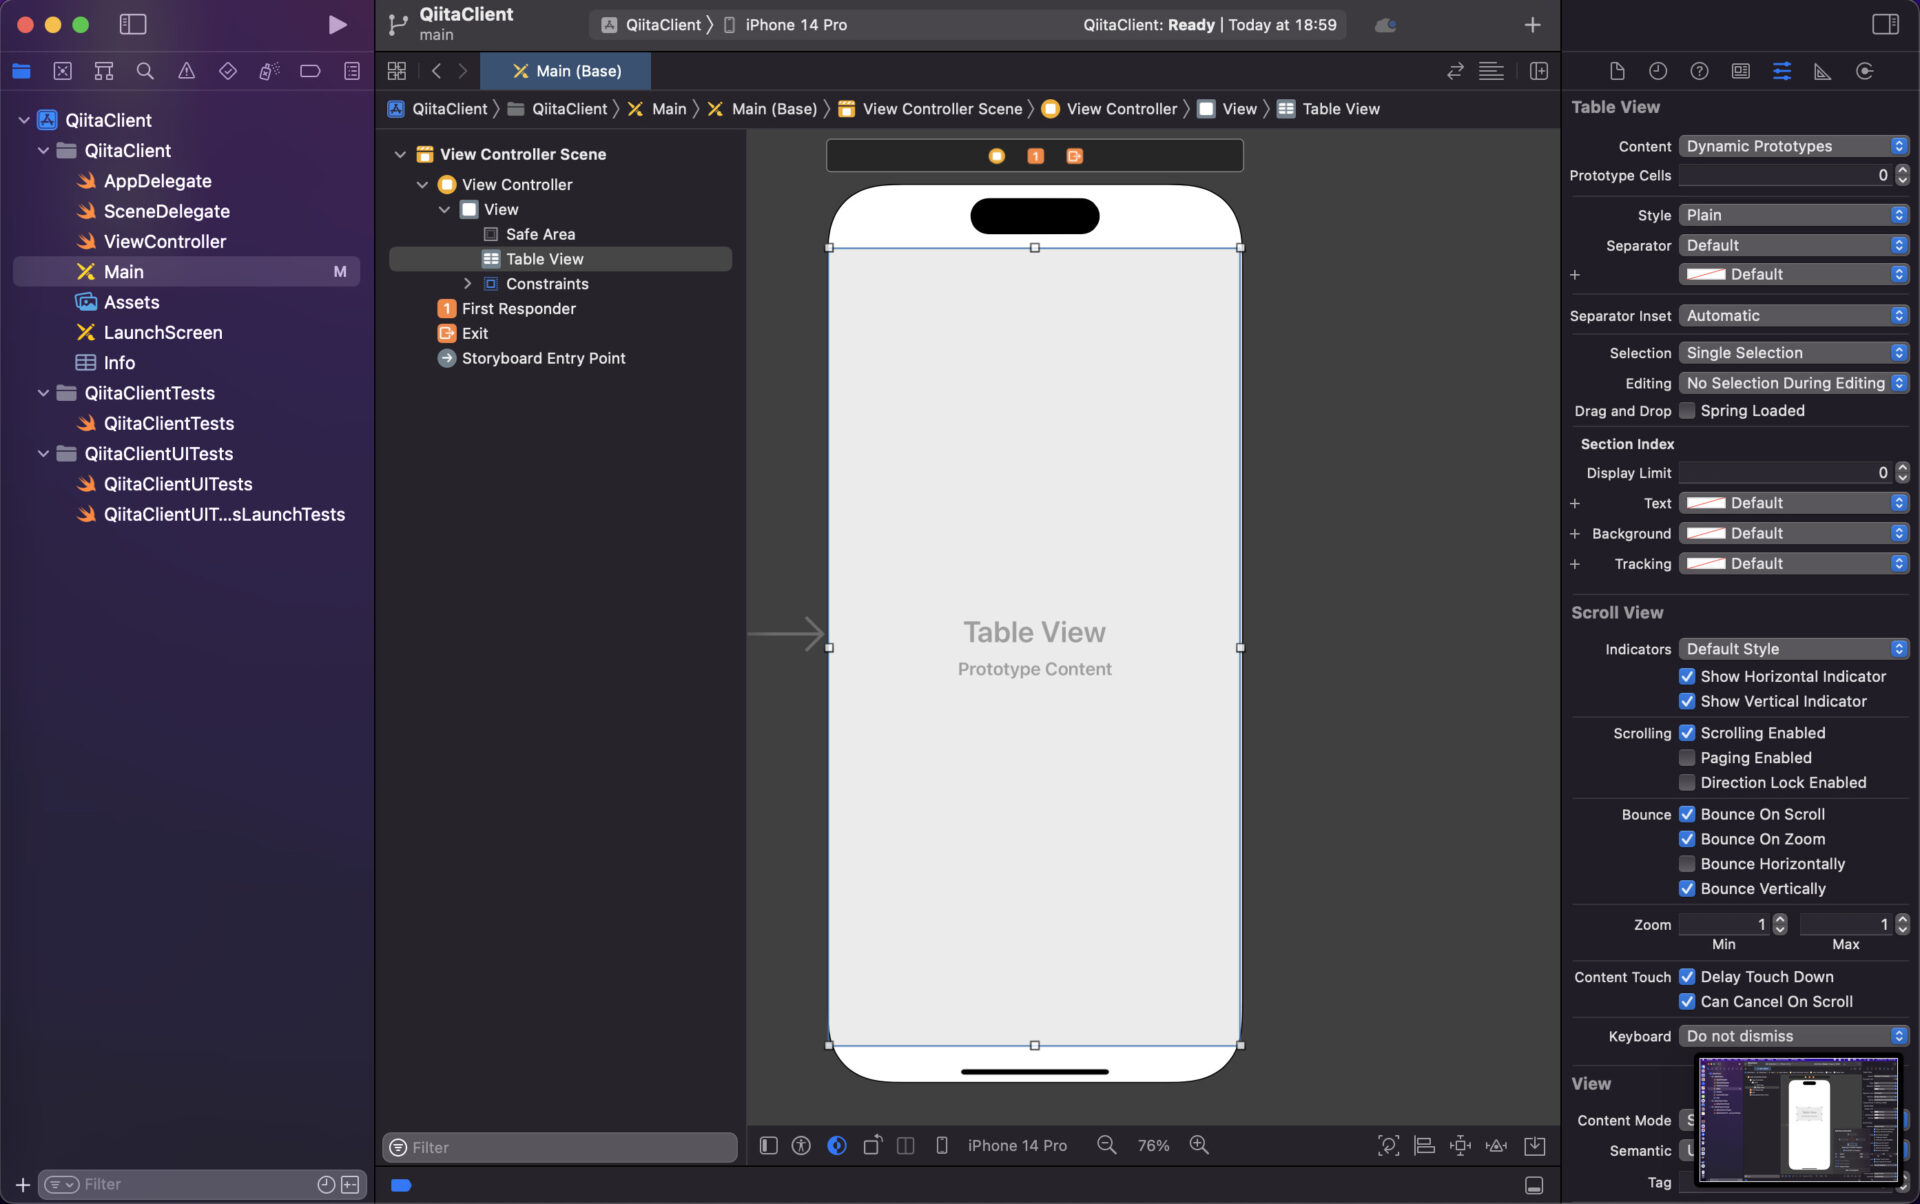
このようにできればOKです。
UITableViewCellに各viewの配置
次はcellを作っていきます。
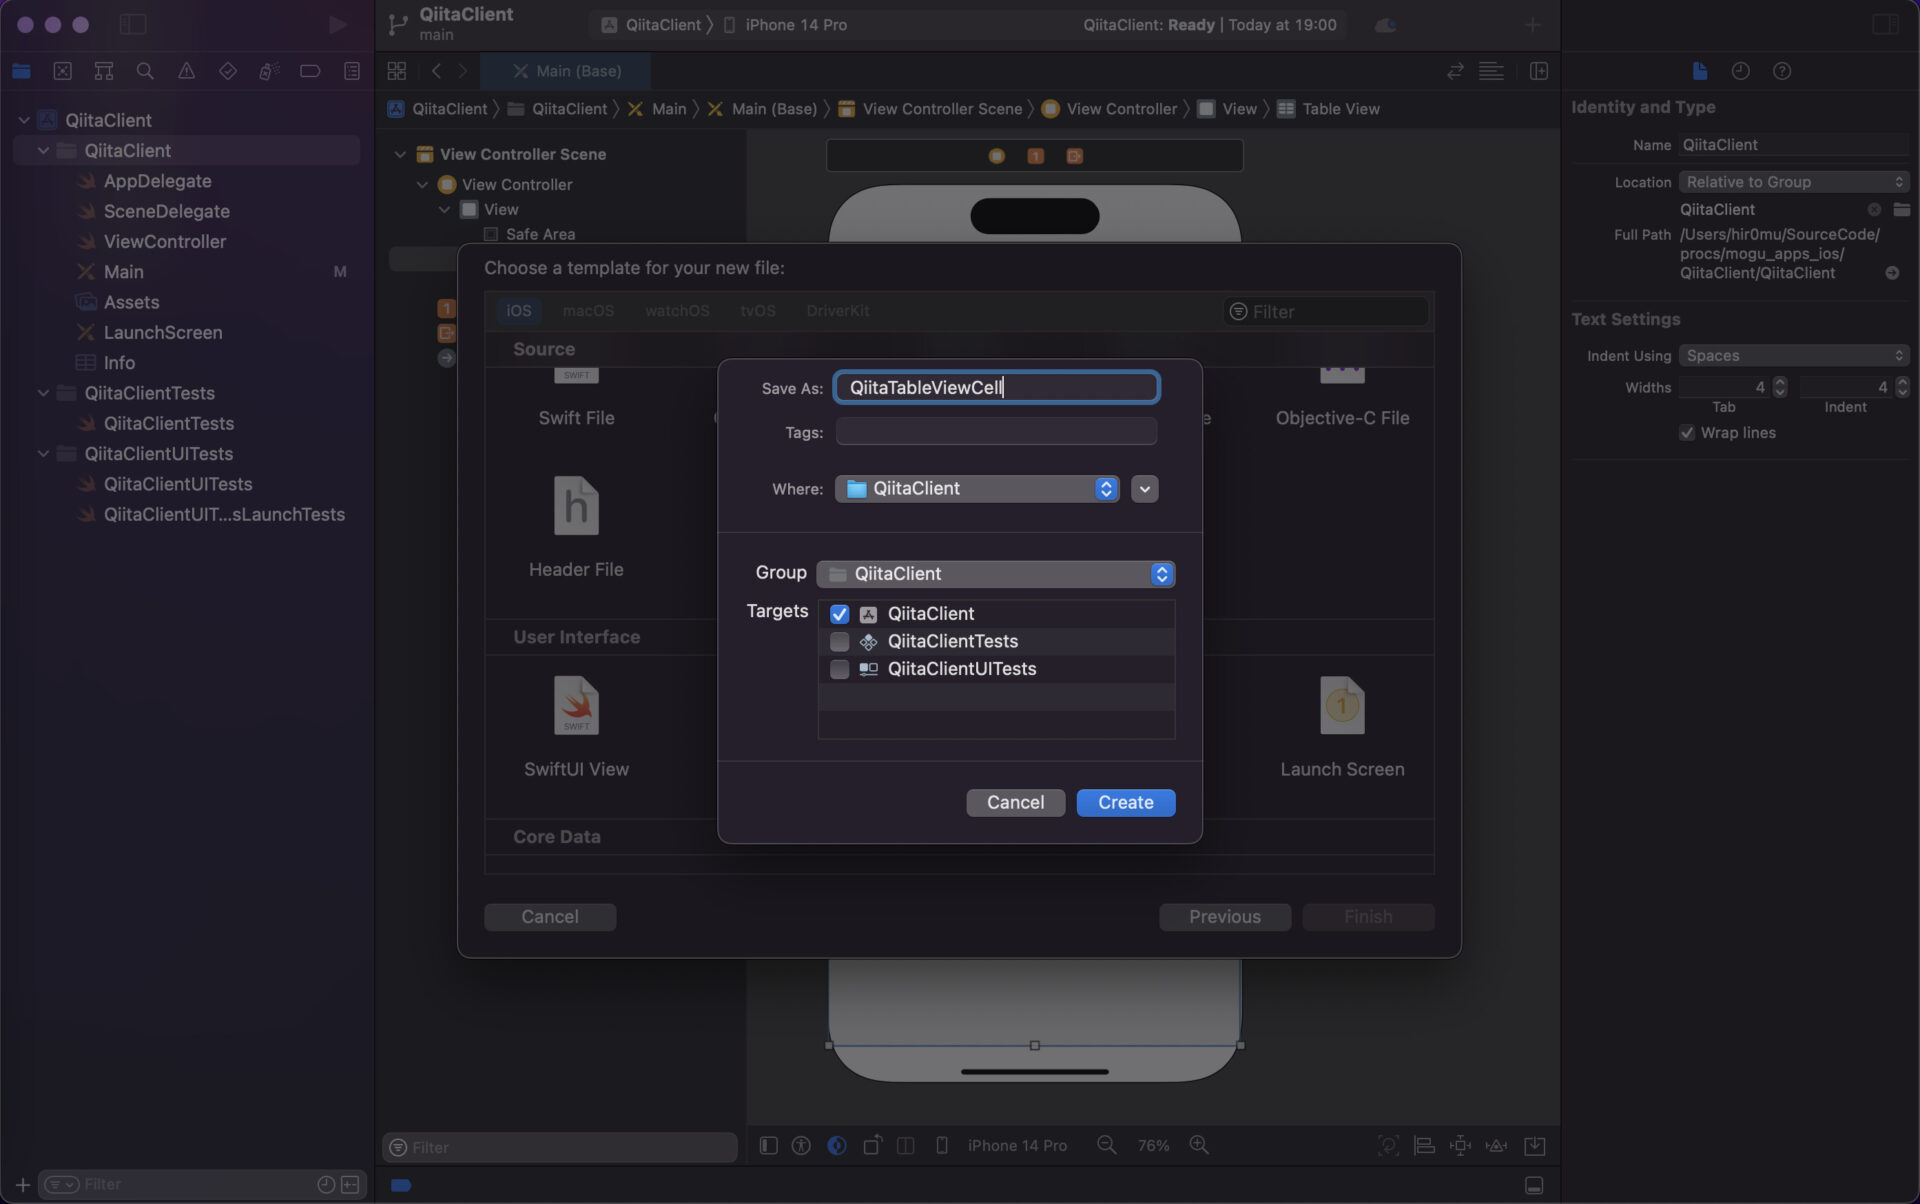
まずはxibファイルを生成して下さい。
今回は QiitaTableViewCell.xib としました。

デフォルトで生成されるViewは必要ないので削除しちゃいましょう。
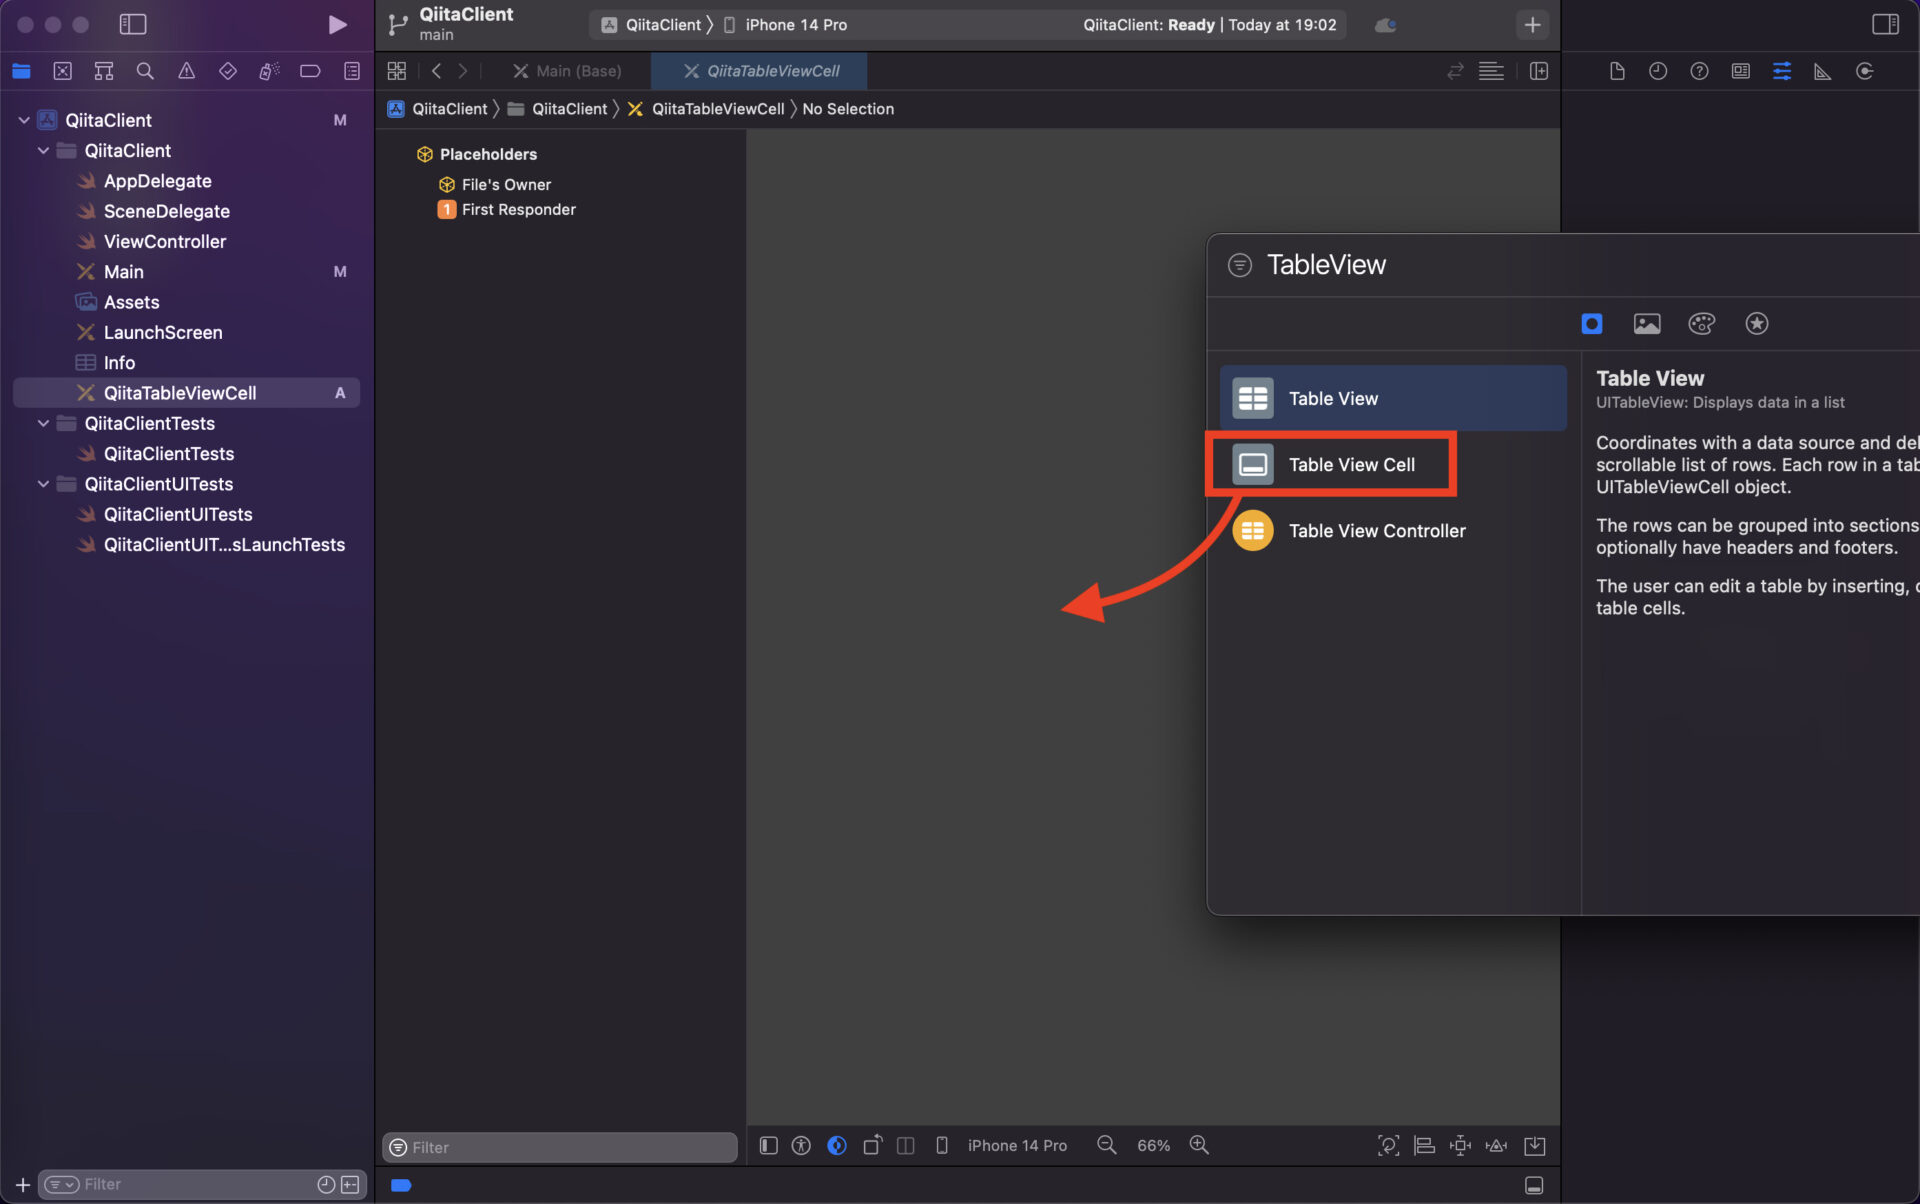
その代わりにTableViewCellを配置します。

配置できたらまずは高さを修正しましょう。おおよそ80に設定してください。
これは仮の値なので正確ではなくて問題ありません。
次にcellの中にviewを置いていきます。
今回のアプリで表示したい情報は下記の3つの情報です。
- ユーザーアイコン
- 記事タイトル
- 作成者の名前

まずはアイコン用にUIImageViewを配置します。
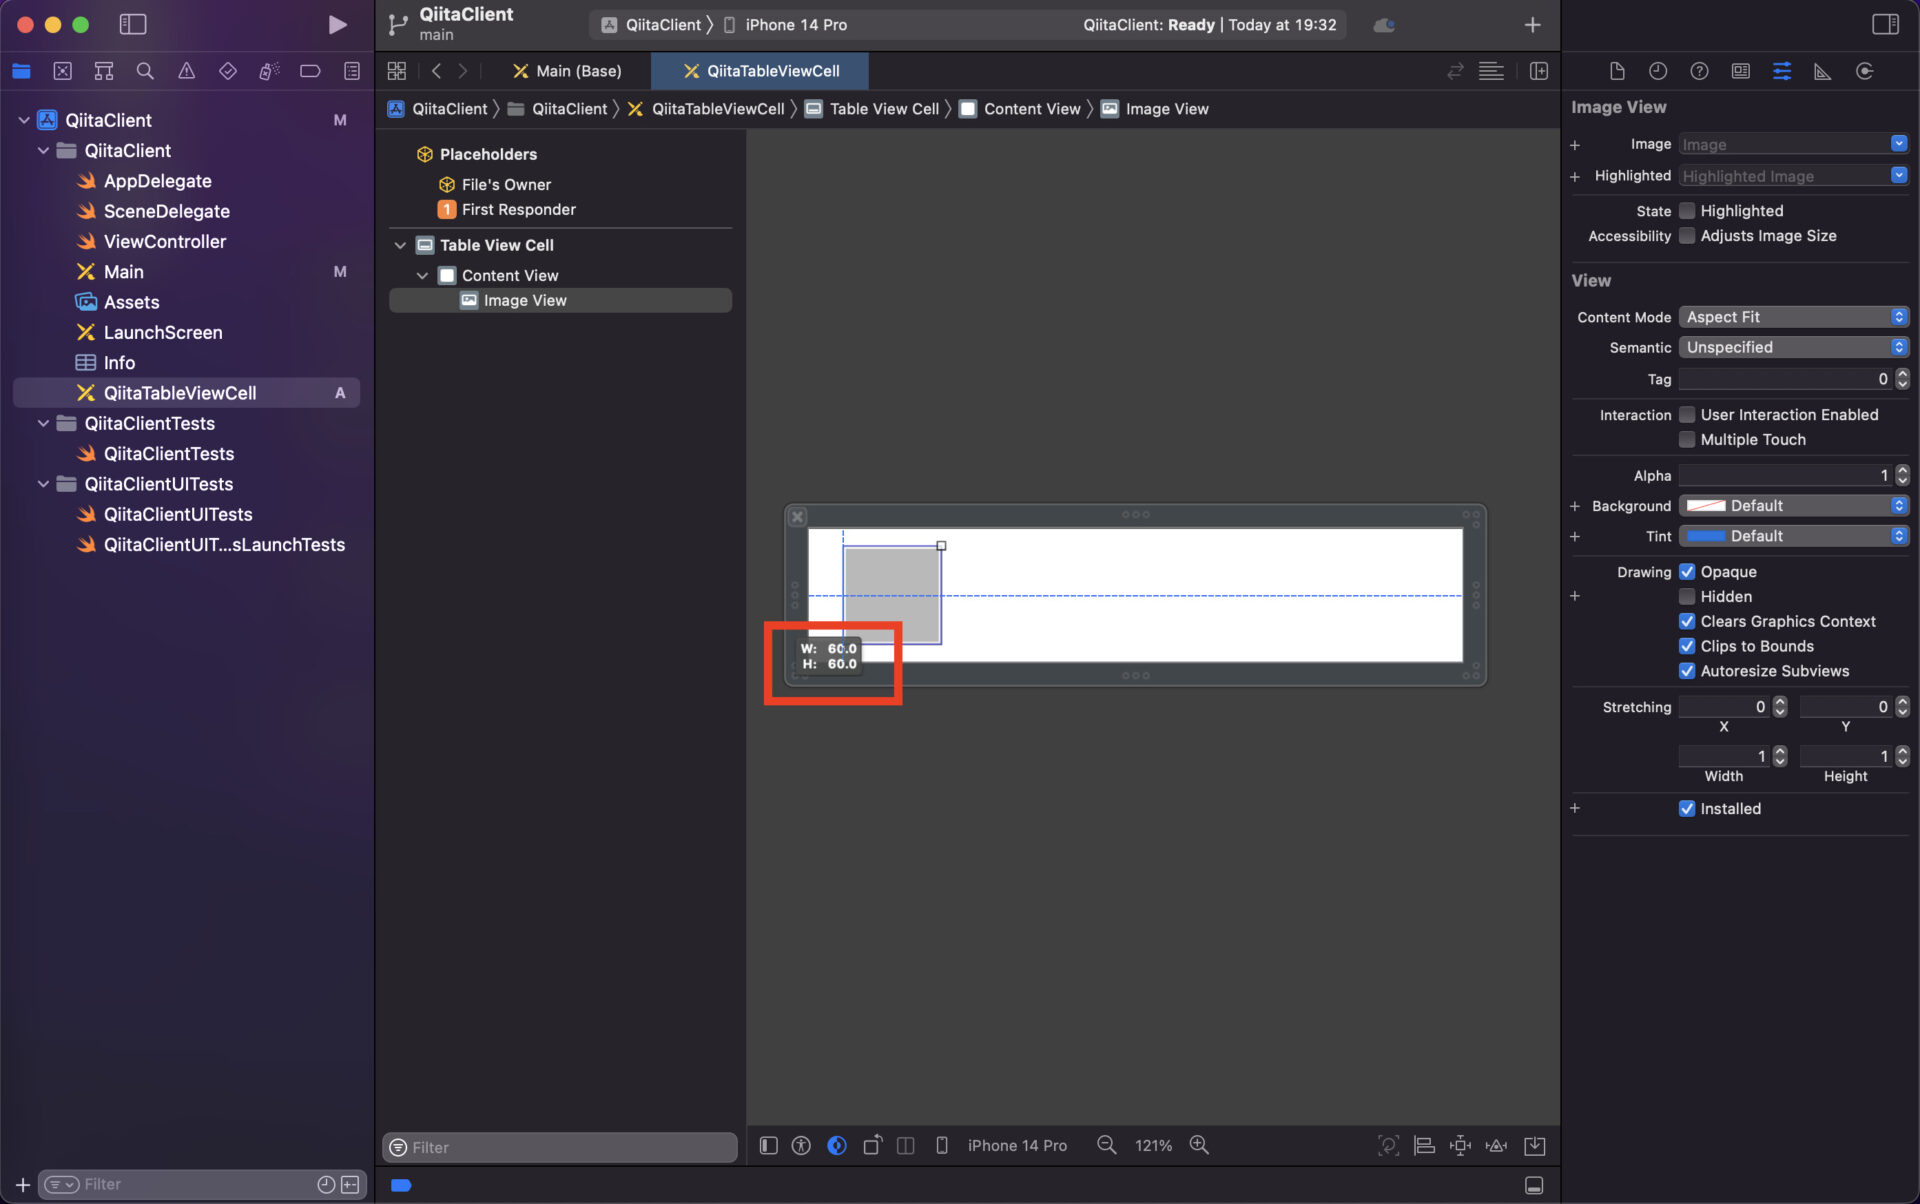
配置できたら大きさを修正しましょう。おおよそ60に設定します。
こちらも仮の値なので正確ではなくて良いです。
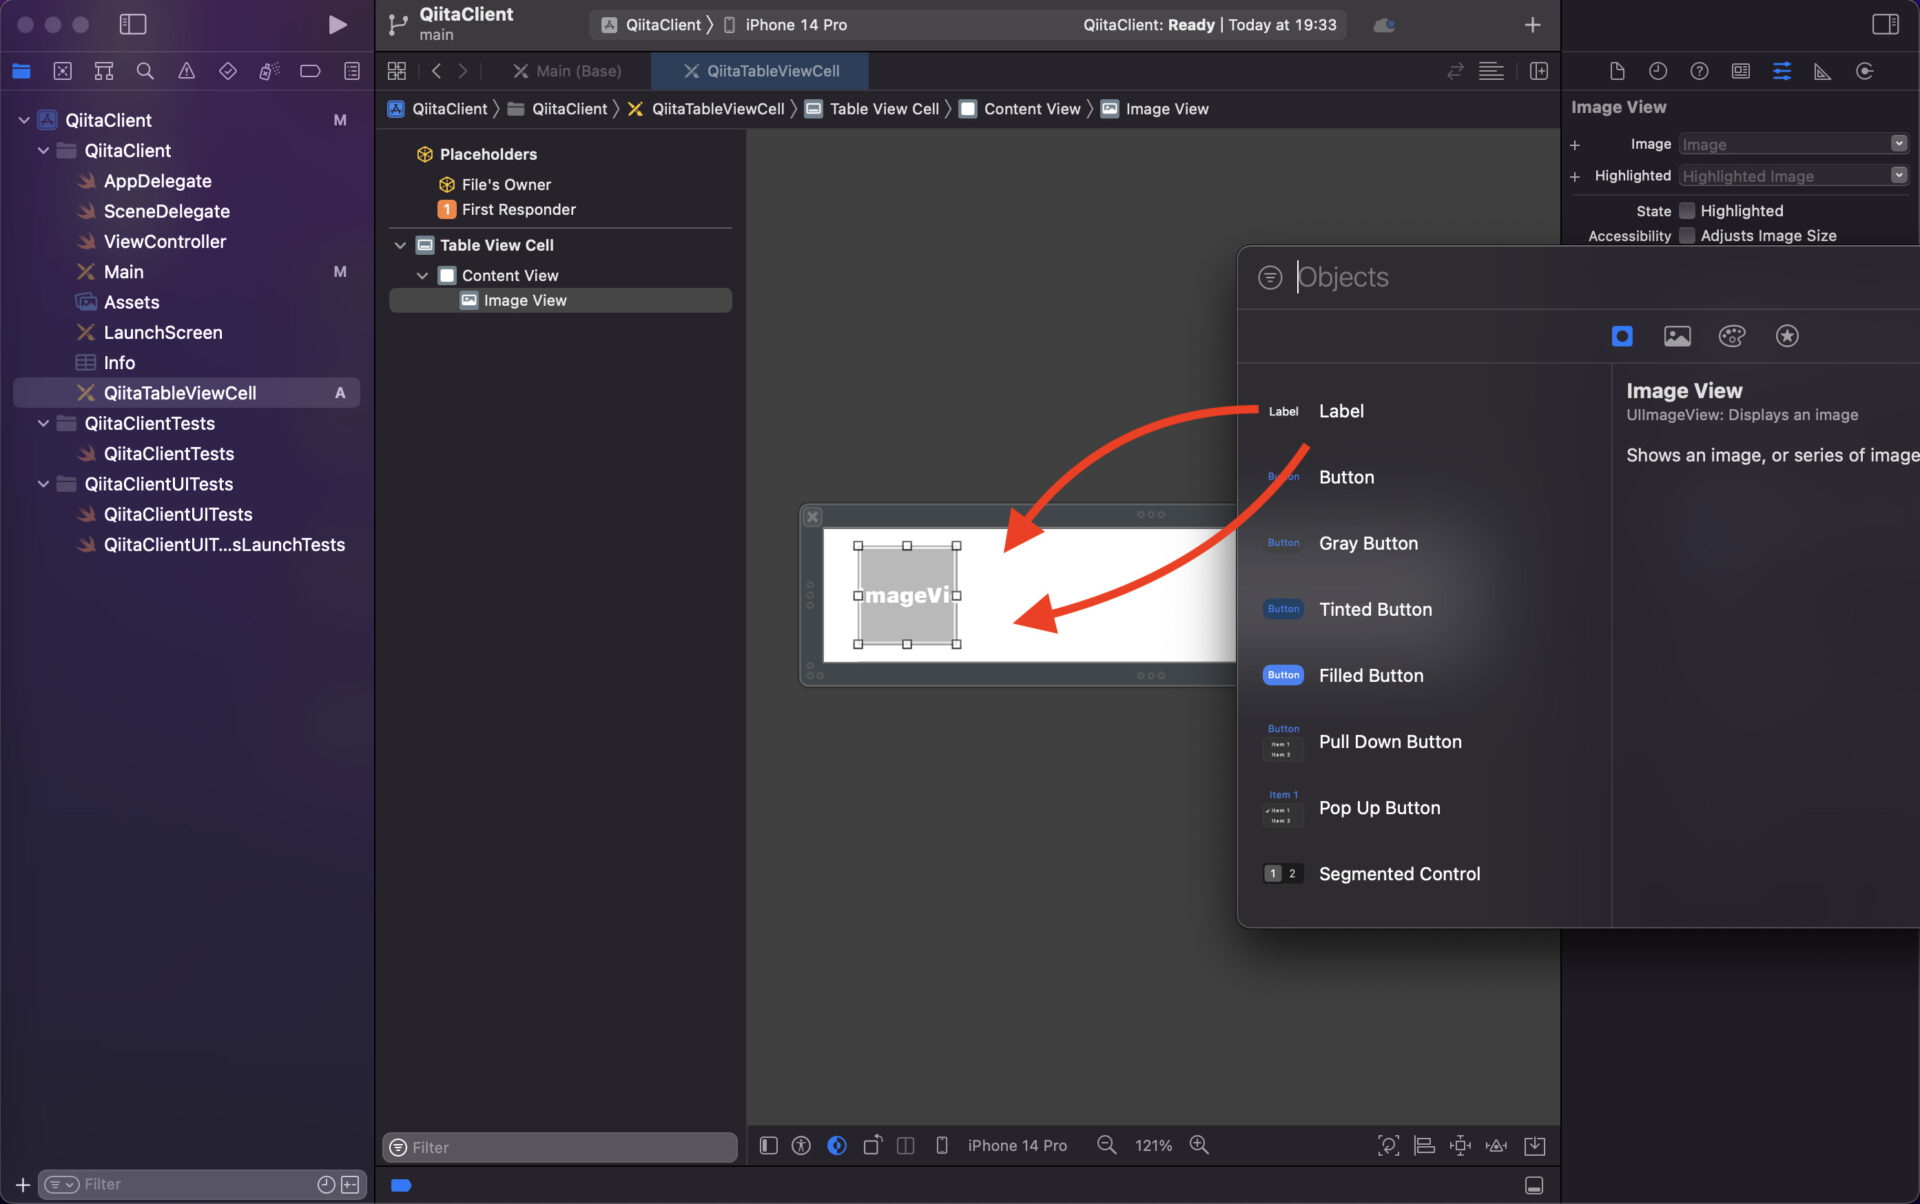
次に記事タイトルと作成者を表示するラベルを配置していきます。
まずは大体で構わないので先ほどおいたUIImageViewの隣に2つのラベルを置いていきます。
それではAutoLayoutの設定をしていきましょう。
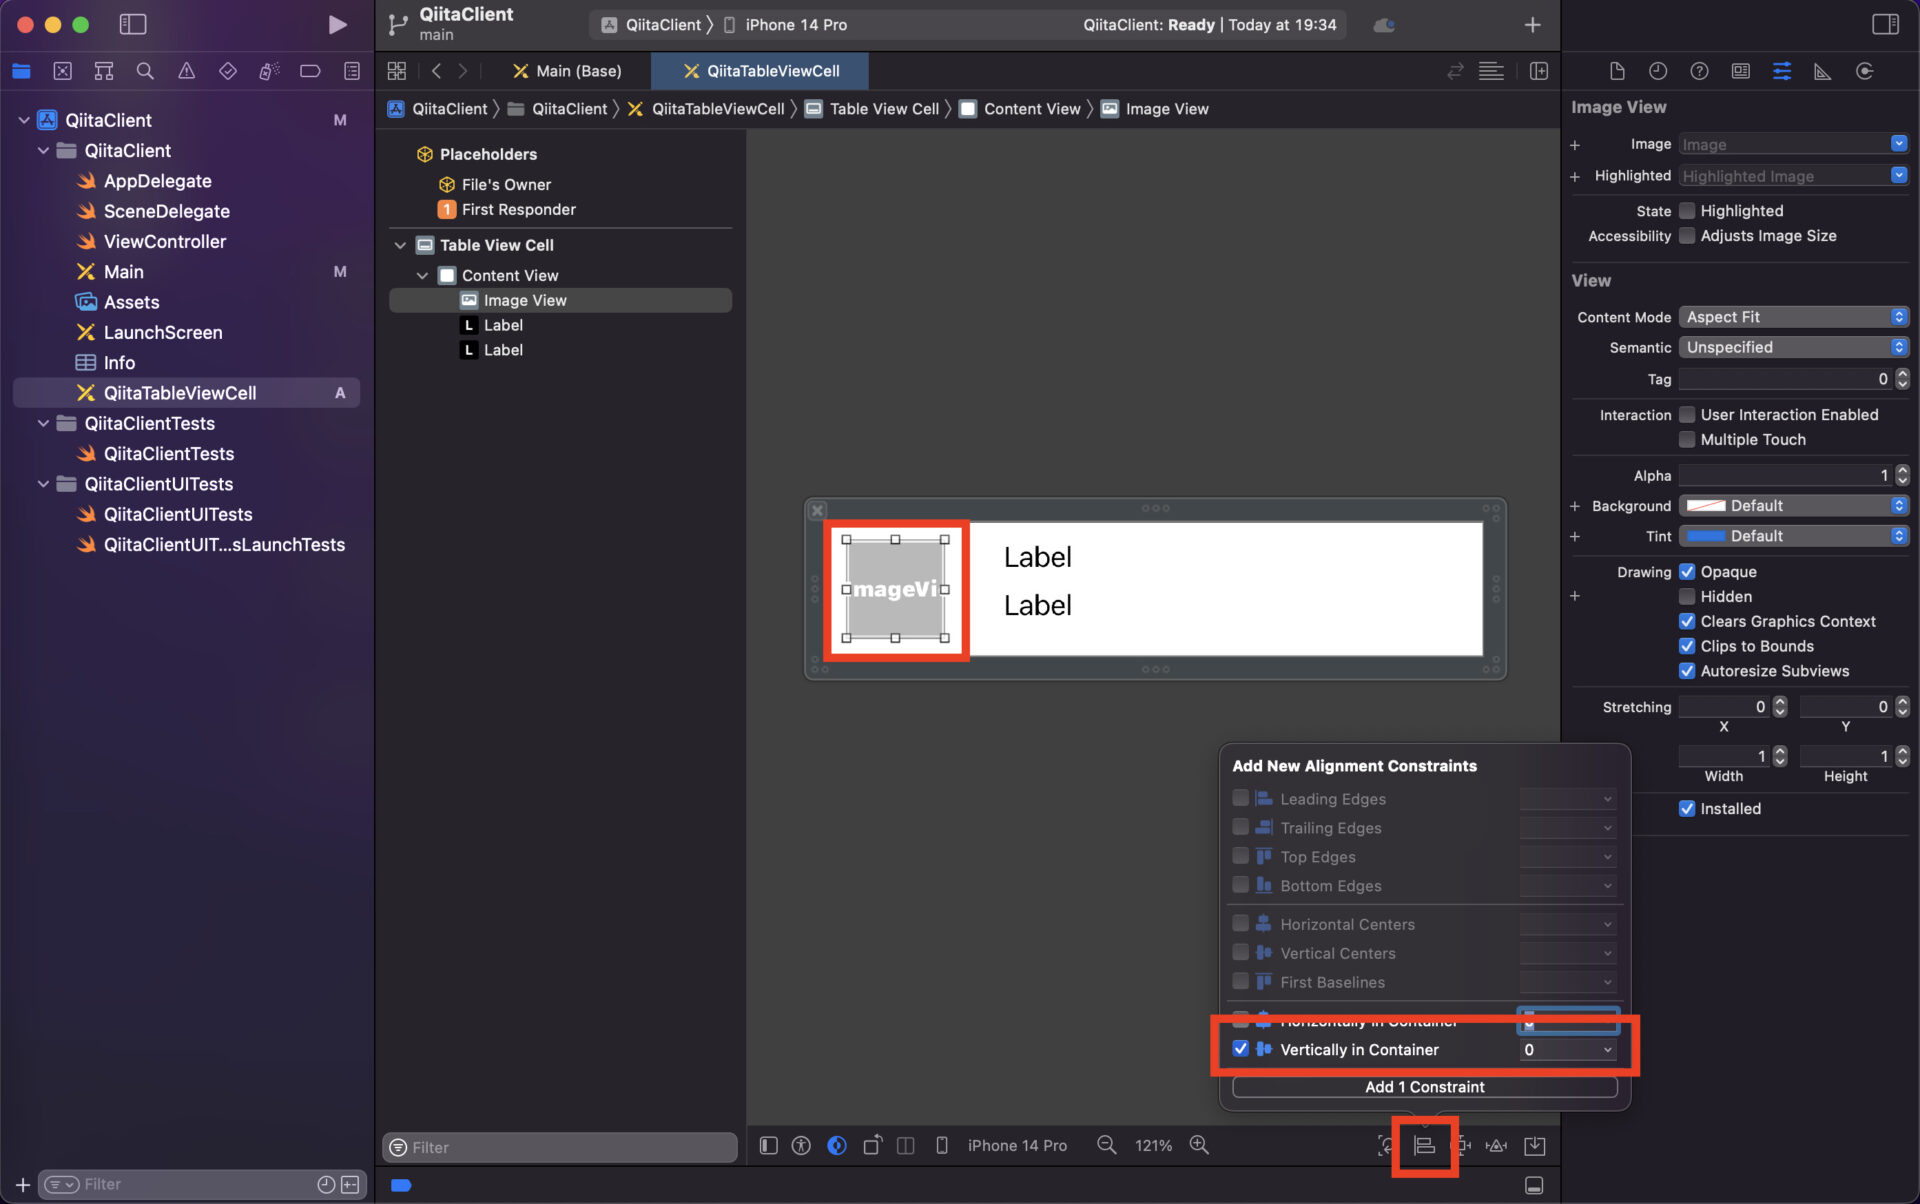
まずはアイコンから設定していきます。
最初に Vertically in Container にチェックを入れます。

左から10pxとるようにして height と width をそれぞれ60pxに設定します。

このようになっていればOKです。
次はタイトルと作成者のラベルにも設定していきましょう。
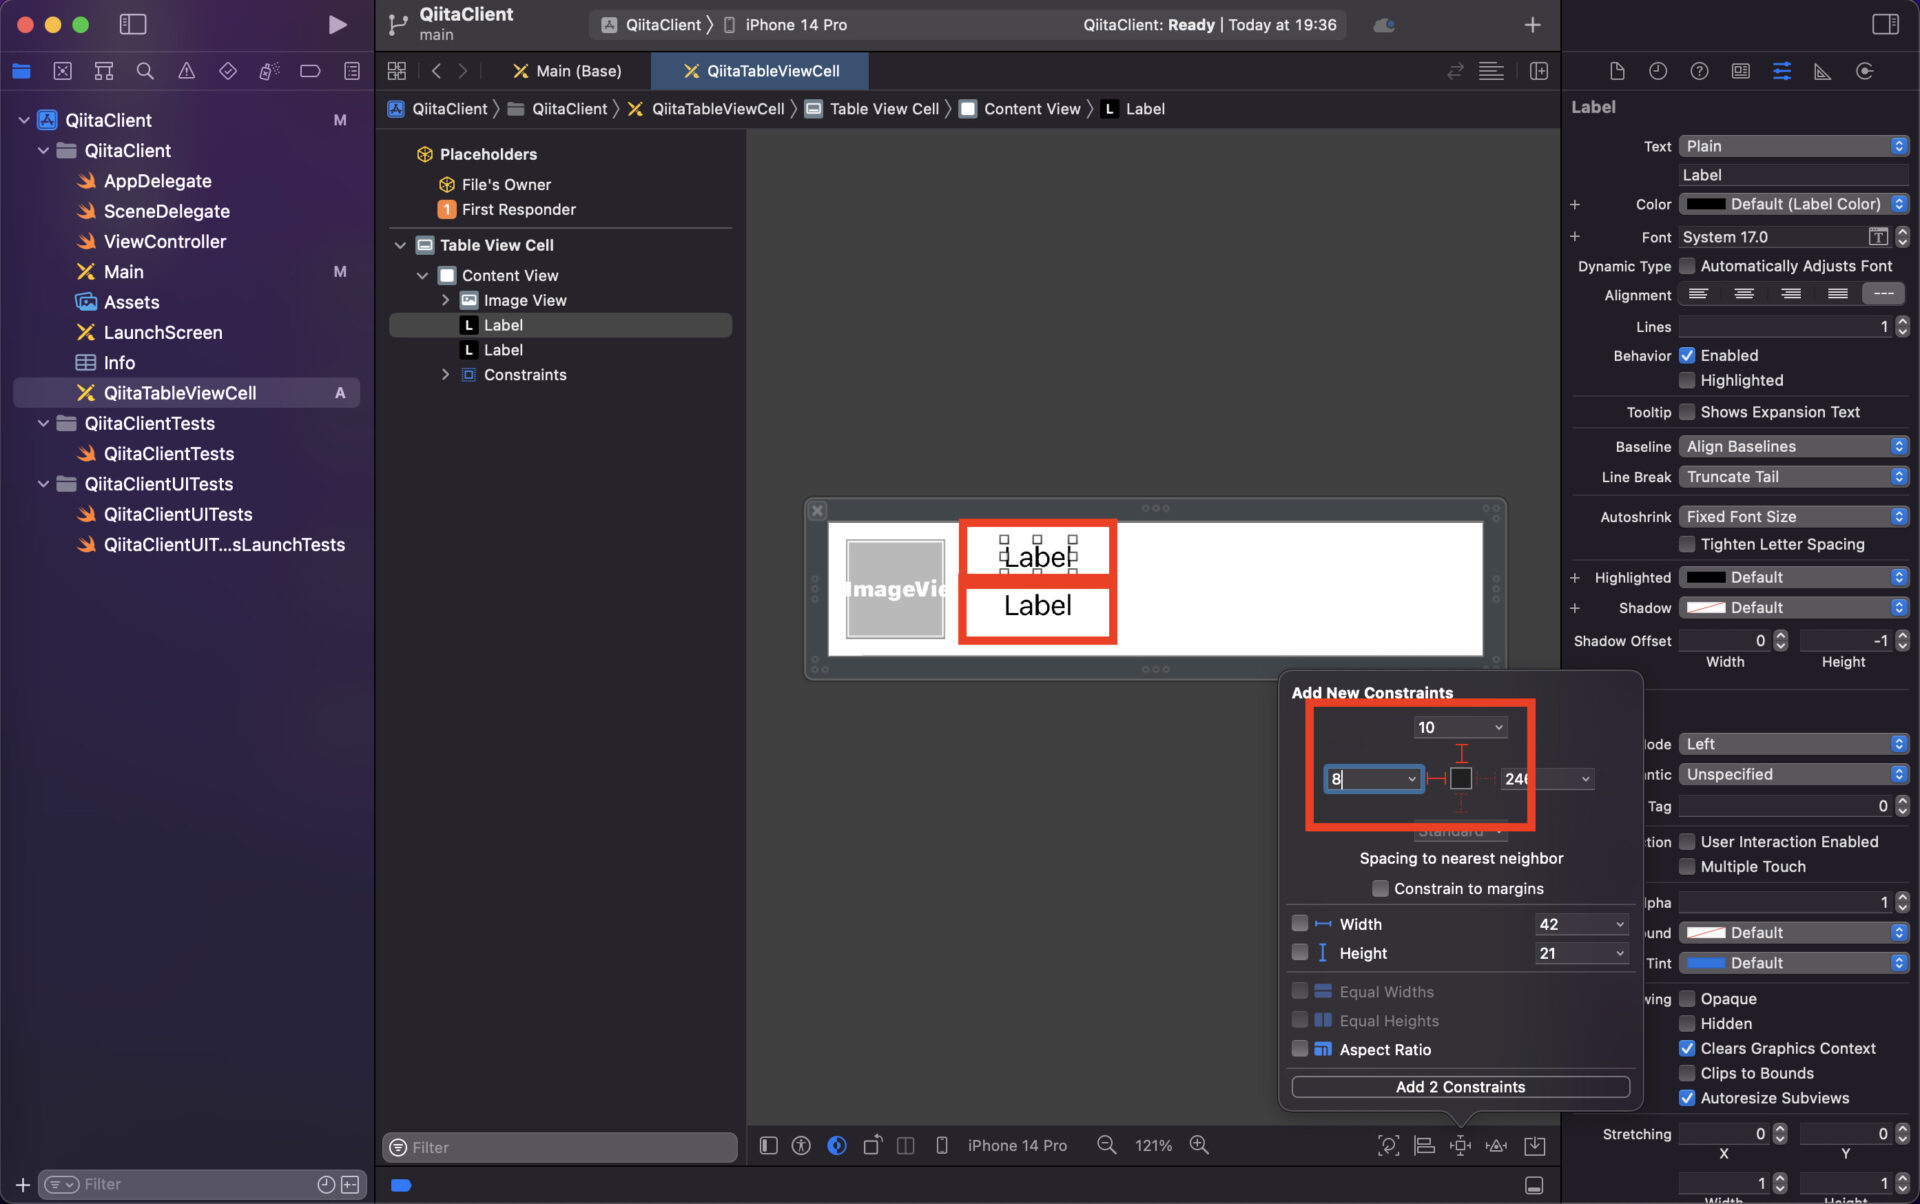
2つとも上に10px、左に8pxとるように設定して下さい。
この時 Constraint to margins のチェックは外しておくようにしましょう。
これでcellは完了です。
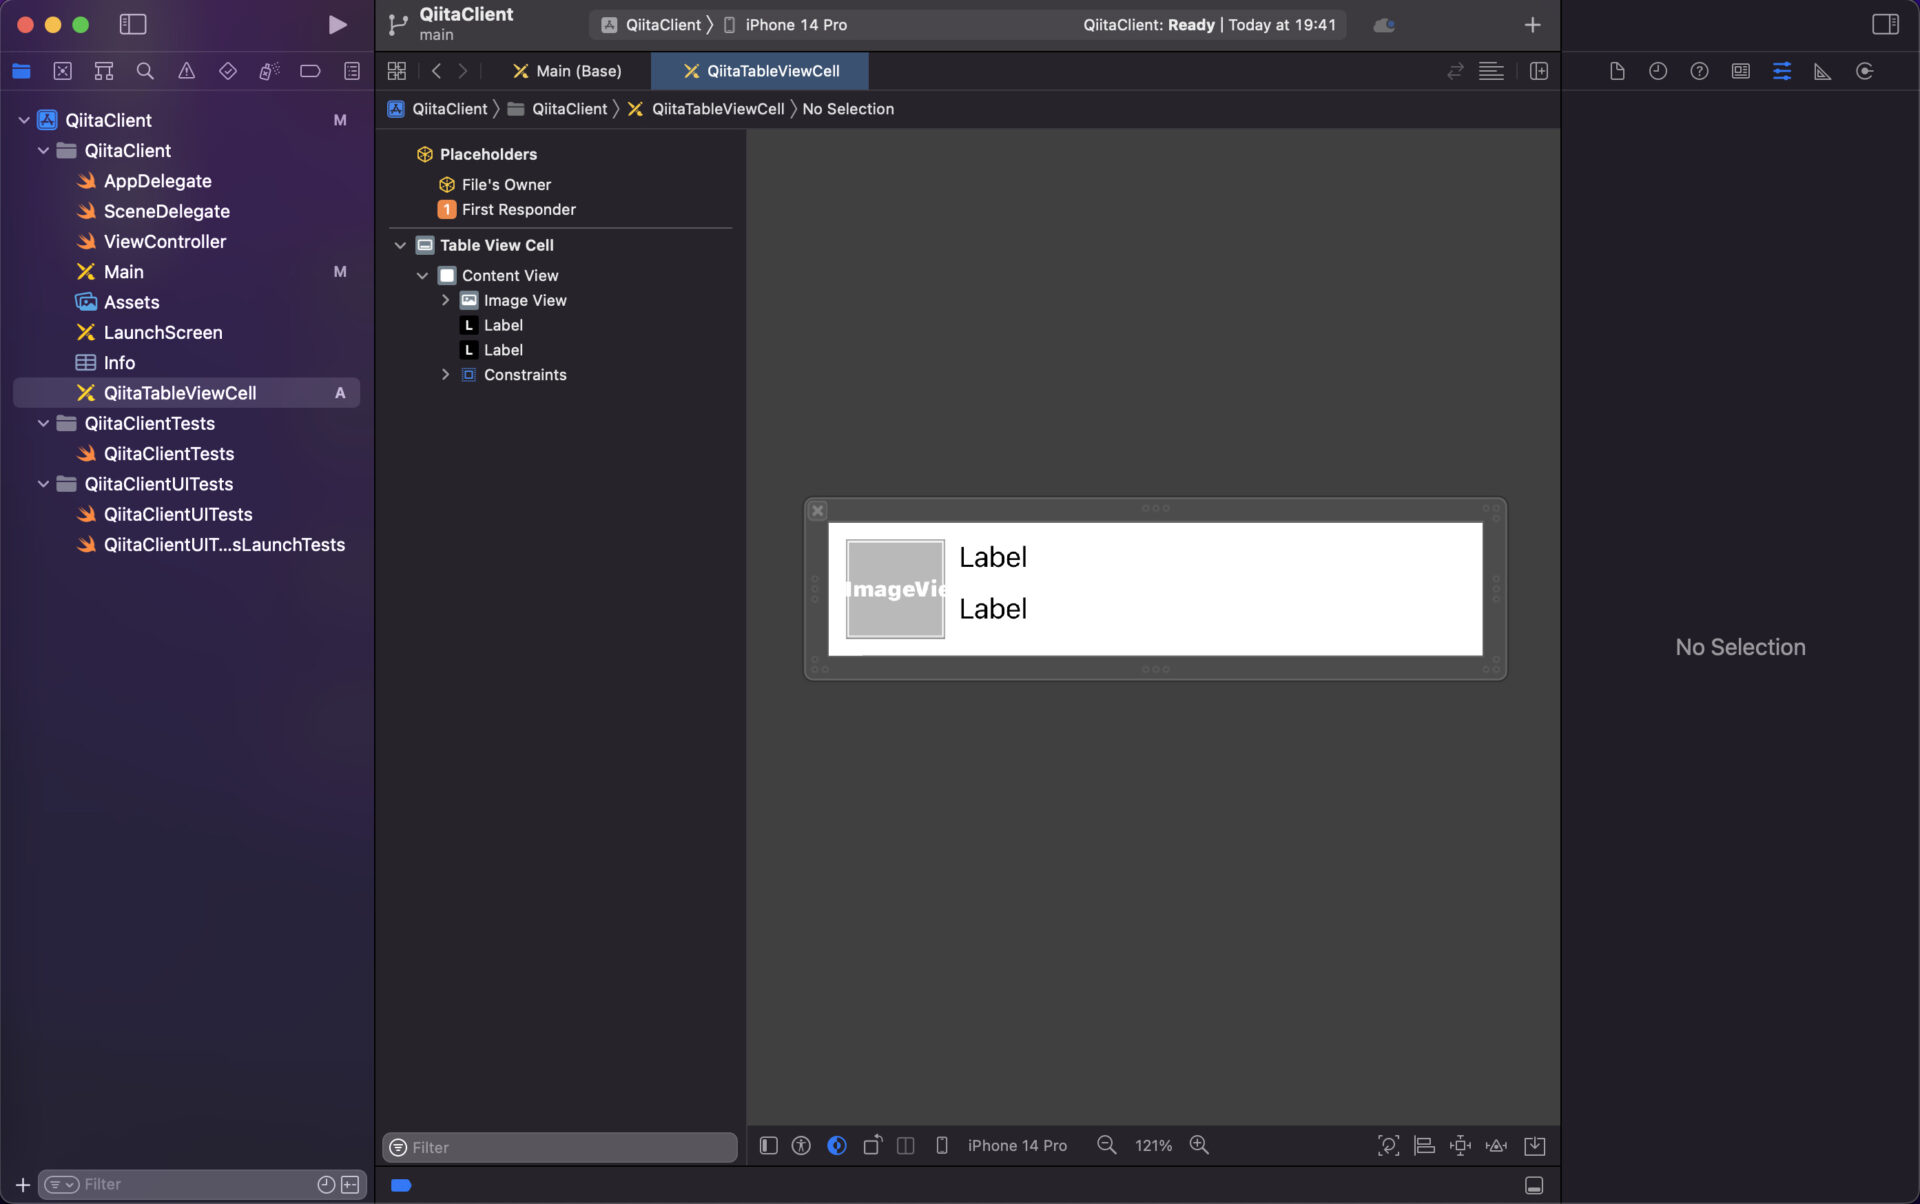
全体を通してこのようになっていればOKです!
UITableViewCellの設定
次に先ほど作成したcellにアイコンやタイトルを設定するためのclassを作っていきます。
まずは QiitaTableViewCell.swift というファイルを作成してQiitaTableViewCellというclassを作りましょう。
ここではこれだけ記述すればOKです。
import UIKit

class QiitaTableViewCell: UITableViewCell {

}
次にここで作成したclassをxibファイルで作成したcellに紐付けます。
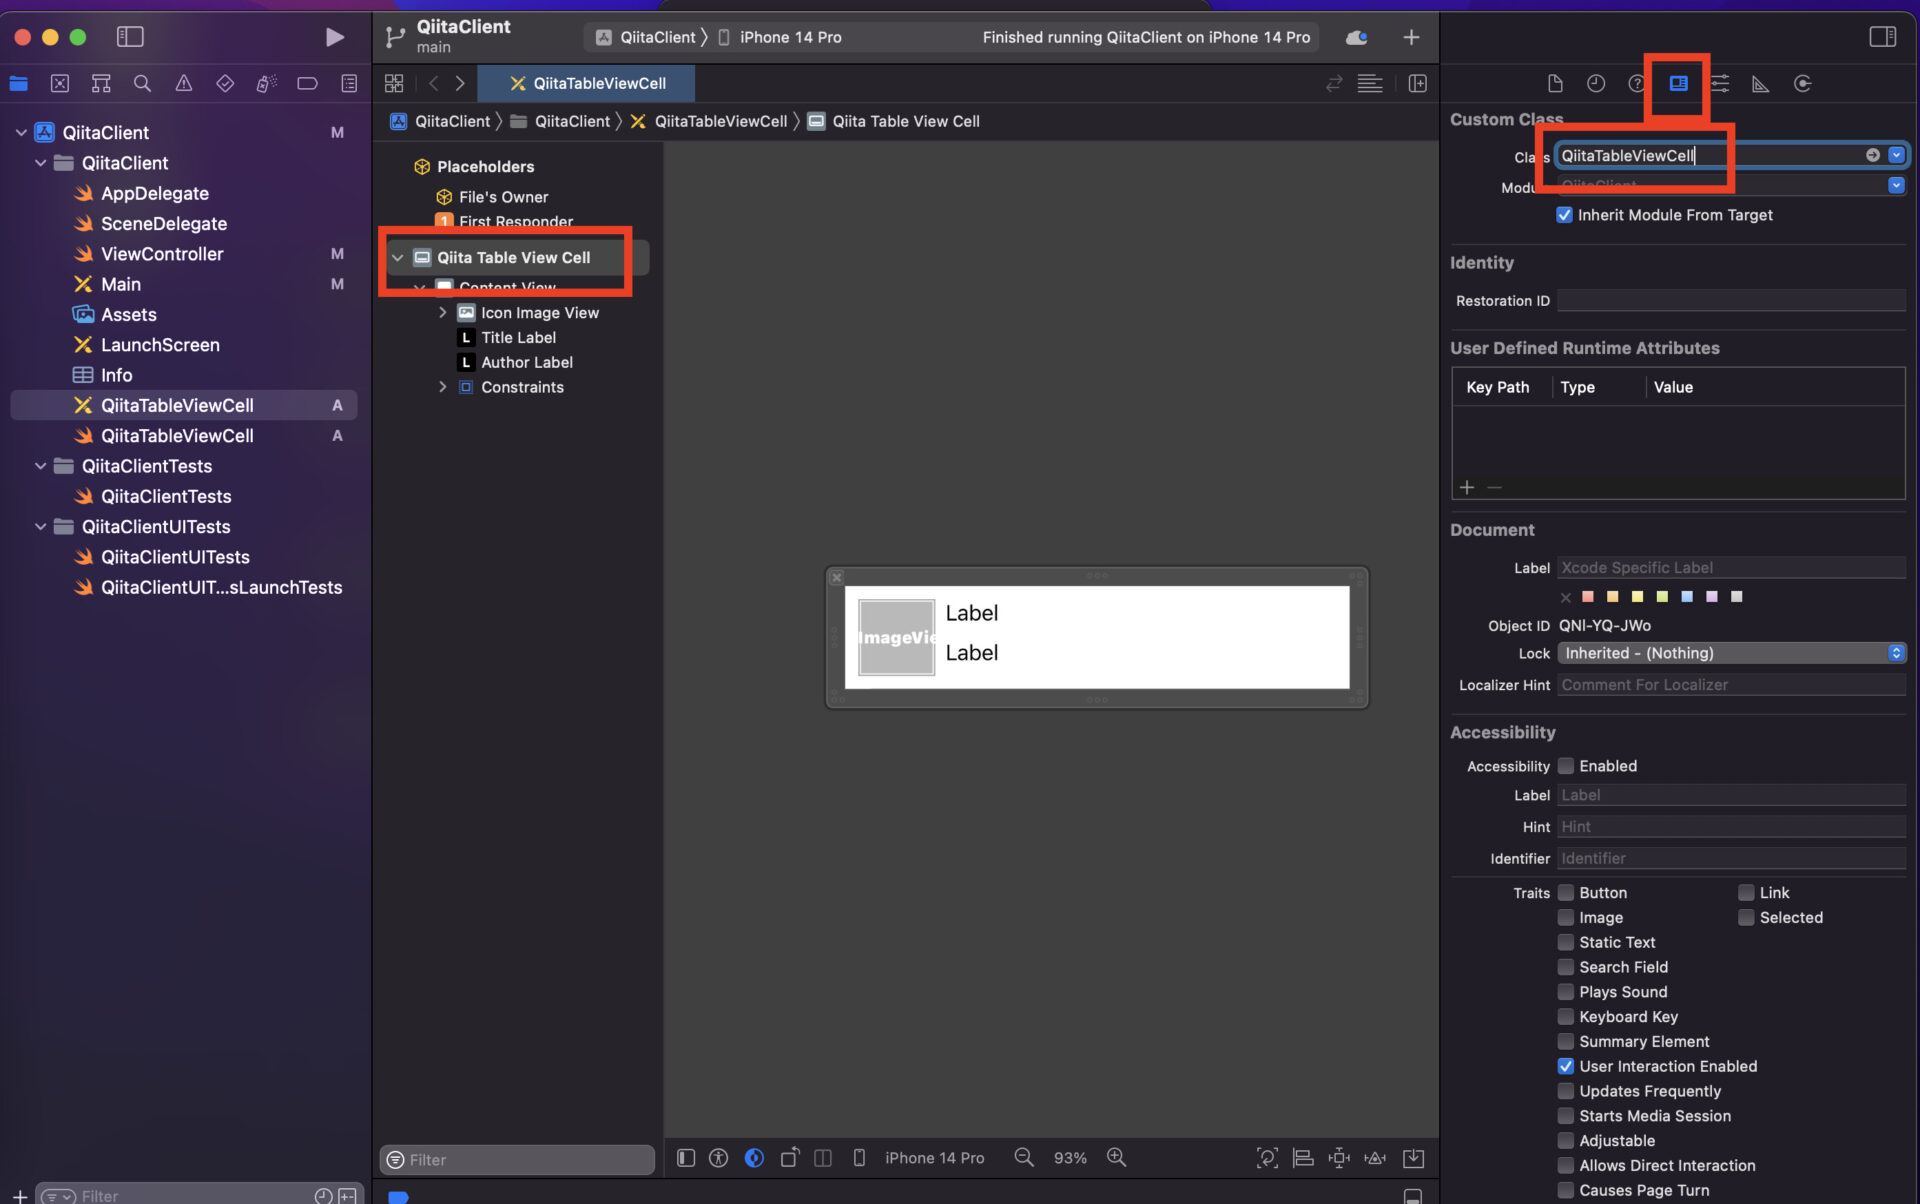
こうすることでIBOutlet や IBAction を定義することが可能になります。

それでは早速紐づけてみましょう。
下のようになればOKです!
import UIKit

class QiitaTableViewCell: UITableViewCell {

    @IBOutlet weak var iconImageView: UIImageView!
    @IBOutlet weak var titleLabel: UILabel!
    @IBOutlet weak var authorLabel: UILabel!
}
次にここでタイトルや作成者を設置する関数を実装しましょう。
この関数は外部から呼び出すことを想定しています。
アイコンに関しては画像urlをこの先で読み込む予定をしているのでとりあえずは背景が赤になるようにしておくだけで良いです。
import UIKit

class QiitaTableViewCell: UITableViewCell {

    @IBOutlet weak var iconImageView: UIImageView!
    @IBOutlet weak var titleLabel: UILabel!
    @IBOutlet weak var authorLabel: UILabel!

    func set(title: String, author: String) {
        iconImageView.backgroundColor = .red
        titleLabel.text = title
        authorLabel.text = author
    }
}
UITableViewにcellを表示
それでは先ほど実装したQiitaTableViewCellをUITableViewに表示しましょう。
UITableViewの紐付け
まずは ViewController にUITableViewのIBOutletを作成します。
このようになっていればOKです!
import UIKit

class ViewController: UIViewController {

    @IBOutlet weak var tableView: UITableView!
    override func viewDidLoad() {
        super.viewDidLoad()
        // Do any additional setup after loading the view, typically from a nib.
    }
}
Cellを表示
次はUITableViewにCellを表示していきます。
ここで UITableViewDataSource を実装していきましょう。
ViewController クラスに以下を追記してください。
import UIKit

class ViewController: UIViewController {

    @IBOutlet weak var tableView: UITableView!
    override func viewDidLoad() {
        super.viewDidLoad()
        // ➀:tableViewのdataSourceをViewController自身に設定
        tableView.dataSource = self

        // ➁:cellをtableViewに設定
        // nibNameはファイル名を指定する
        let nib = UINib(nibName: "QiitaTableViewCell", bundle: nil)
        // Identifierを登録
        tableView.register(nib, forCellReuseIdentifier: "QiitaTableViewCell")
        // cellの高さを設定
        tableView.rowHeight = 80
    }
}

extension ViewController: UITableViewDataSource {
    func tableView(_ tableView: UITableView, numberOfRowsInSection section: Int) -> Int {
        // 表示するcellの数を返す
        return 15
    }

    func tableView(_ tableView: UITableView, cellForRowAt indexPath: IndexPath) -> UITableViewCell {
        // ➂:➁で設定したIdentifierと同じ文字列で取得する。
        guard let cell = tableView.dequeueReusableCell(withIdentifier: "QiitaTableViewCell", for: indexPath) as? QiitaTableViewCell else {
            return UITableViewCell()
        }
        // ➃:cellに情報を設定する
        cell.set(title: "タイトル\(indexPath.row)", author: "作成者")
        return cell
    }
}
1つ1つ説明していきます。
①
tableViewnのdataSourceに自分自身(self)を登録することでextensionしている UITableViewDataSource の関数が呼ばれるようになります。
UITableViewDataSource はUITableViewのcellの数や内容などのデータを決めるためのdelegateです。
②
xibファイルで作成している QiitaTableViewCell を登録しています。
ここで登録することで➂でやっていますがUITableViewの関数である dequeueReusableCell() でcellを取得することが可能になります。
③
➁で登録した QiitaTableViewCell を取得するために dequeueReusableCell() を呼んでいます。guard を使って QiitaTableViewCell クラスかどうかを検査していますが、今回は1種類しか登録していないので以下のようにしても構いません。
しかしcellの1種類とは限らない時には guard を使っておいたほうが良いです。
let cell = tableView.dequeueReusableCell(withIdentifier: "QiitaTableViewCell", for: indexPath) as! QiitaTableViewCell④
QiitaTableViewCell クラスを作成した時に set() 関数を作成したと思いますが、それをこのタイミング呼んであげます。
今はダミーの値をセットしていますが、QiitaのAPIをつなぎ込んだ際にはダミーを修正してあげます。
それではここでビルドしてみましょう。
このような動きになっていれば成功です!
最後に
お疲れ様でした!
完成図と同じようになりましたでしょうか?
今回UIを実装したので、次回はcellを押した時にWebViewを表示するように実装していきます。
引き続き頑張りましょう!
第2回の【WebView編】はこちら